How about a Lego Computer that’s just as customizable as the original but 75% smaller and 40% cheaper?
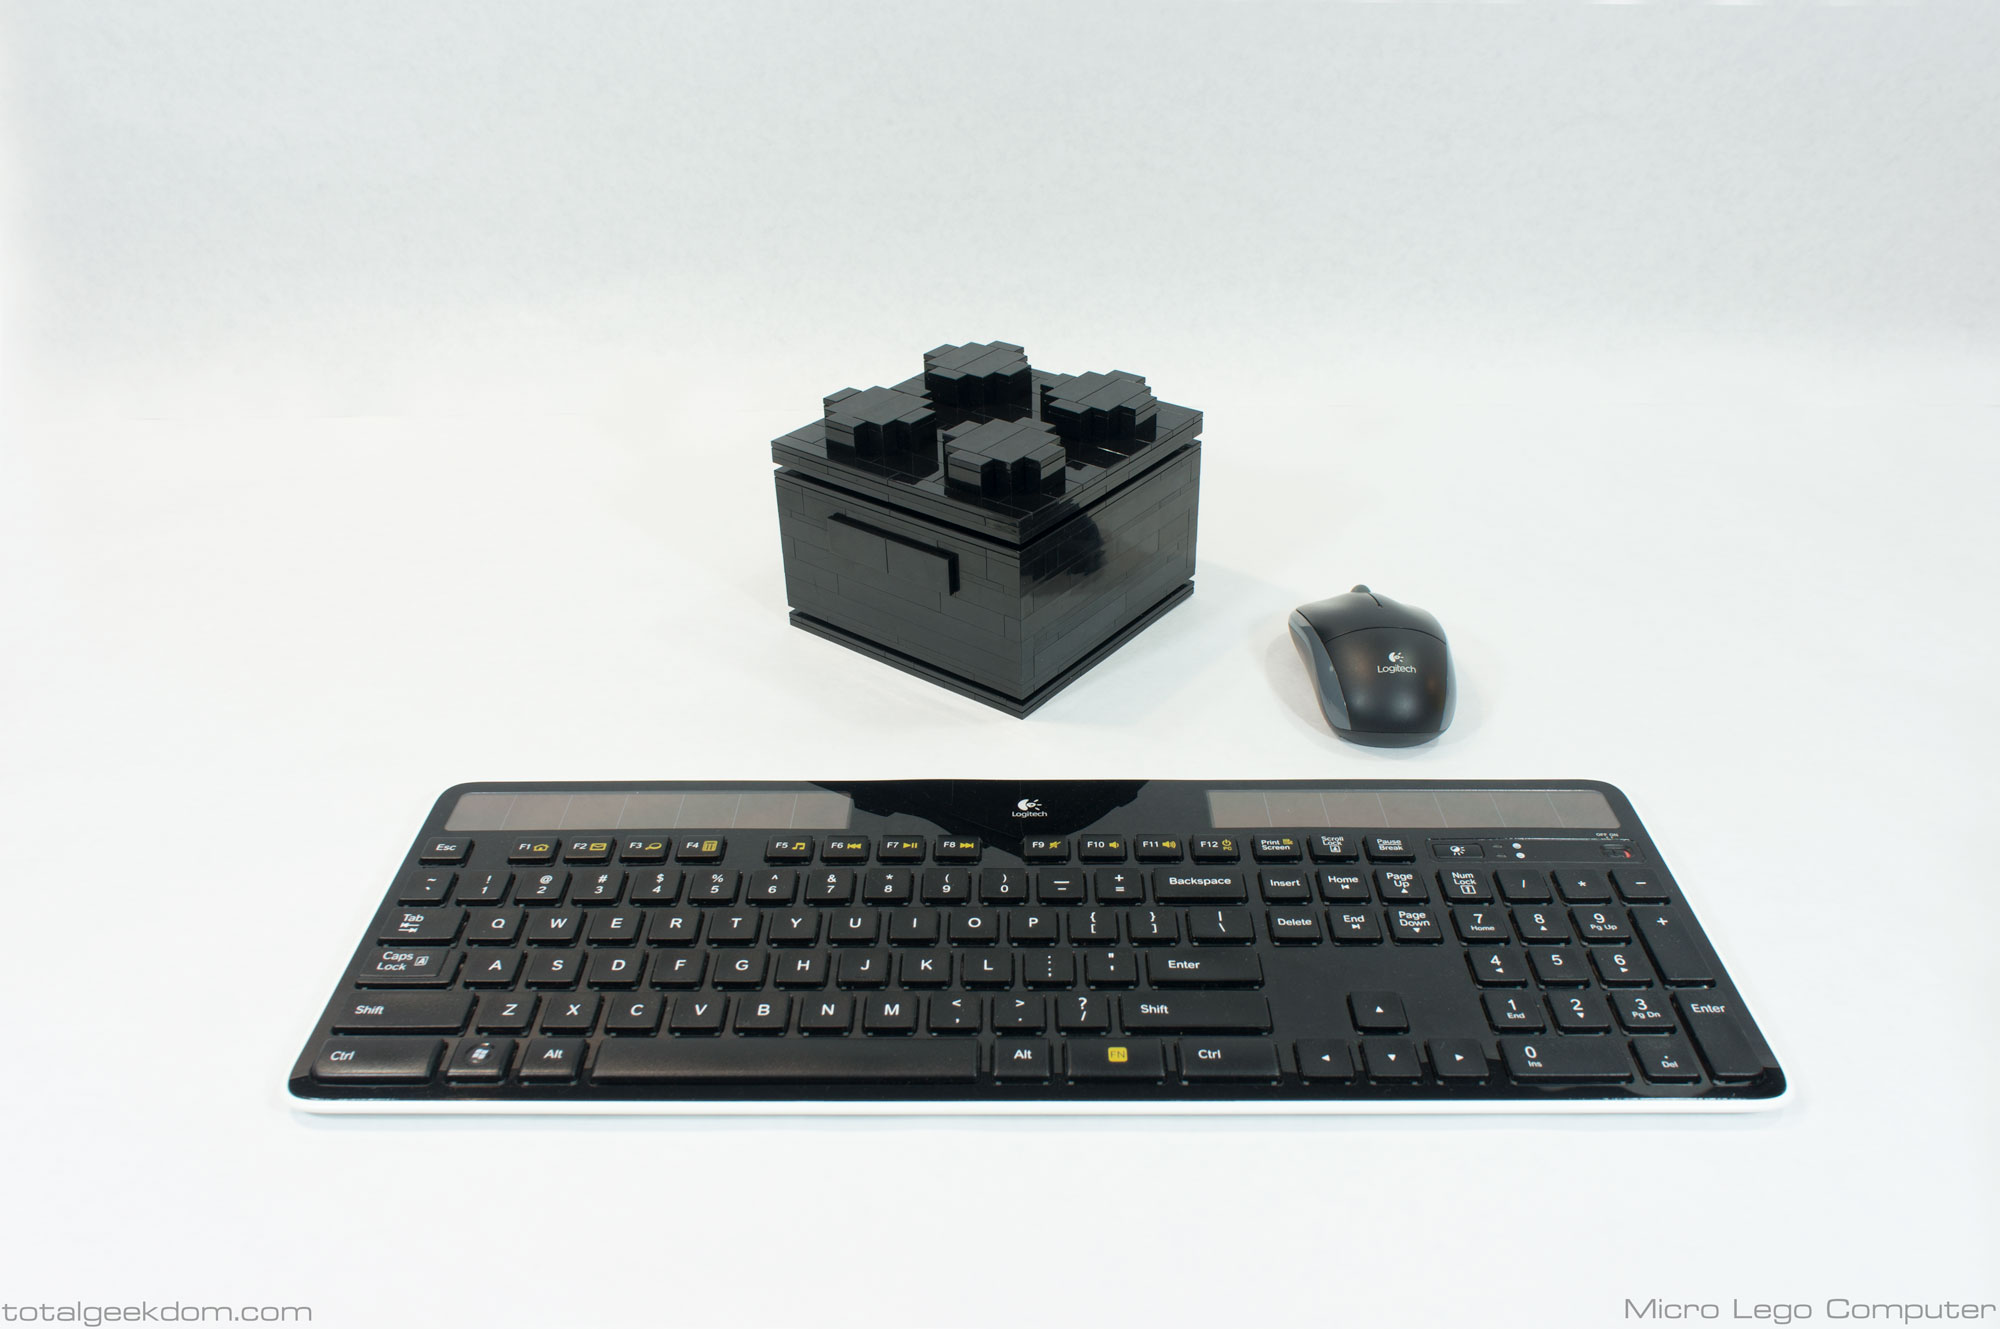
Micro Lego Computer System Bricks
Like many of the projects I’ve done, one thing tends to lead to another…. and another and so on. When I built my first Lego Computer about 5 years ago and posted it on my site, I got a lot of positive feedback, and it was picked up by various tech sites all over the internet. From this coverage, I started getting a lot of inquiries from people to build them their own custom Lego Computer, and over the years, I built various systems for individuals – Lego Servers, Lego Gaming Computers, Lego Mini Computers, and everything in between. However, I discovered that a lot of the requests I was getting were for very similar systems with a similar set of requirements. I therefore decided to design and develop a system that could meet those needs featuring a unique but standardized design built entirely out of Lego but that was easily reproducible, could be customized, and was a powerful and reliable computer. From this came the Mini Lego Computer.
Following the release of the Mini Lego Computer earlier this year, I received a great response with a lot of interest from people all over the world inquiring about the system. It was posted on sites like Engadget and Gizmodo, tweeted 1000s of times and received millions of views on forums such as imgur and Reddit. I received hundreds of inquiries, and I’ve been building and developing new systems for clients ever since. From this mass influx of media attention, I started to get requests for systems that I had not received previously. There were requests for a gaming version of the Lego Computer (which is currently being developed), but a significant number of my email inquiries were requested a more affordable, entry-level system. When I designed and built the Mini Lego Computer, I wanted it to be very powerful and versatile – enough so that it would be more than capable of handling most computing tasks thrown at it. Consequently, the Mini Lego Computer is a very versatile system that offers more power and customizable options and configurations than any other small form-factor computer on the market today. The only downside to having all this power was the cost. The components are not cheap, and while there are cheaper options available, they are less powerful, and that would have compromised the system’s design.
With more inquiries for Lego Computers of varying levels of performance, I revisited the design for the existing Mini Lego Computer to see what options I had. Since I spent so much time developing the Mini Lego Computer system, I didn’t want to modify it extensively to meet these other requests. Instead, I decided that I would design and develop additional systems that meet the most common categories of requests I was getting. Based on the inquiries I was receiving, I was able to pretty quickly hone in on two additional systems that were needed to complete the Lego Computer line: a more affordable system that was would offer the processing power required for the average computer user at a price point that would fit the budgets of people that loved the idea of the Lego Computer but didn’t need higher-end performance. Beyond that, I also needed a gaming based system, which would feature a dedicated graphics card, capable of playing the latest games at the highest settings.
I began with the Micro Lego Computer. I had been working on this concept somewhat in parallel during my design of the Mini Lego Computer. This new Micro Lego Computer took what I learned during my development of the other systems and incorporated new strategies of Lego computer building into the design. Smaller than the Mini Lego Computer, the Micro Lego Computer is an excellent compromise of affordability, processing power and unique Lego aesthetic.
From the outset of the Micro Lego Computer design, I wanted to build a system that had a much lower cost but was still quite capable and could handle most computing tasks without a hiccup. I also wanted to incorporate some of the customizable elements that I added to the Mini Lego Computer. My first step was establishing a basic set of guidelines for the new system.
Micro Size
Low Cost
Use Latest Intel Processors (i3, i5 & i7)
Support up to 16GB Memory
Support up to 1TB SSD Drives
Capable of HD and 4K Playback
Multi-Monitor Capable
HDMI + Displayport Connections
USB 3.0 Ports
Mild Gaming
After working for a bit and going over the desired systems specs and capabilities, I kept coming back to the Intel NUC platform, which had basically everything I wanted from a technical standpoint as well as the micro form-factor I was looking to achieve. So I purchased a NUC system and started testing to see if it would work as the core of the Micro Lego Computer.
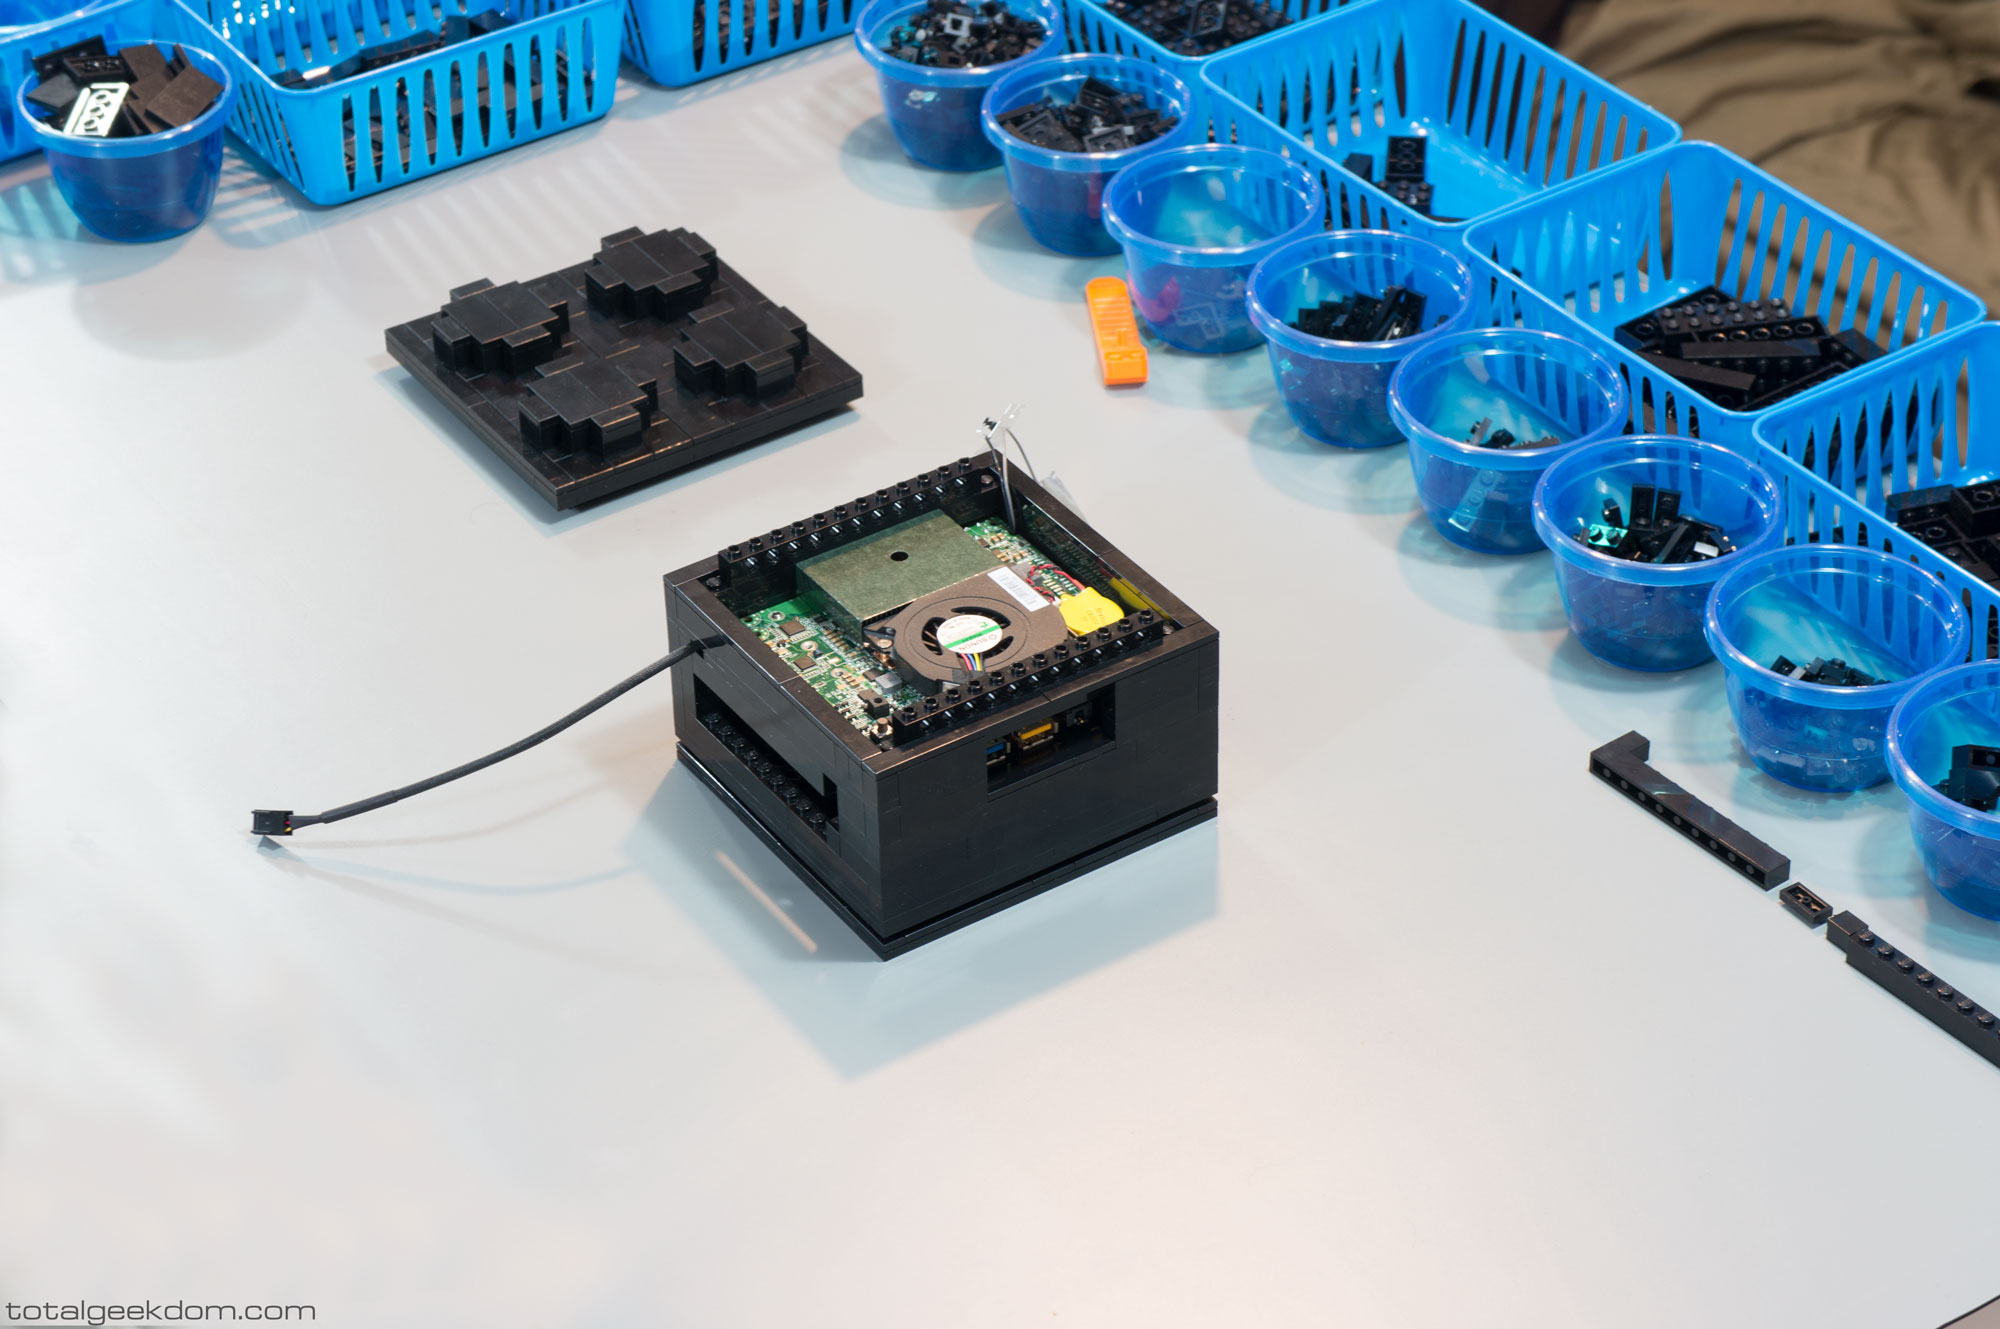
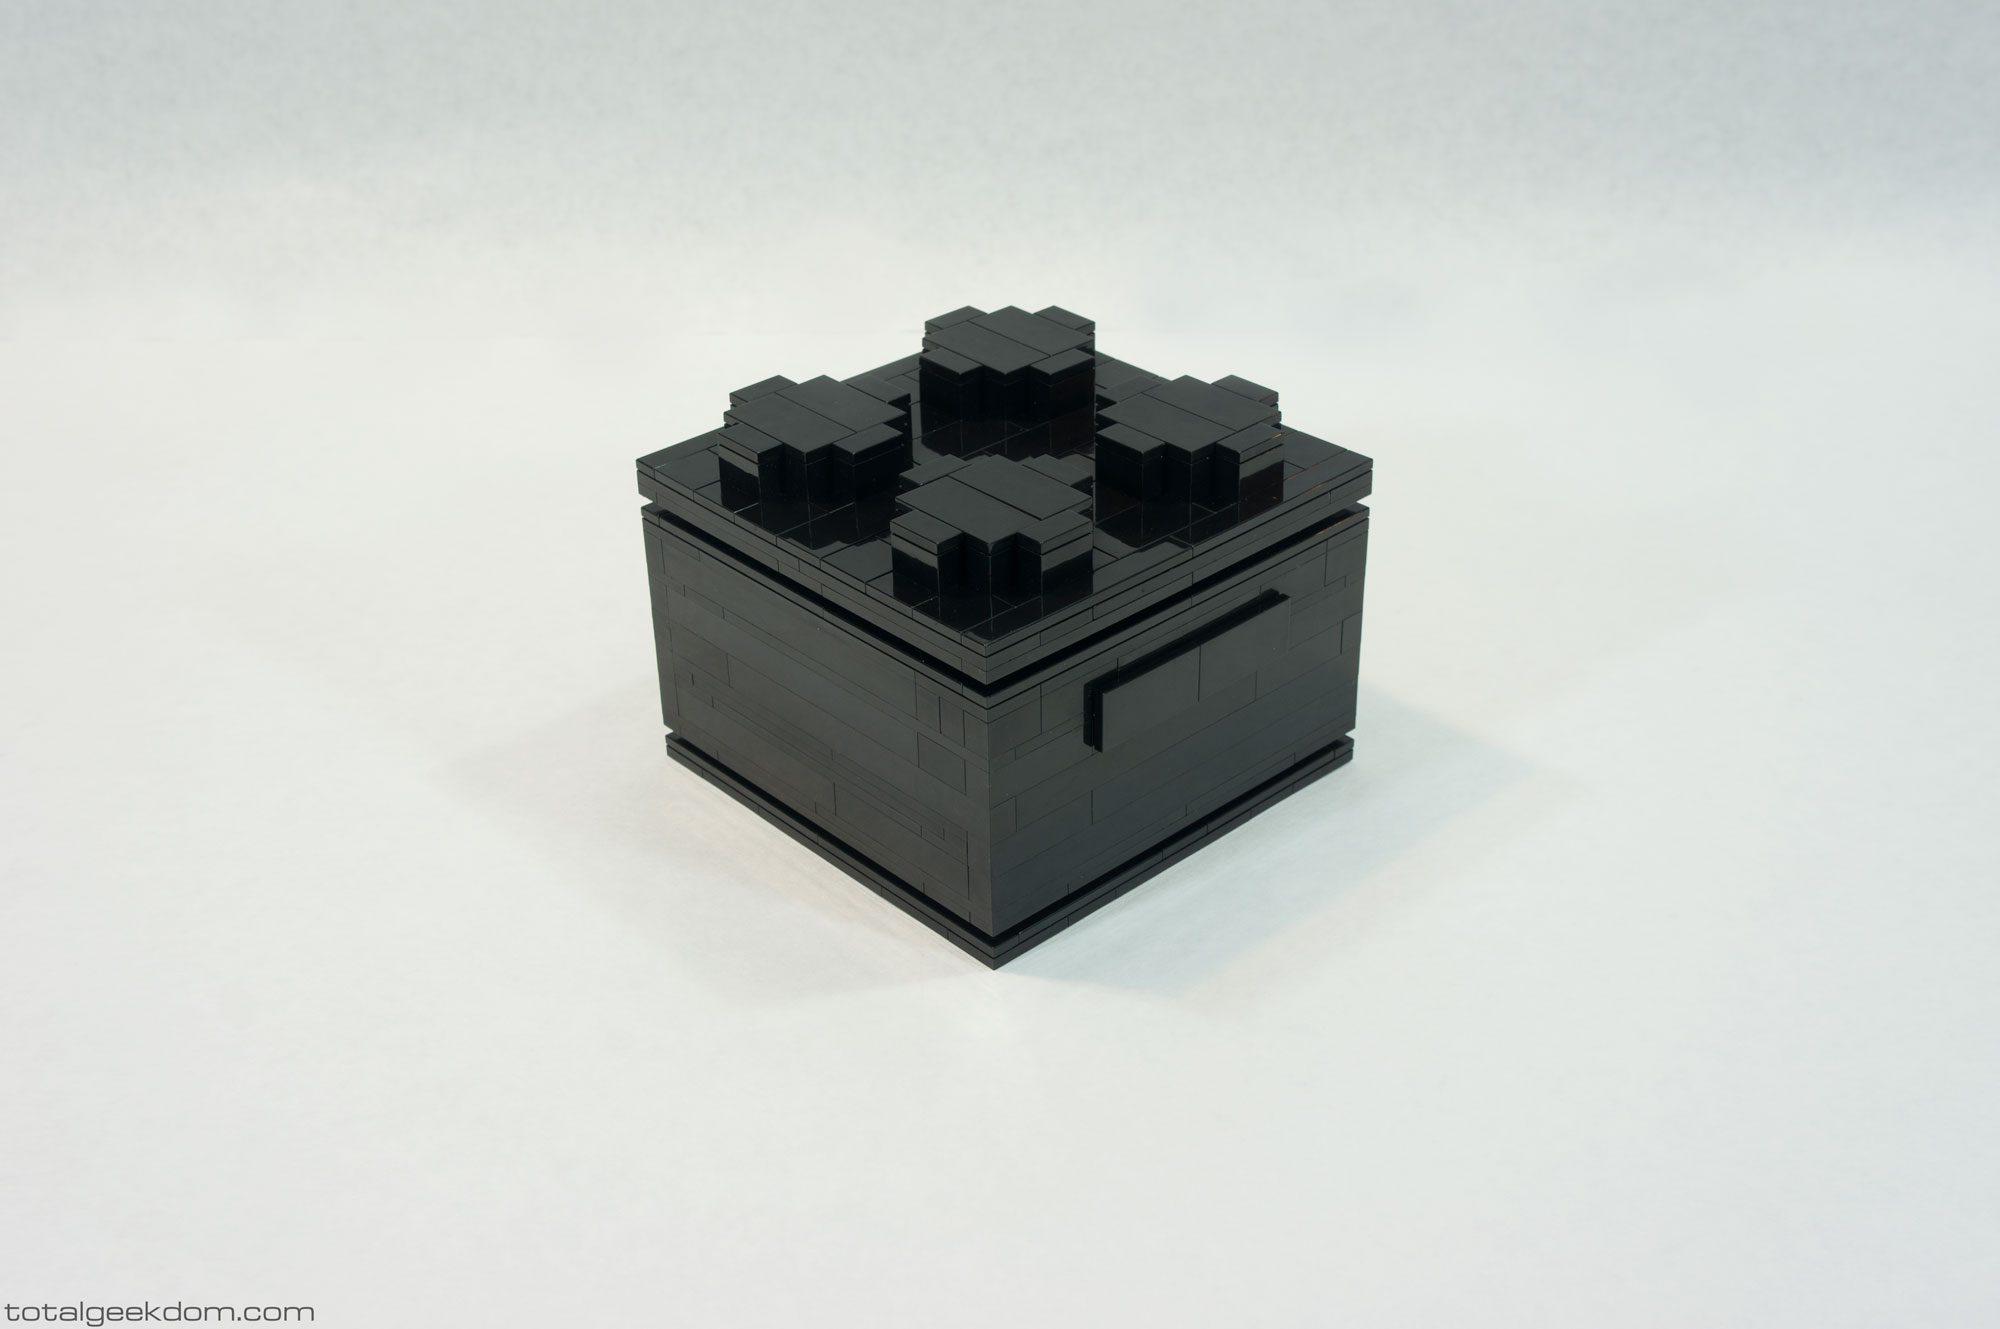
Utilizing the NUC platform gave me a very small form-factor motherboard/processor combo that would work well for the system I was looking to build. The next step was building a Lego-based case to house the system. I started with a similar design aesthetic to the Mini Lego Computer, matching the 2×2 brick design, just in a much smaller form. From there I worked towards incorporating different elements that I wanted to add into the system.
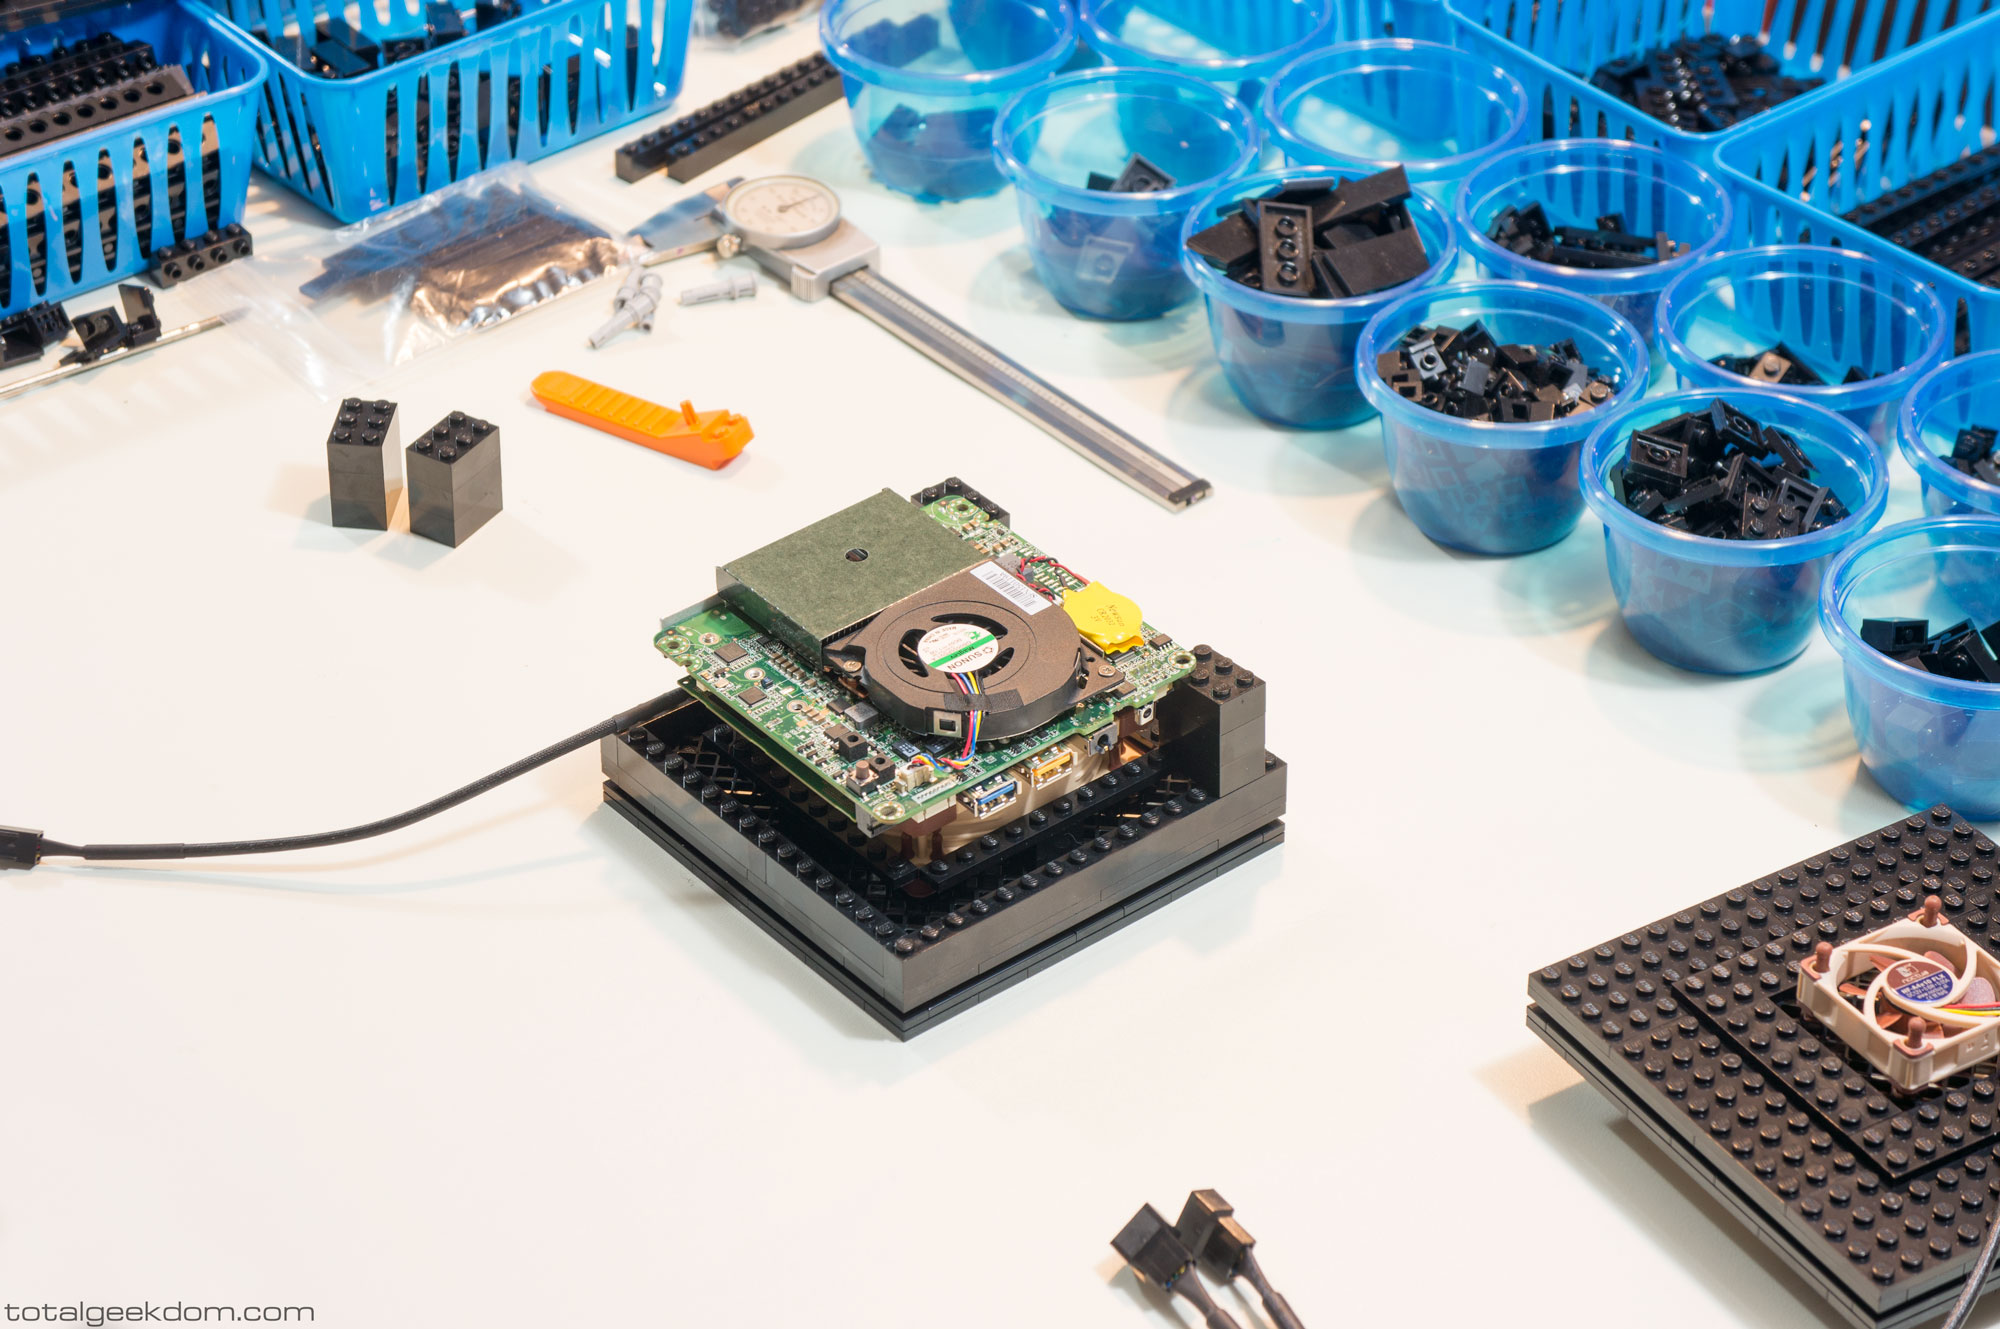
The first thing that was important to me was adding a system cooling fan. The default NUC systems do not use a cooling fan and are designed to work with passive cooling and no fan. But I wanted to improve upon this method of cooling, as I believe pretty strongly in actively cooling electronic components, especially ones that will possibly see higher temperatures. This fan testing phase took quite a bit of time, as the form-factor really limited the options in terms of fan mounting and system configuration. Another element that added to the system’s difficulty in design was that I wanted the design of the case to be stackable, just like a real Lego brick (more on this in a bit). Due to these constraints, I tested quite a few fans and a number of different fan configurations before I was finally able to find a setup I was happy with. I used a Noctua fan, as they are the best cooling fans on the market in terms of low noise, high flow, and excellent durability.
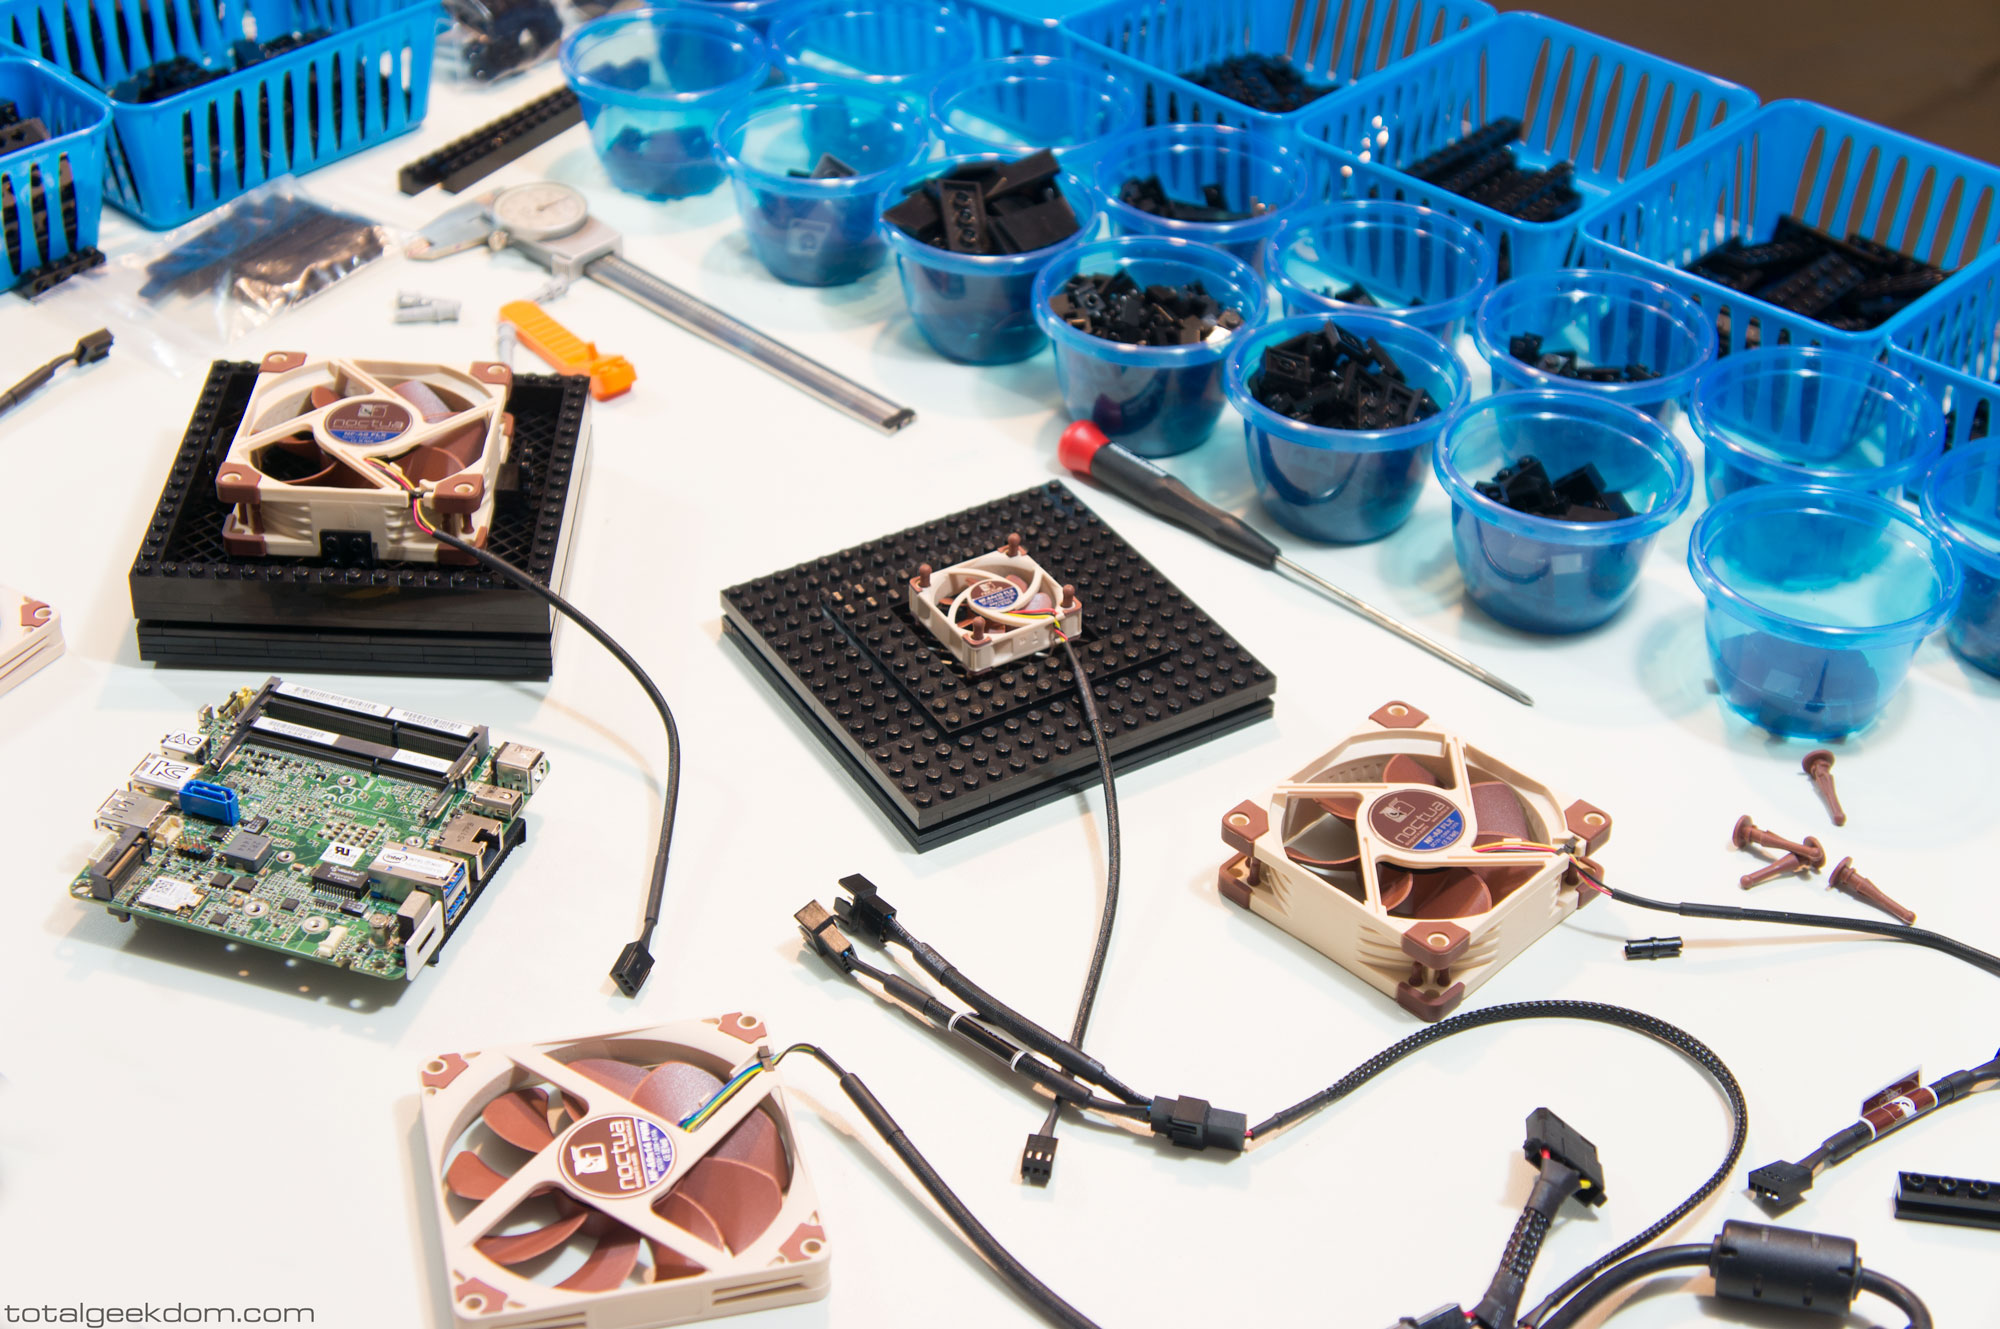
Micro Lego Computer Fan Testing
An important element of the system’s design phase was working towards making the case stackable, just like a real Lego brick. Part of the effect was purely for novelty, but it was also to work towards a larger goal for the system on a whole. I wanted the system to be capable of having add-on modules for increasing storage capabilities or providing an additional USB 3.0 hub/card reader. This would allow multiple cases to connect together, just like real Lego bricks, and add more functionality and expansion to the system. This aspect of the system though presented challenges with the design of the main system and its case. In order to ensure that the fan always had an unrestricted inlet, I needed to create a lower case design that both allowed for stacking and locking into place, while at the same time having an airflow path to allow for proper cooling. This ended up being challenging for a couple different reasons. The extremely small form-factor of the system was probably the biggest contributor, as was finding a fan small enough yet powerful enough. I went through almost every fan that Noctua makes while testing. Another issue that added to the complexity was the airflow configuration was how the fan needed to have a certain volume of air available on the intake side to be efficient.
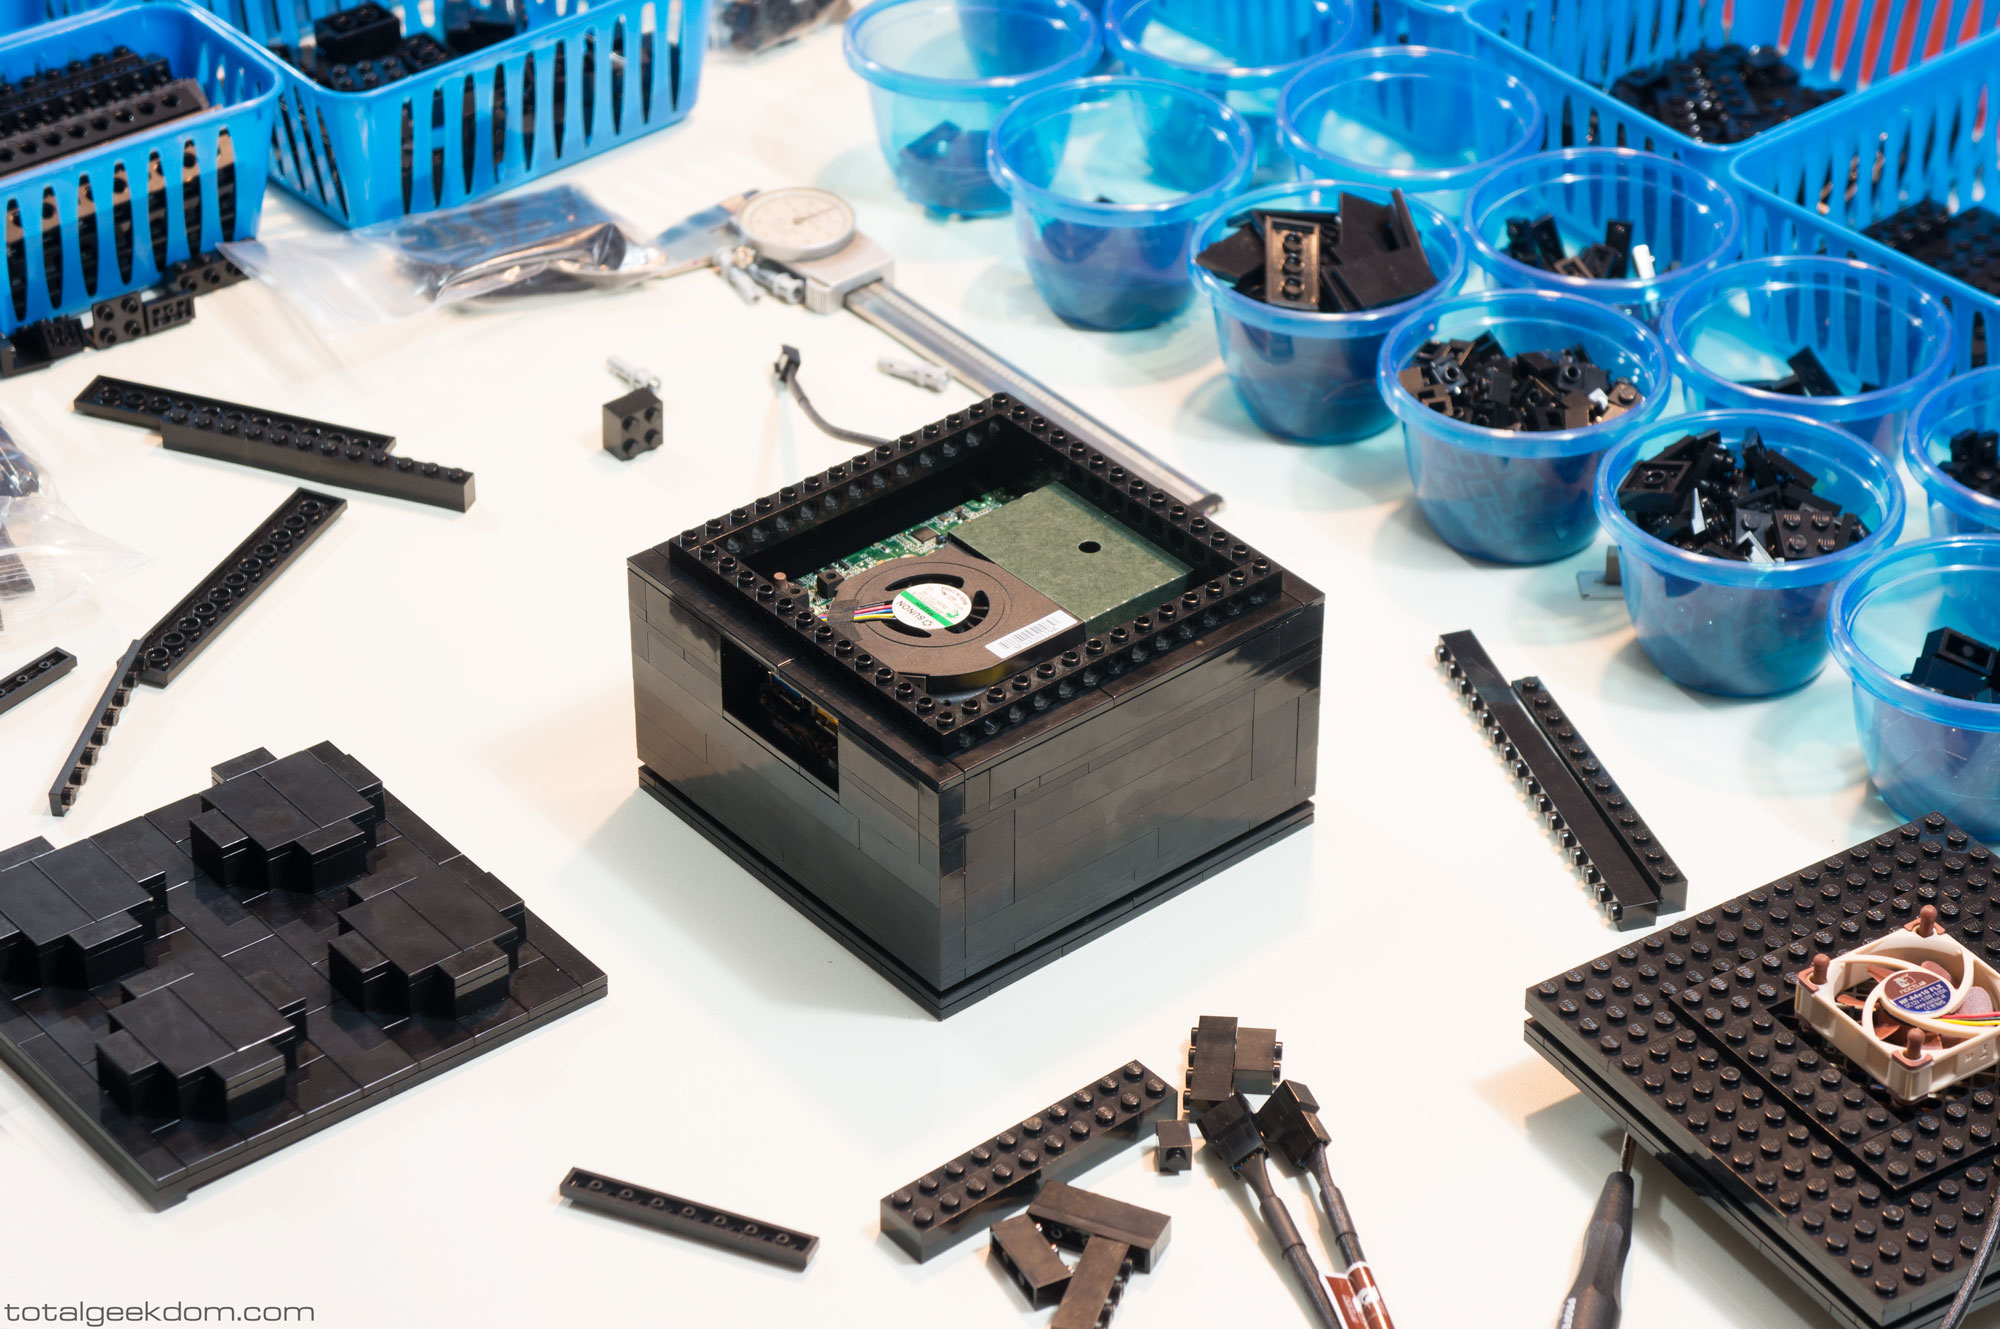
The design of the base incorporates a lot of open Lego elements as well as very specific spacing of some Technic Lego bricks to get added area for airflow. The open design of the base is what allows the intake air volume to be high enough for efficient fan operation and cooling. This also meant that I needed to account for the restriction that would exist when you stacked the system on another add-on module. Because the add-on modules are built using the same scaling technique, the lugs on the top of those modules fit into the bottom of the system module, which means they restrict the airflow path. This required a lot of trial and error in testing to produce the most ideal arrangement of Lego elements and airflow paths to ensure proper cooling.
Upon completing and testing the base of the system, I worked my way up, doing various tests of the cooling system, measuring the thermal output at various settings and ensuring that the cooling system was doing its job. This testing was accomplished with both an IR (infrared) heat gun as well as the use of a thermal imaging camera. This allowed for testing and measuring every single component of the system (Memory, SSD, Power Circuitry, Processor, etc.).
Micro Lego Computer Infrared Gun Temperature Testing SSD
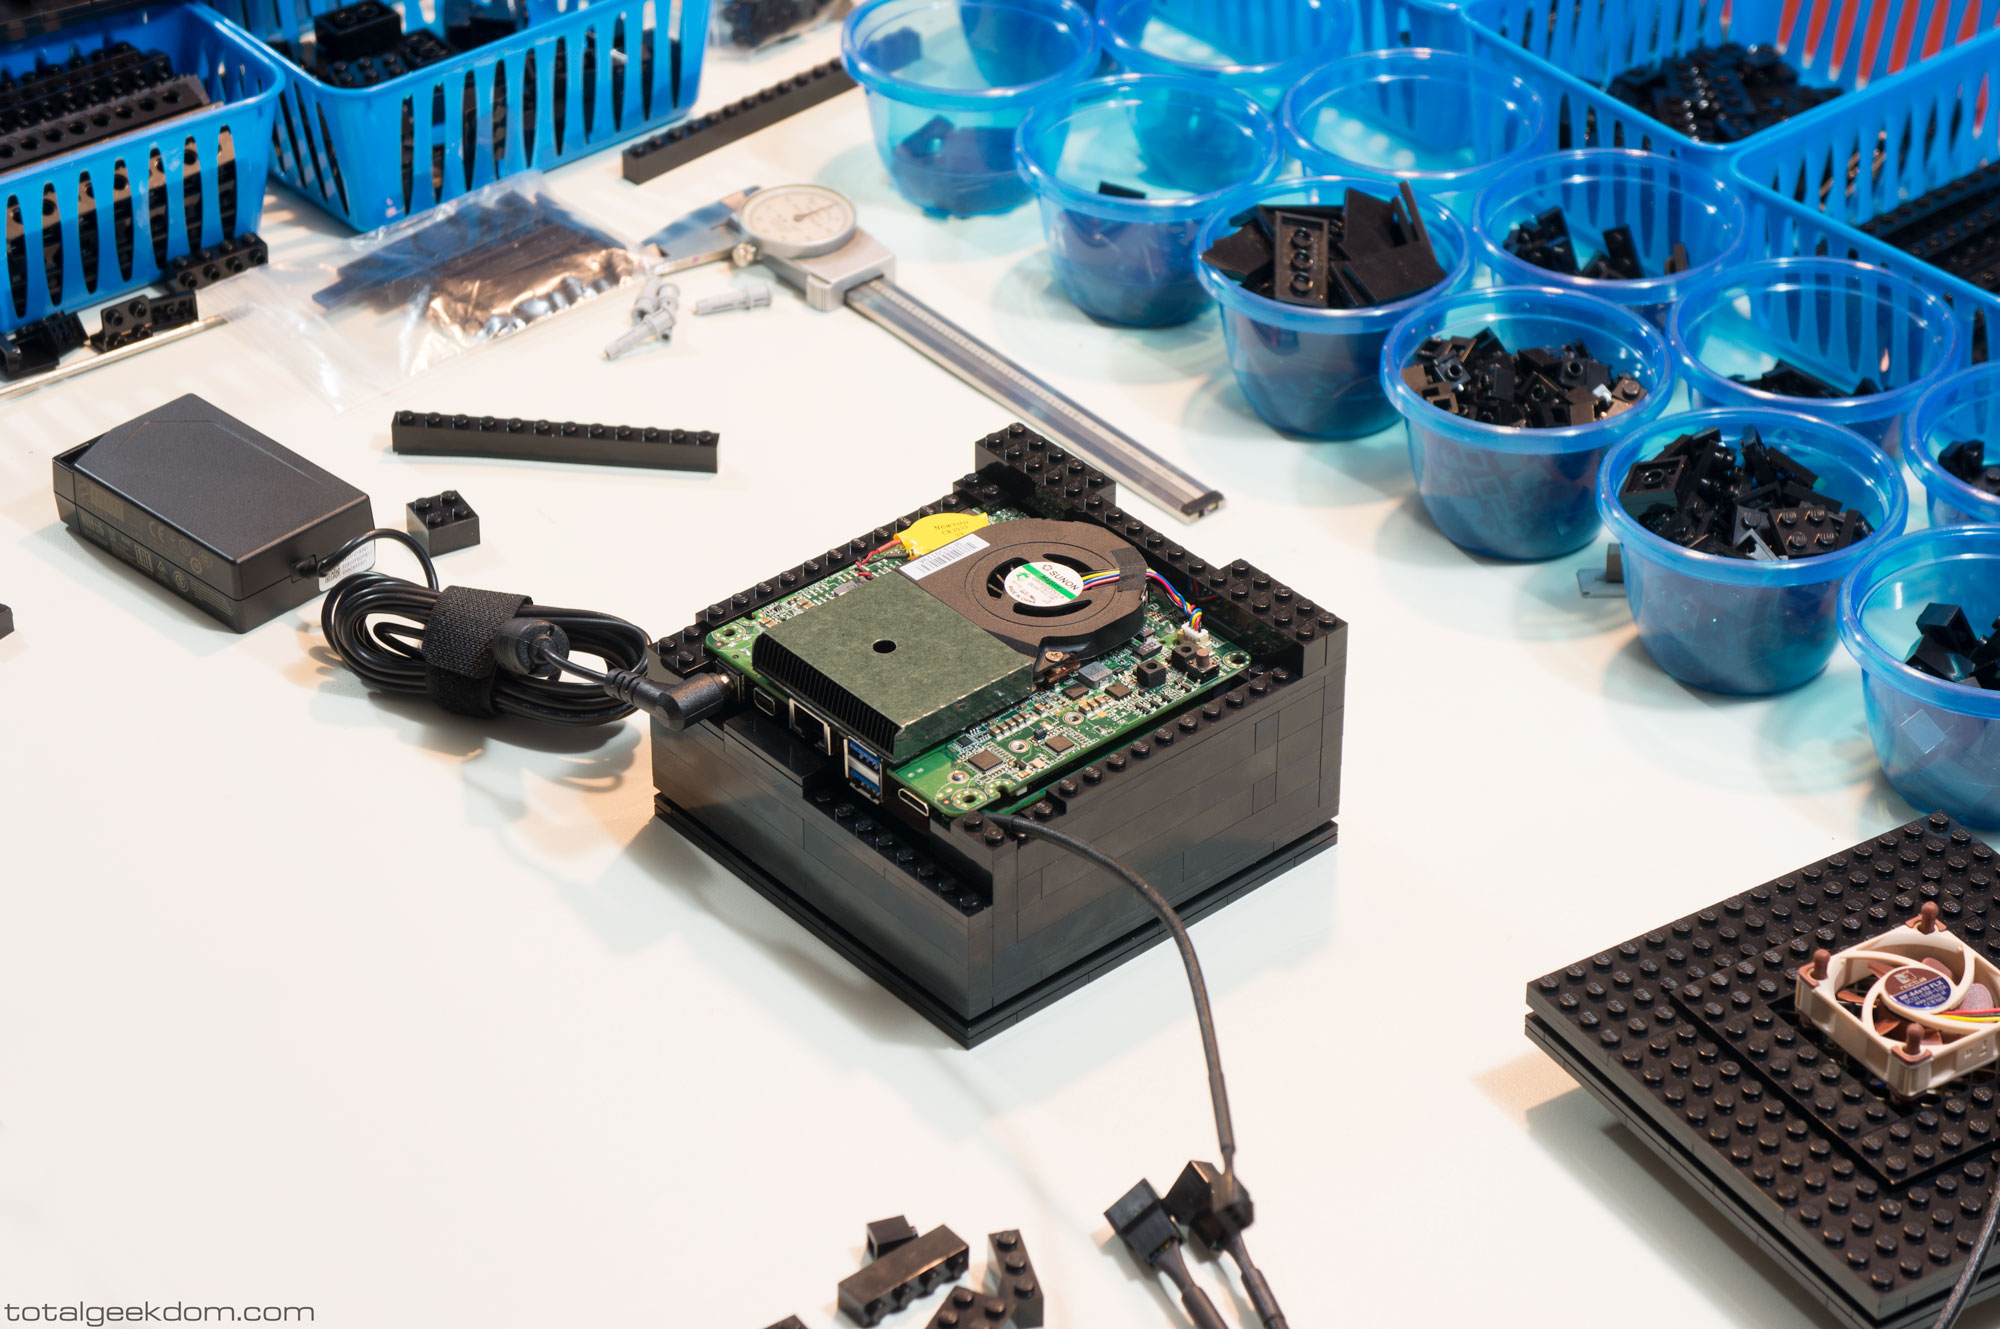
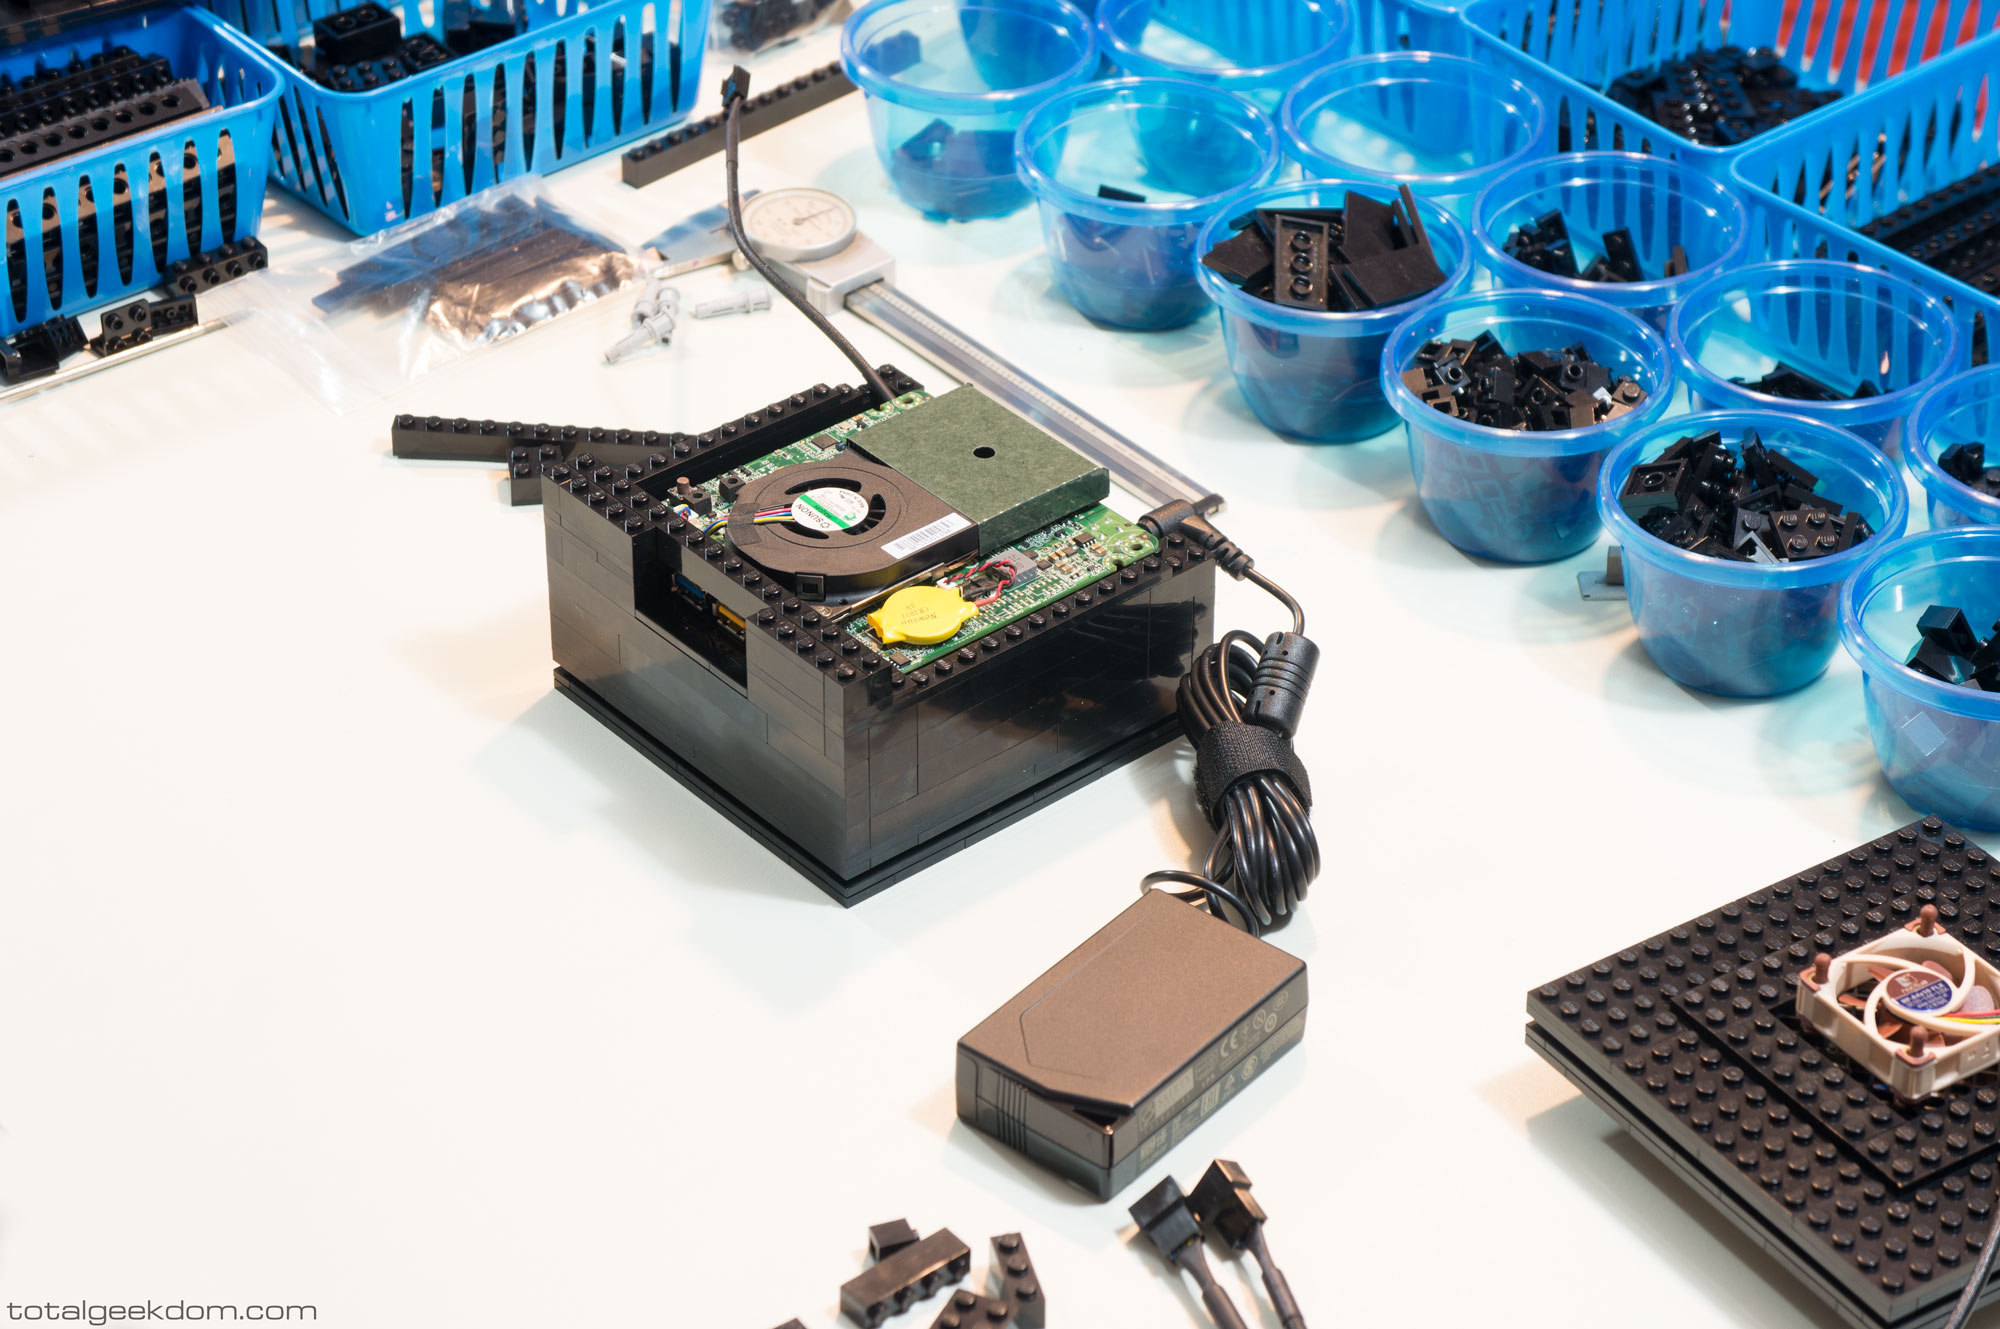
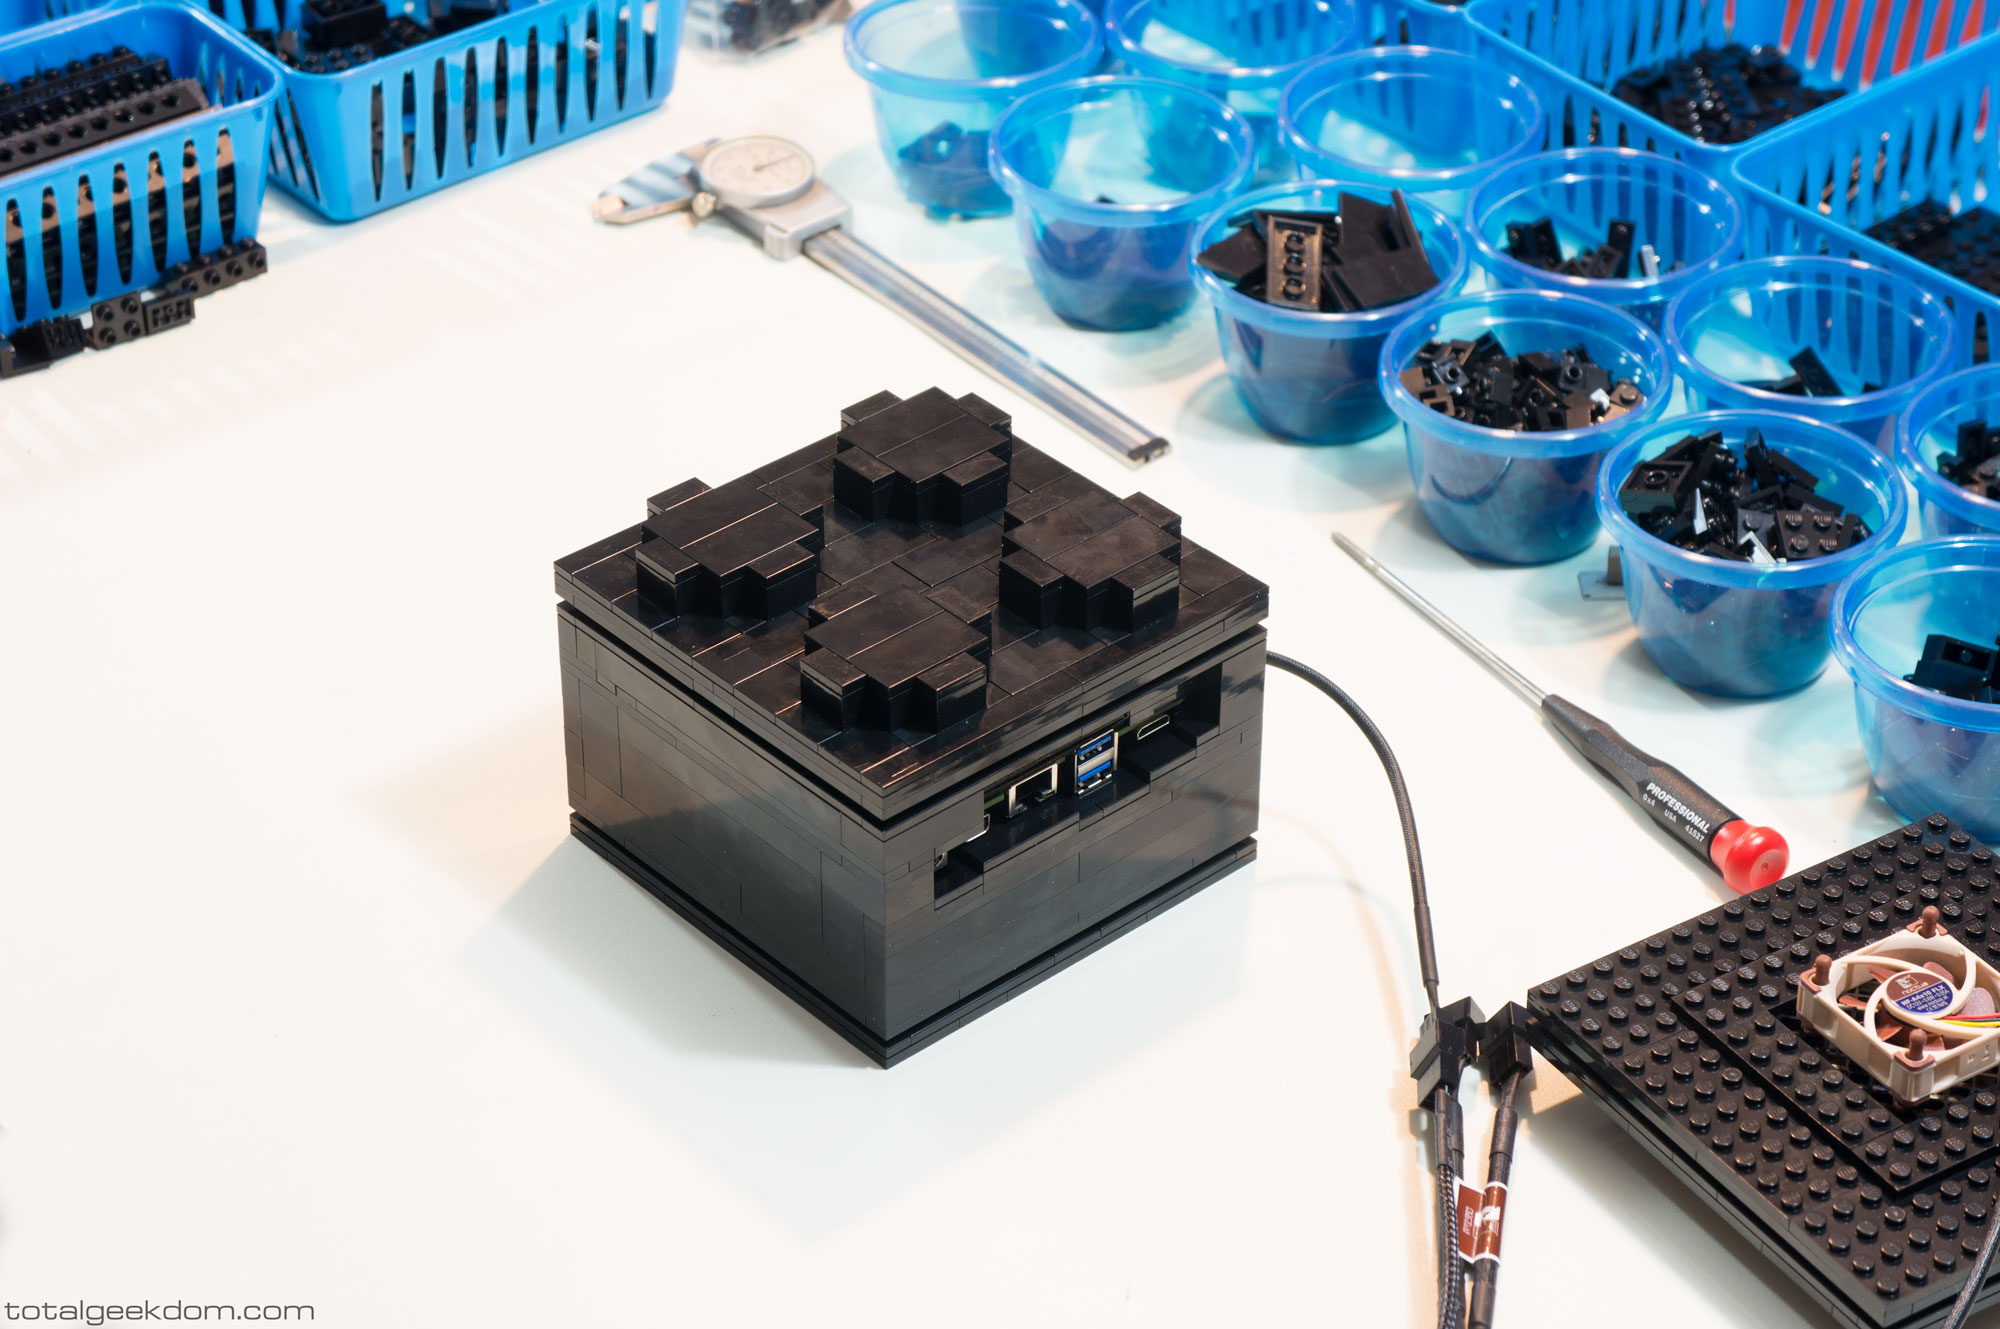
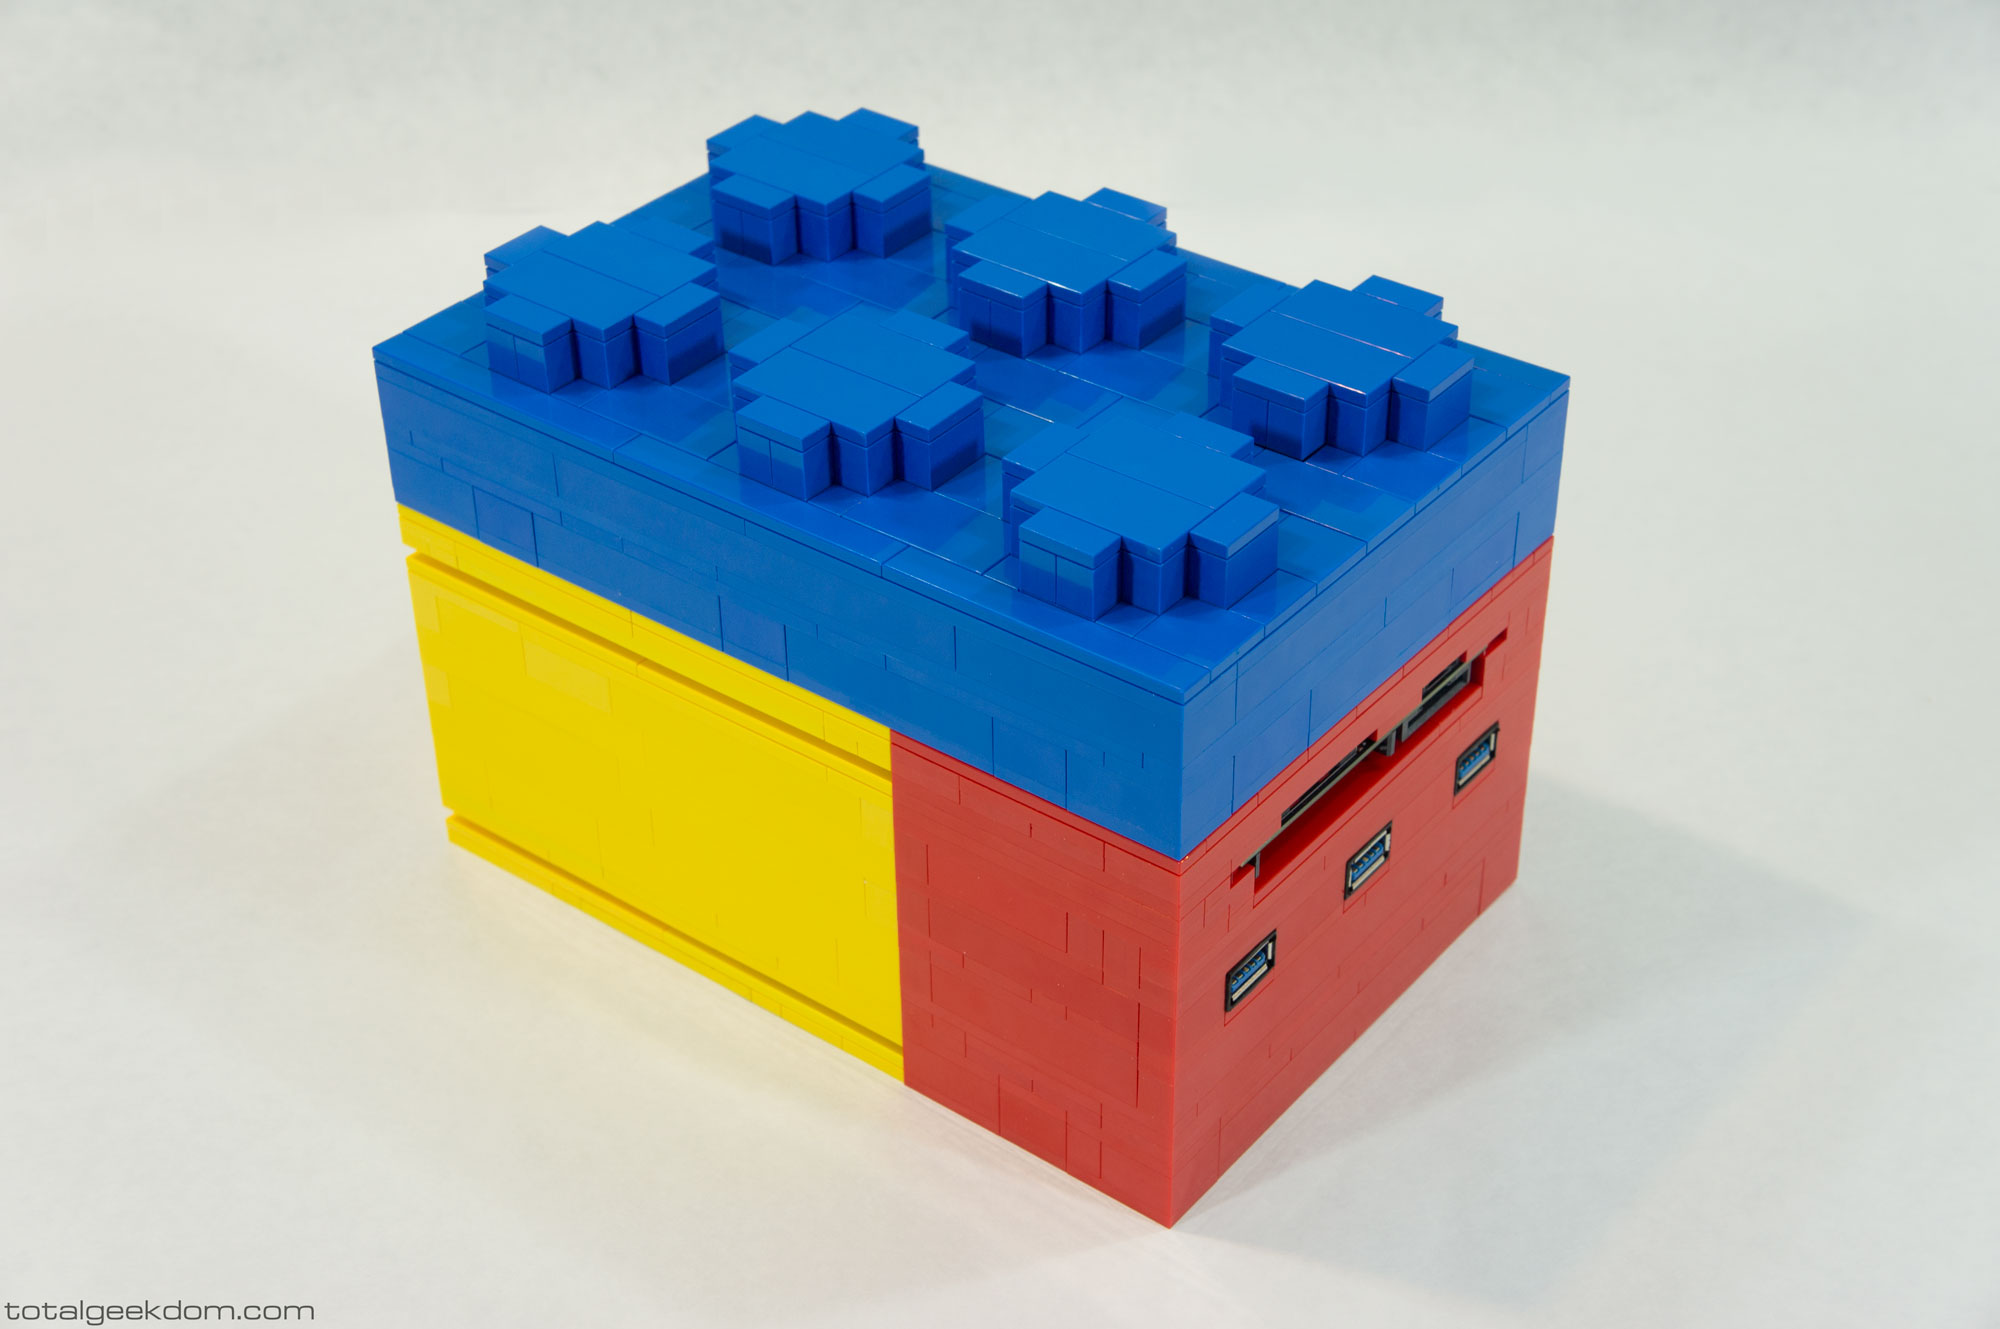
The next obstacle was the port configuration. The front of the system motherboard has a couple of USB 3.0 ports and an audio out port, and the rear has the rest of the connections (Mini-HDMI, Mini-Displayport, USB 3.0 Ports, Power Jack) as well as the processor exhaust. Since they are not arranged in an even horizontal plane, I had to create a series of steps in the design to incorporate all the different port heights. The front of the system took a little more work because I couldn’t easily flush mount the USB ports while maintaining the correct aspect ratio for the Lego brick design. I also wanted the front to look as clean as possible, without a series of ports popping out. So I recessed them slightly and hid them behind some swiveling tiles.
Micro Lego Computer Lower Fan Mockup
Micro Lego Computer Lower Case Mockup
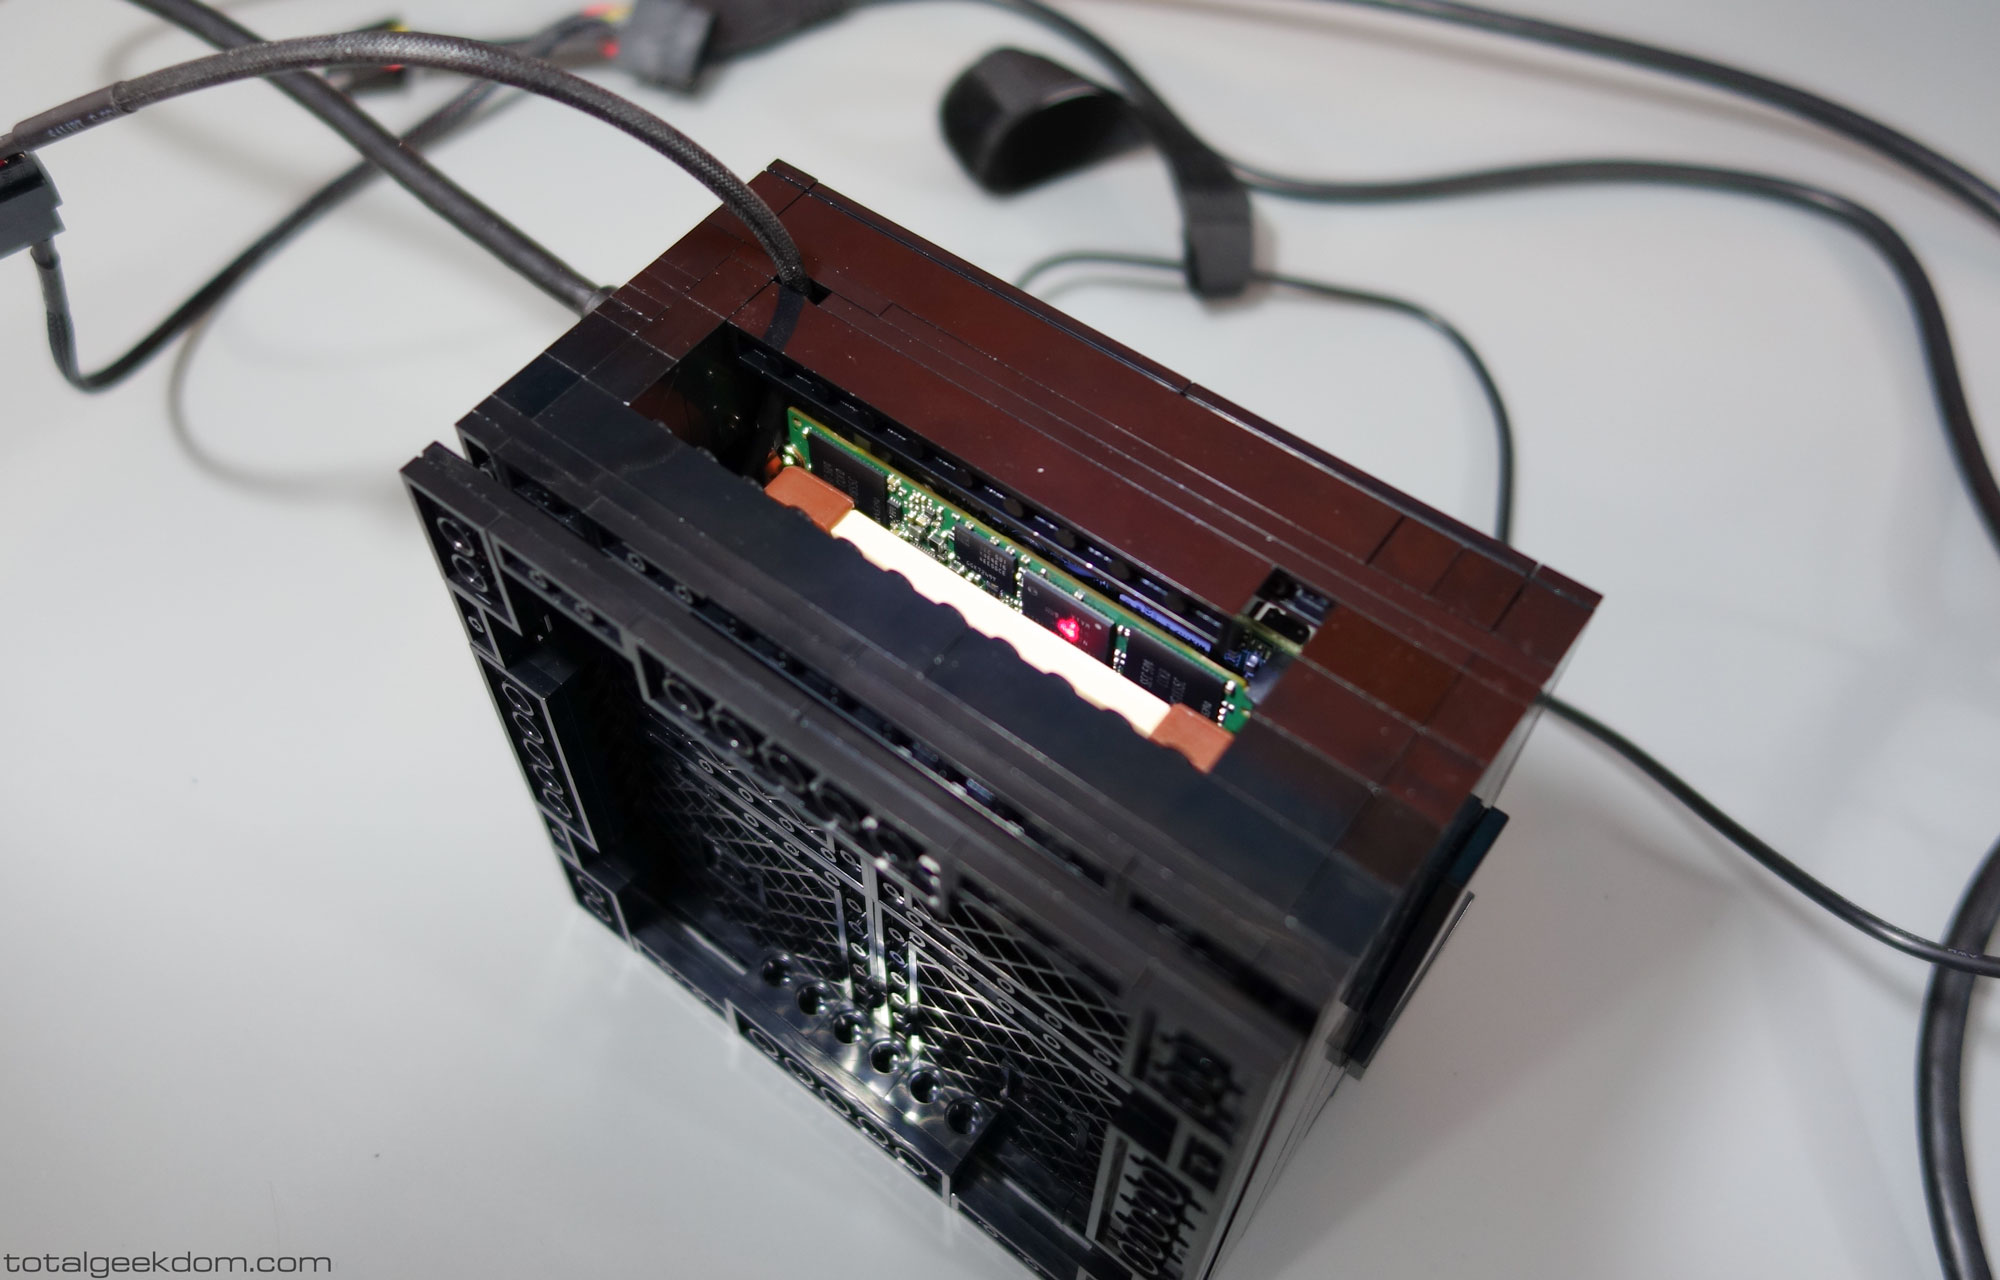
The upper portion of the system incorporates another perimeter slot that goes around the case. This is backed by Lego bricks that have holes all the way around, allowing for 360 degrees of ventilation for airflow at the top of the system. Moving up from there, we have the lid section, which replicates the designs of the larger Mini Lego Computer I previously built.
Micro Lego Computer Motherboard Mockup
Micro Lego Computer Antenna
Micro Lego Computer Upper Vent
Micro Lego Computer Rear System
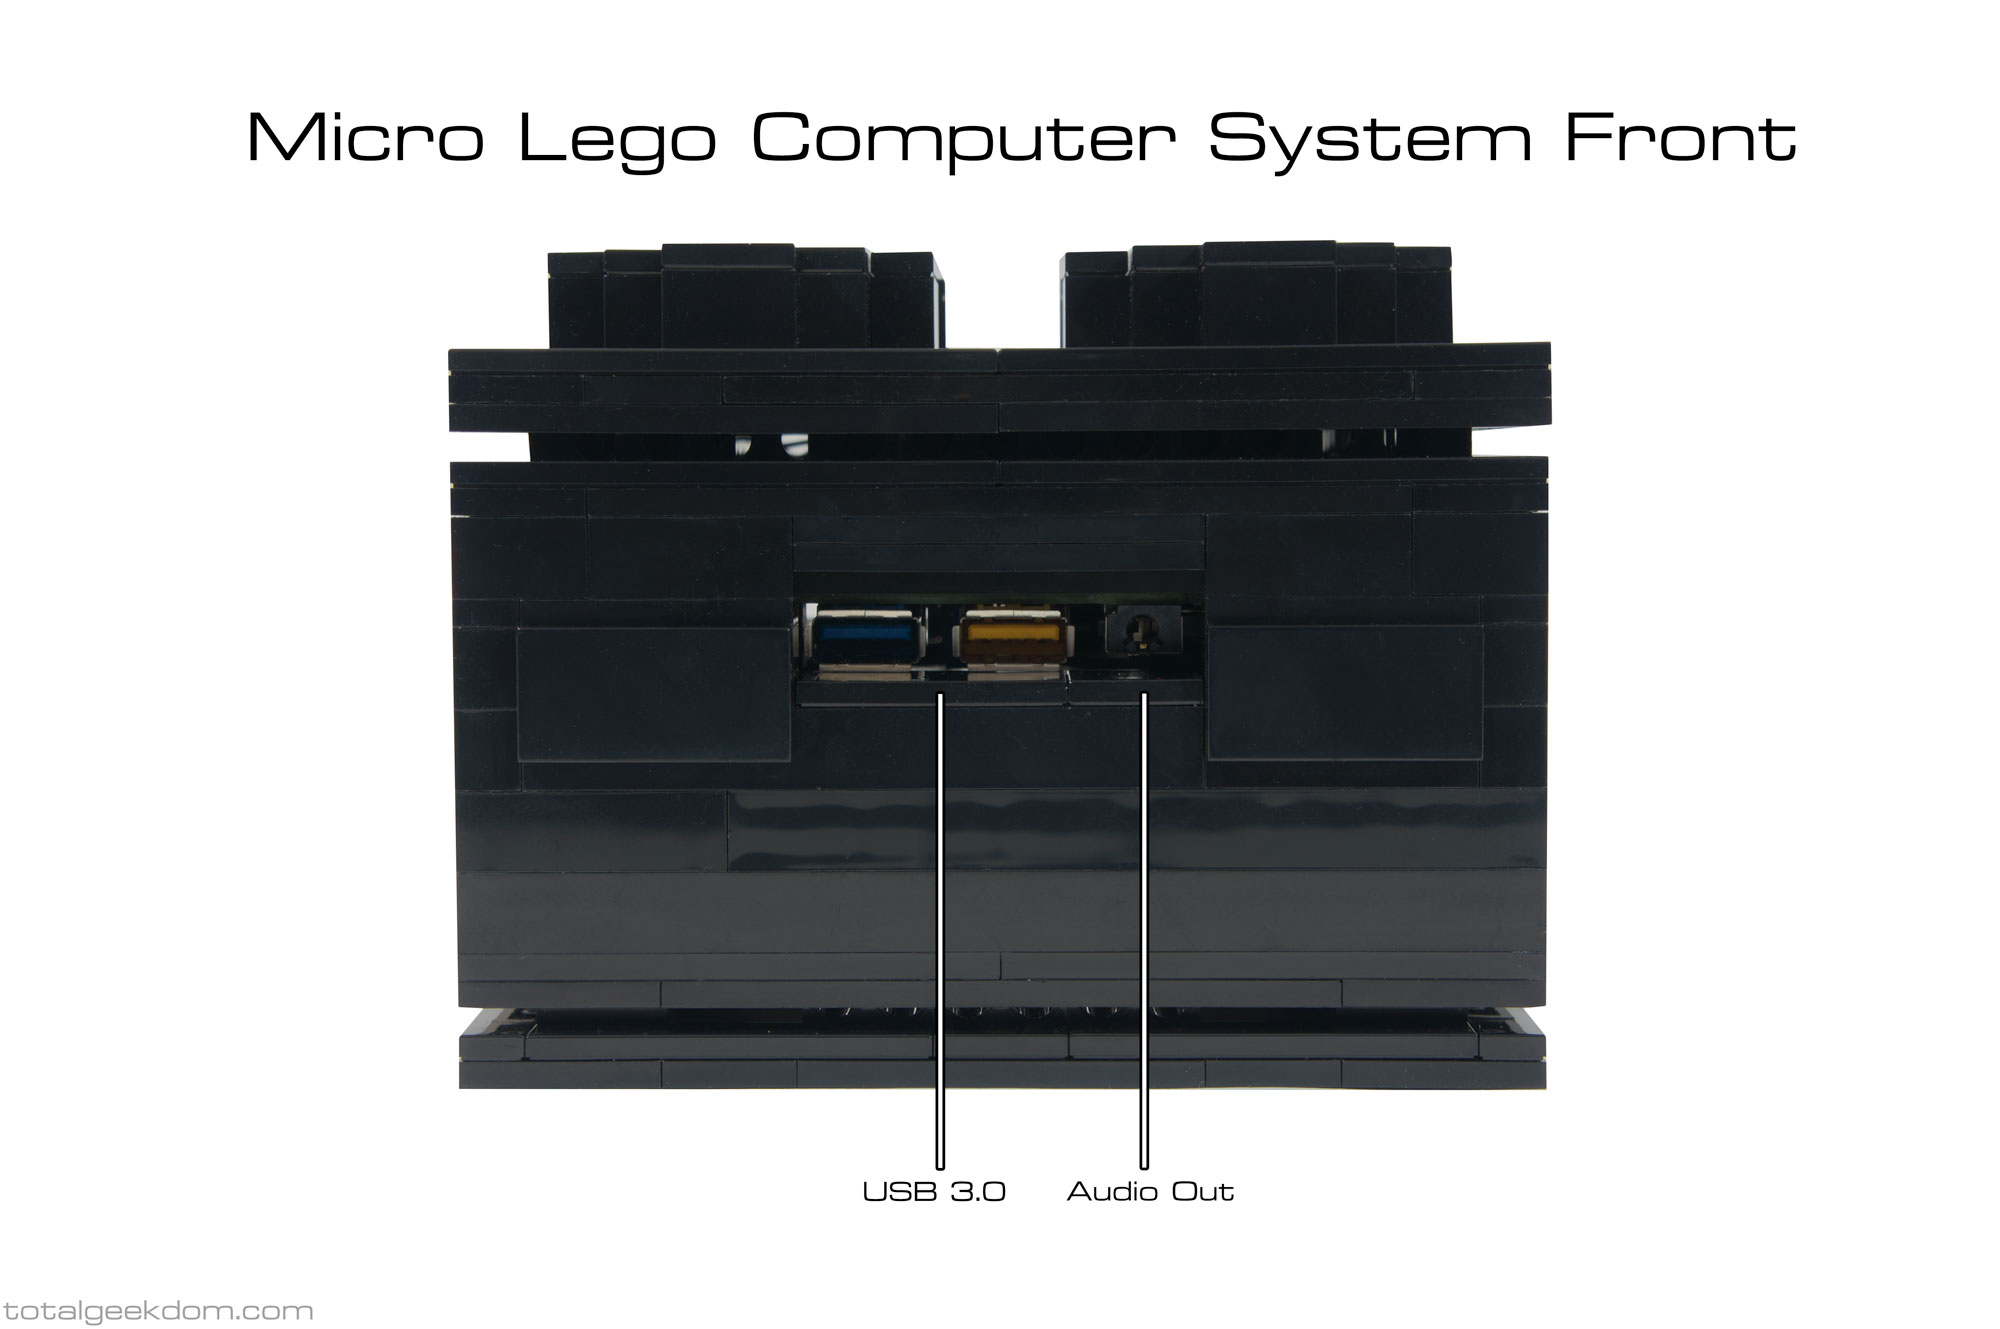
Micro Lego Computer System Front
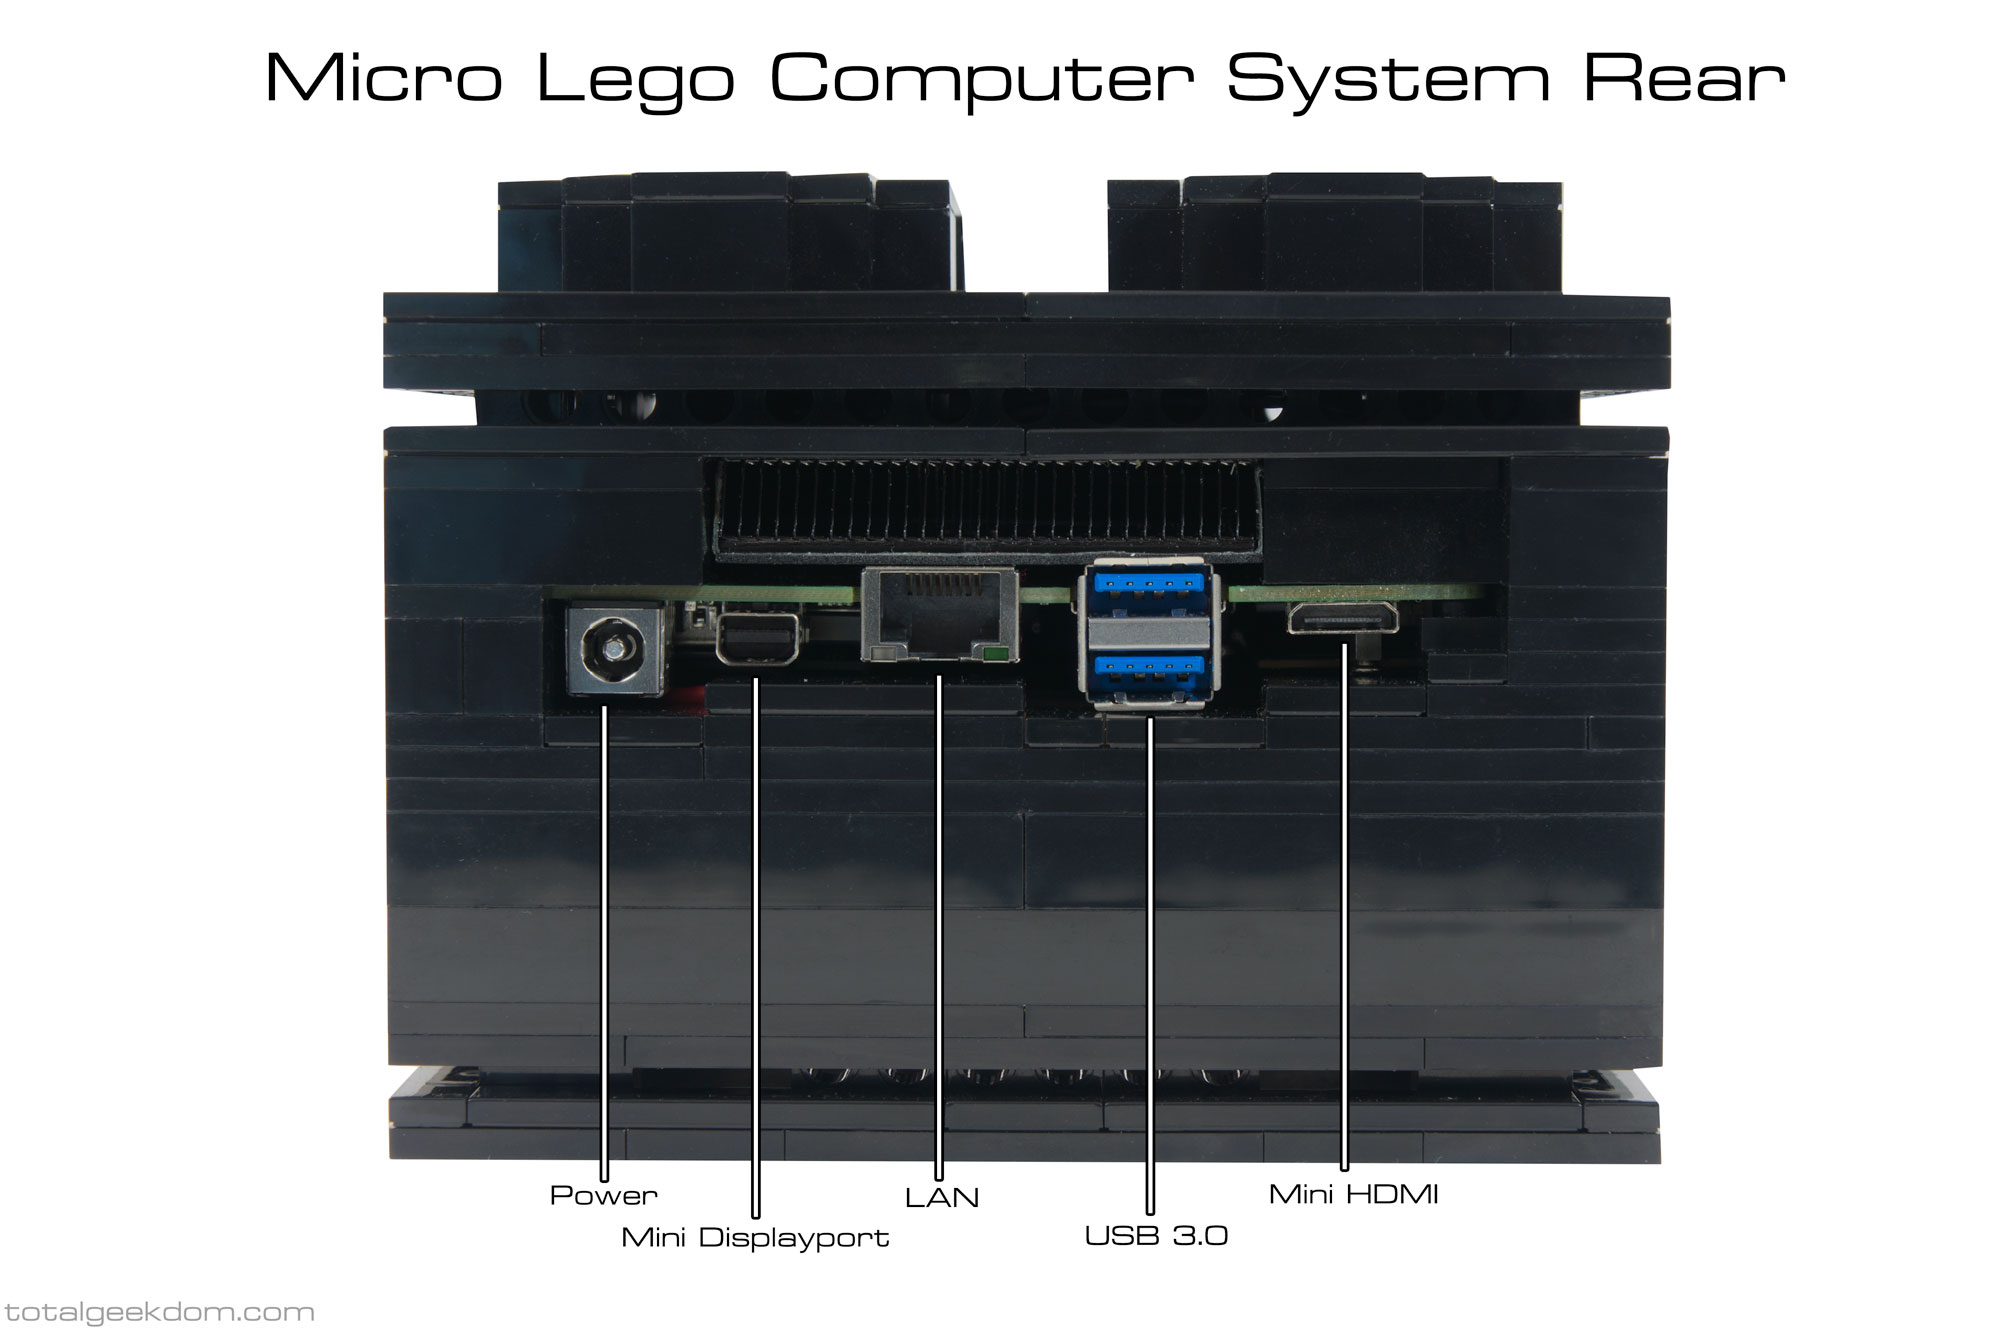
Micro Lego Computer System Rear
The power button was another hurdle, as the motherboard has the switch soldered directly onto it. This required some trial and error with different designs to find a way to push the power button without being able to move its location. I eventually settled in on having one of the bricks in the top of the system act as a button.
Micro Lego Computer Complete
Once all the testing and design of the system was complete, I turned my attention to the add-on modules. The idea for expandable Lego-based modules came from working on the previous Mini Lego Computer. The scale of the system was a bit of a challenge, and I decided not to pursue it at that time. When I started working on the Micro Lego Computer, I found that the scale of the system was perfect for add-on modules. Part of the reason that I wanted to offer these add-on modules was to offer expansion for the system, while also maintaining a lower price point for the base system. This allows for a cheaper base computing system (Micro Lego Computer), while being able to add on expansion and functionality for users that require it.
The first add-on module that I built was an external hard drive module. This module allows for adding increased storage to the base Micro Lego Computer, and it fits the design by allowing the modules to be stacked just like a standard Lego brick. The module is based on a 2×3 Lego plate but scaled up in size to match the system. This allows for an additional hard drive to be added to the system (up to 2TB) and uses just a single USB 3.0 connection that provides both power and data.
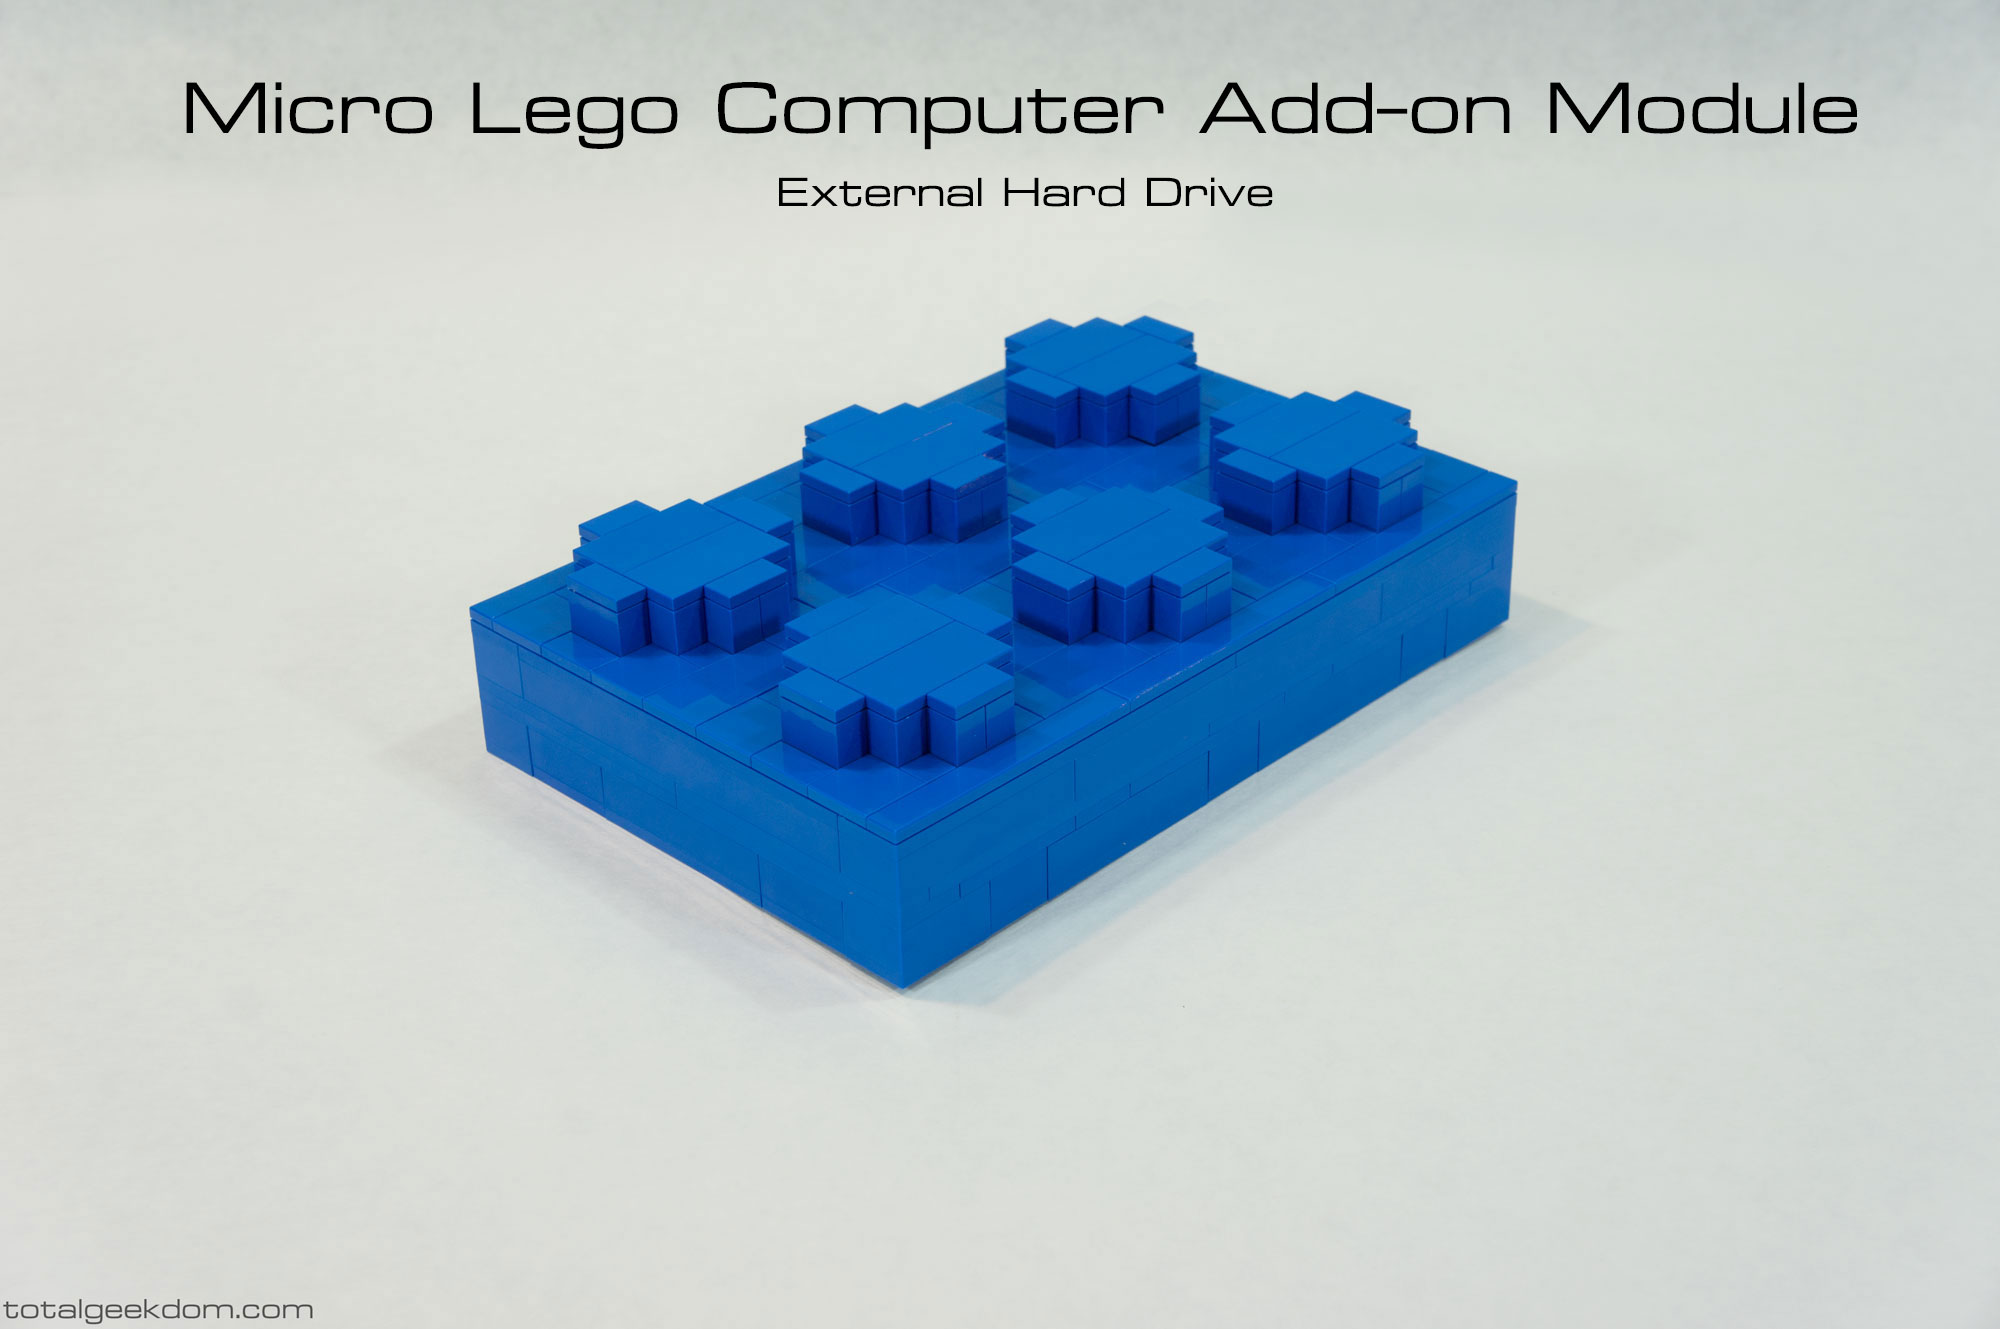
Micro Lego Computer Add-on External Hard Drive Module
The next add-on module I built was a combination card reader/ USB 3.0 hub. This module allows for adding more USB 3.0 ports, as well as a card reader to the system and is based around a 1×2 Lego brick. Like the hard drive module, card reader/ USB 3.0 hub only requires the single USB 3.0 connection for both power and data.
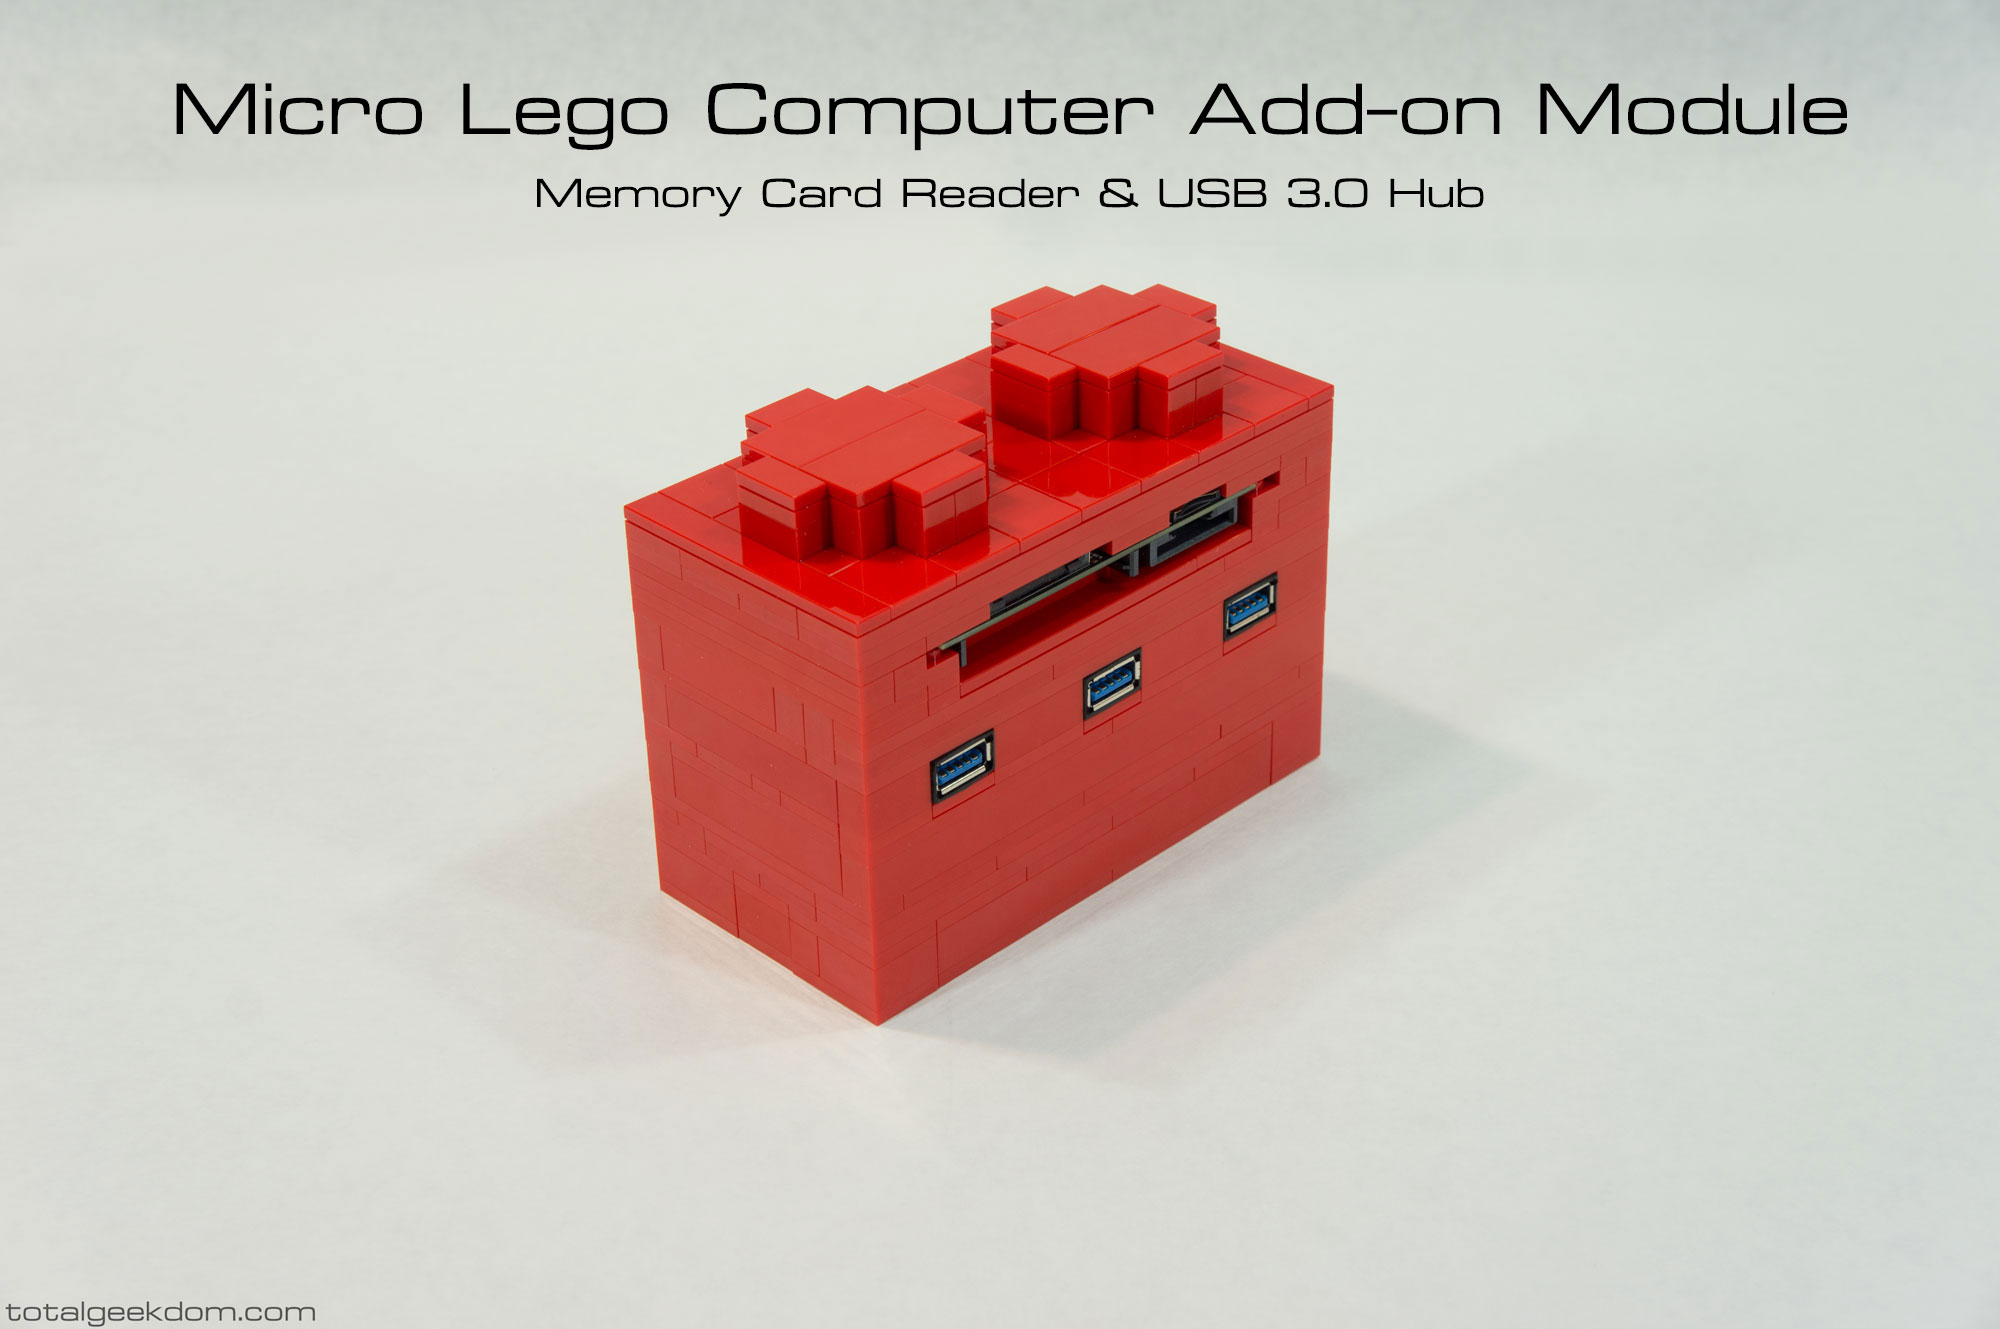
Micro Lego Computer Add-on Memory Card-USB 3.0 Hub Module
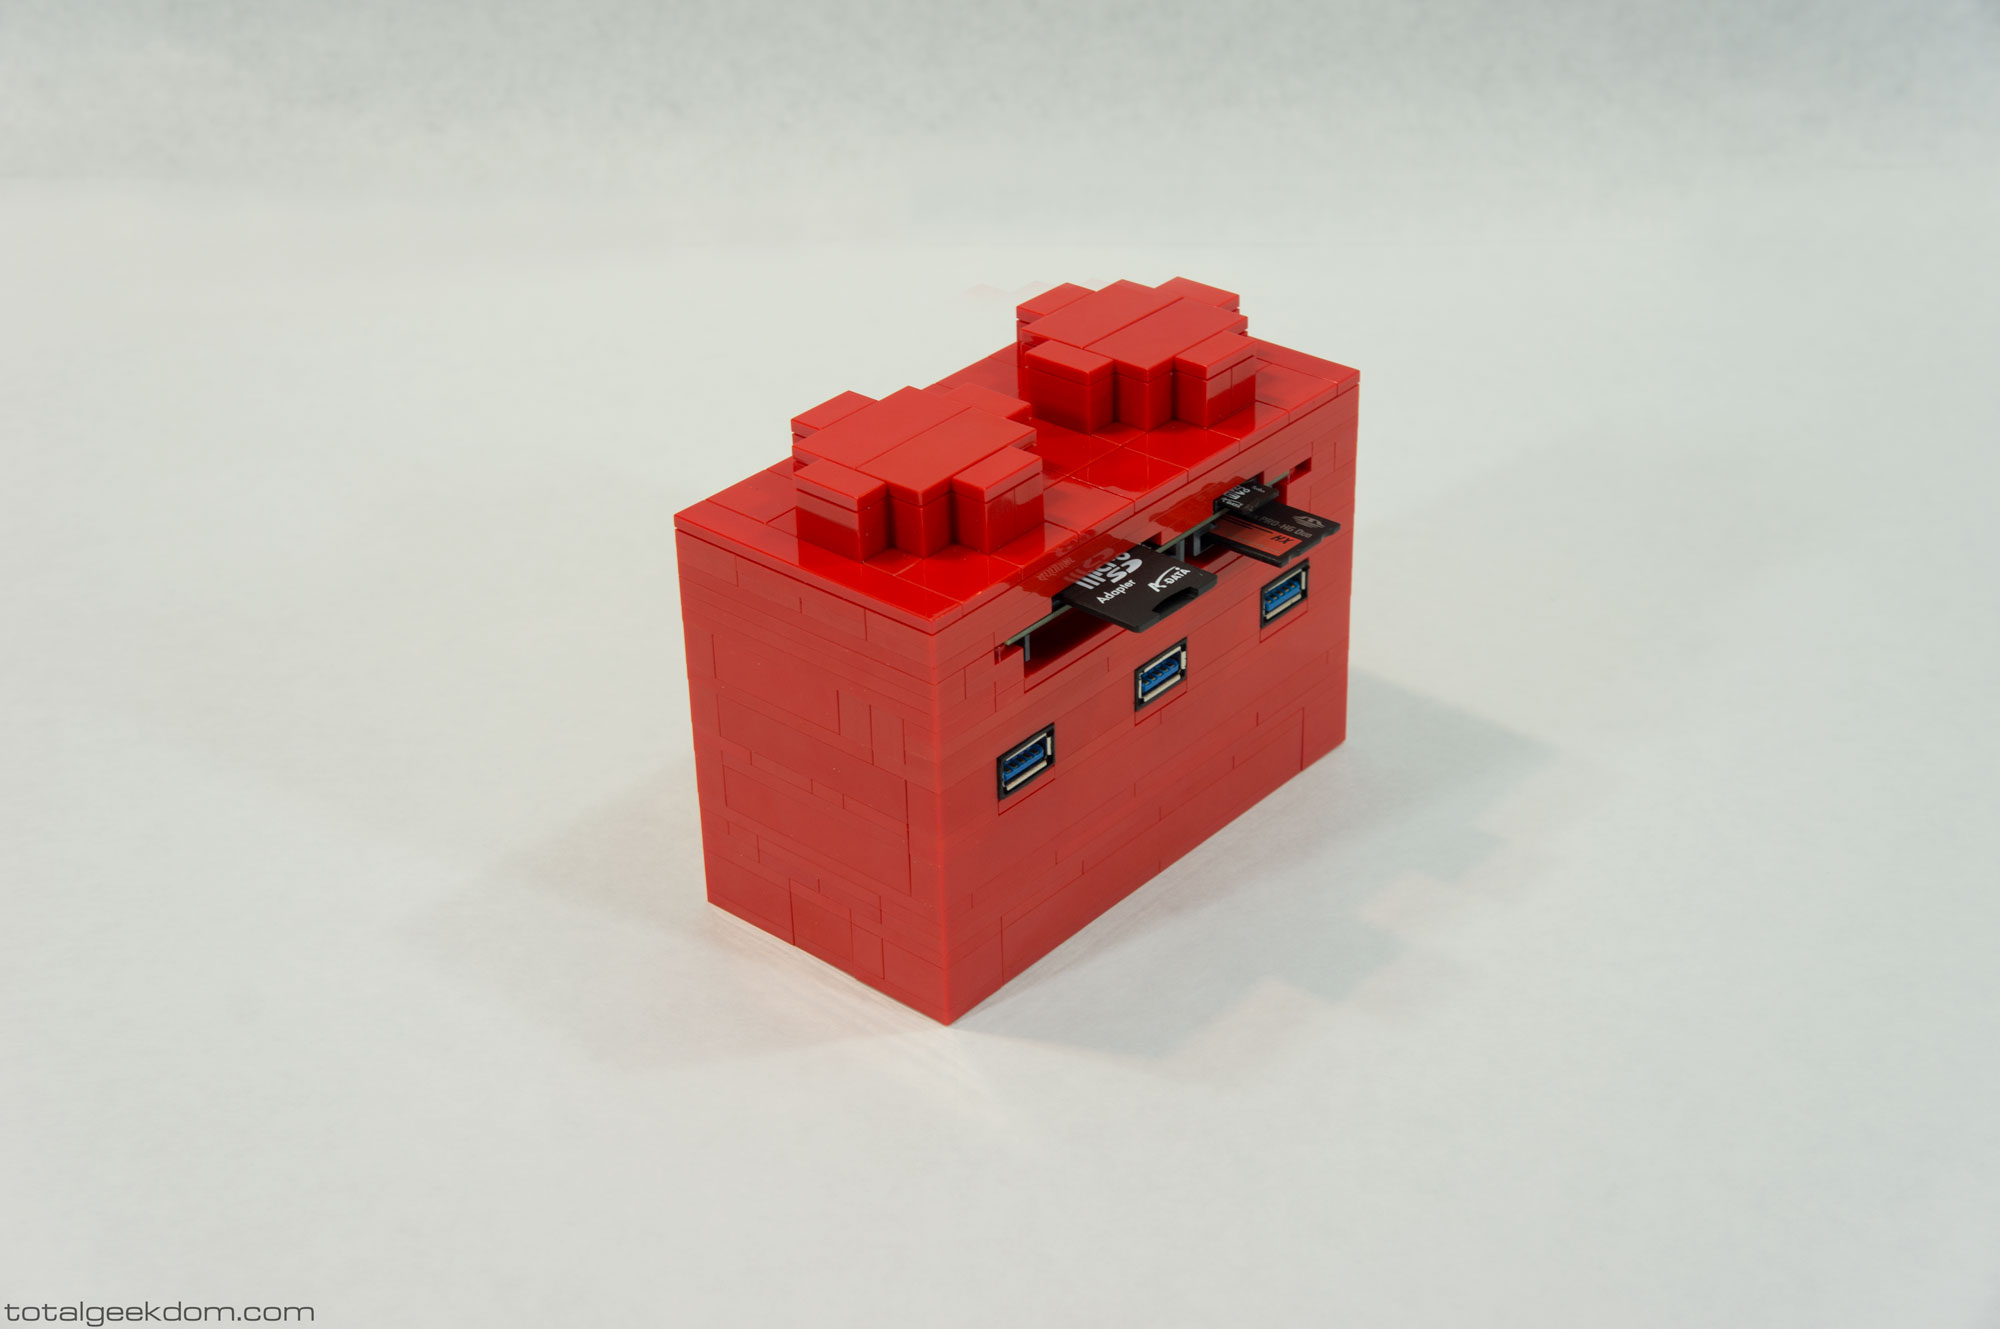
Micro Lego Computer Add-on Card Reader Module
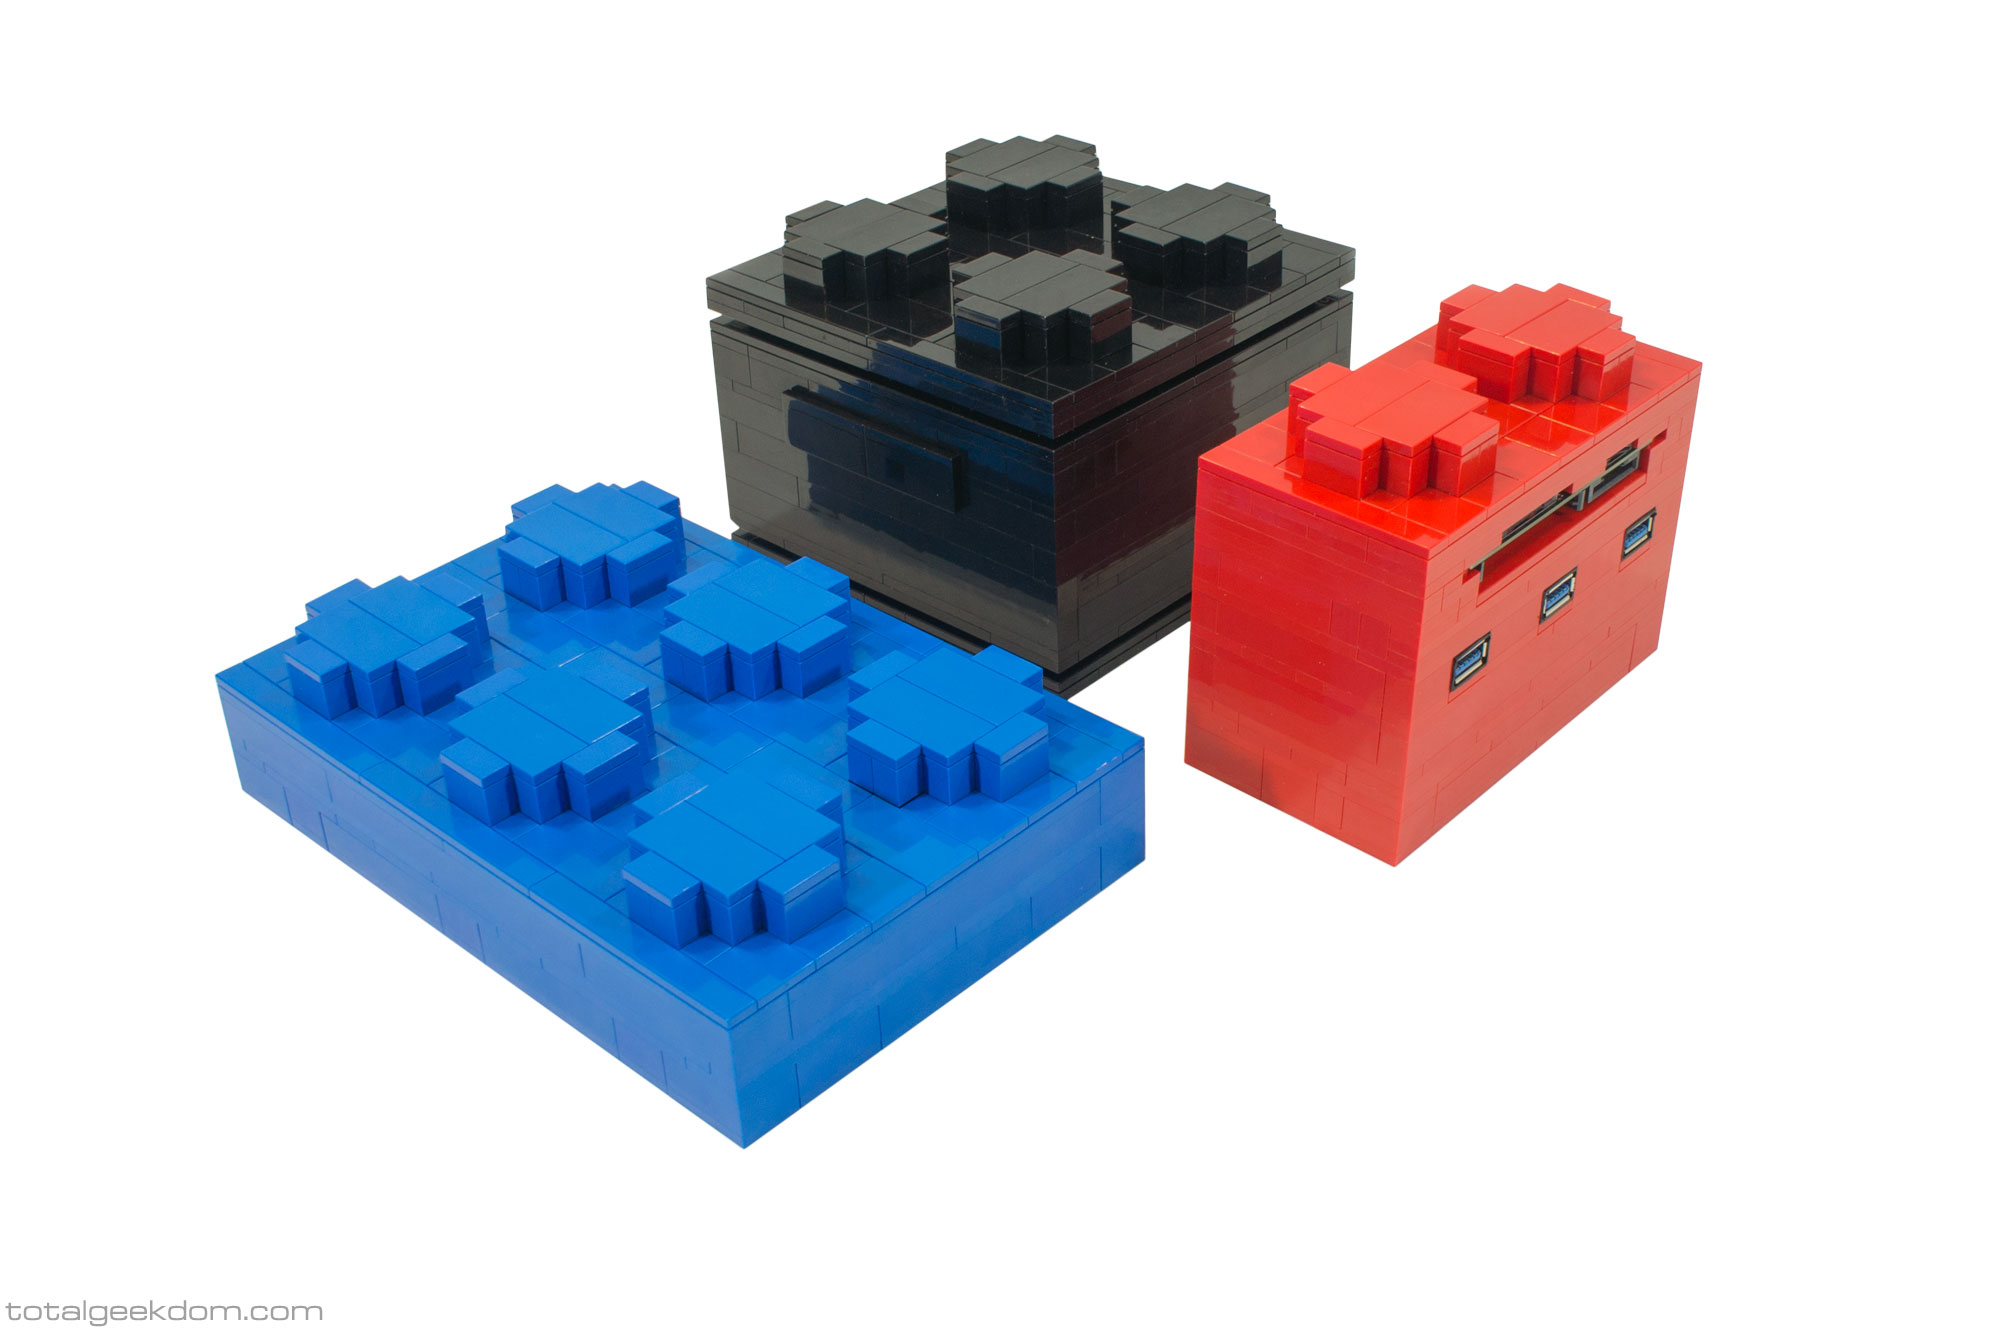
Once I had completed the add-on modules, I combined them with the Micro Lego Computer and was very pleased with the result. The Lego bricks all stacked together neatly into one complete system, offering affordable increases to performance and expandability, looked fun and unique, and it was also the ideal way to produce a well-rounded computer system.
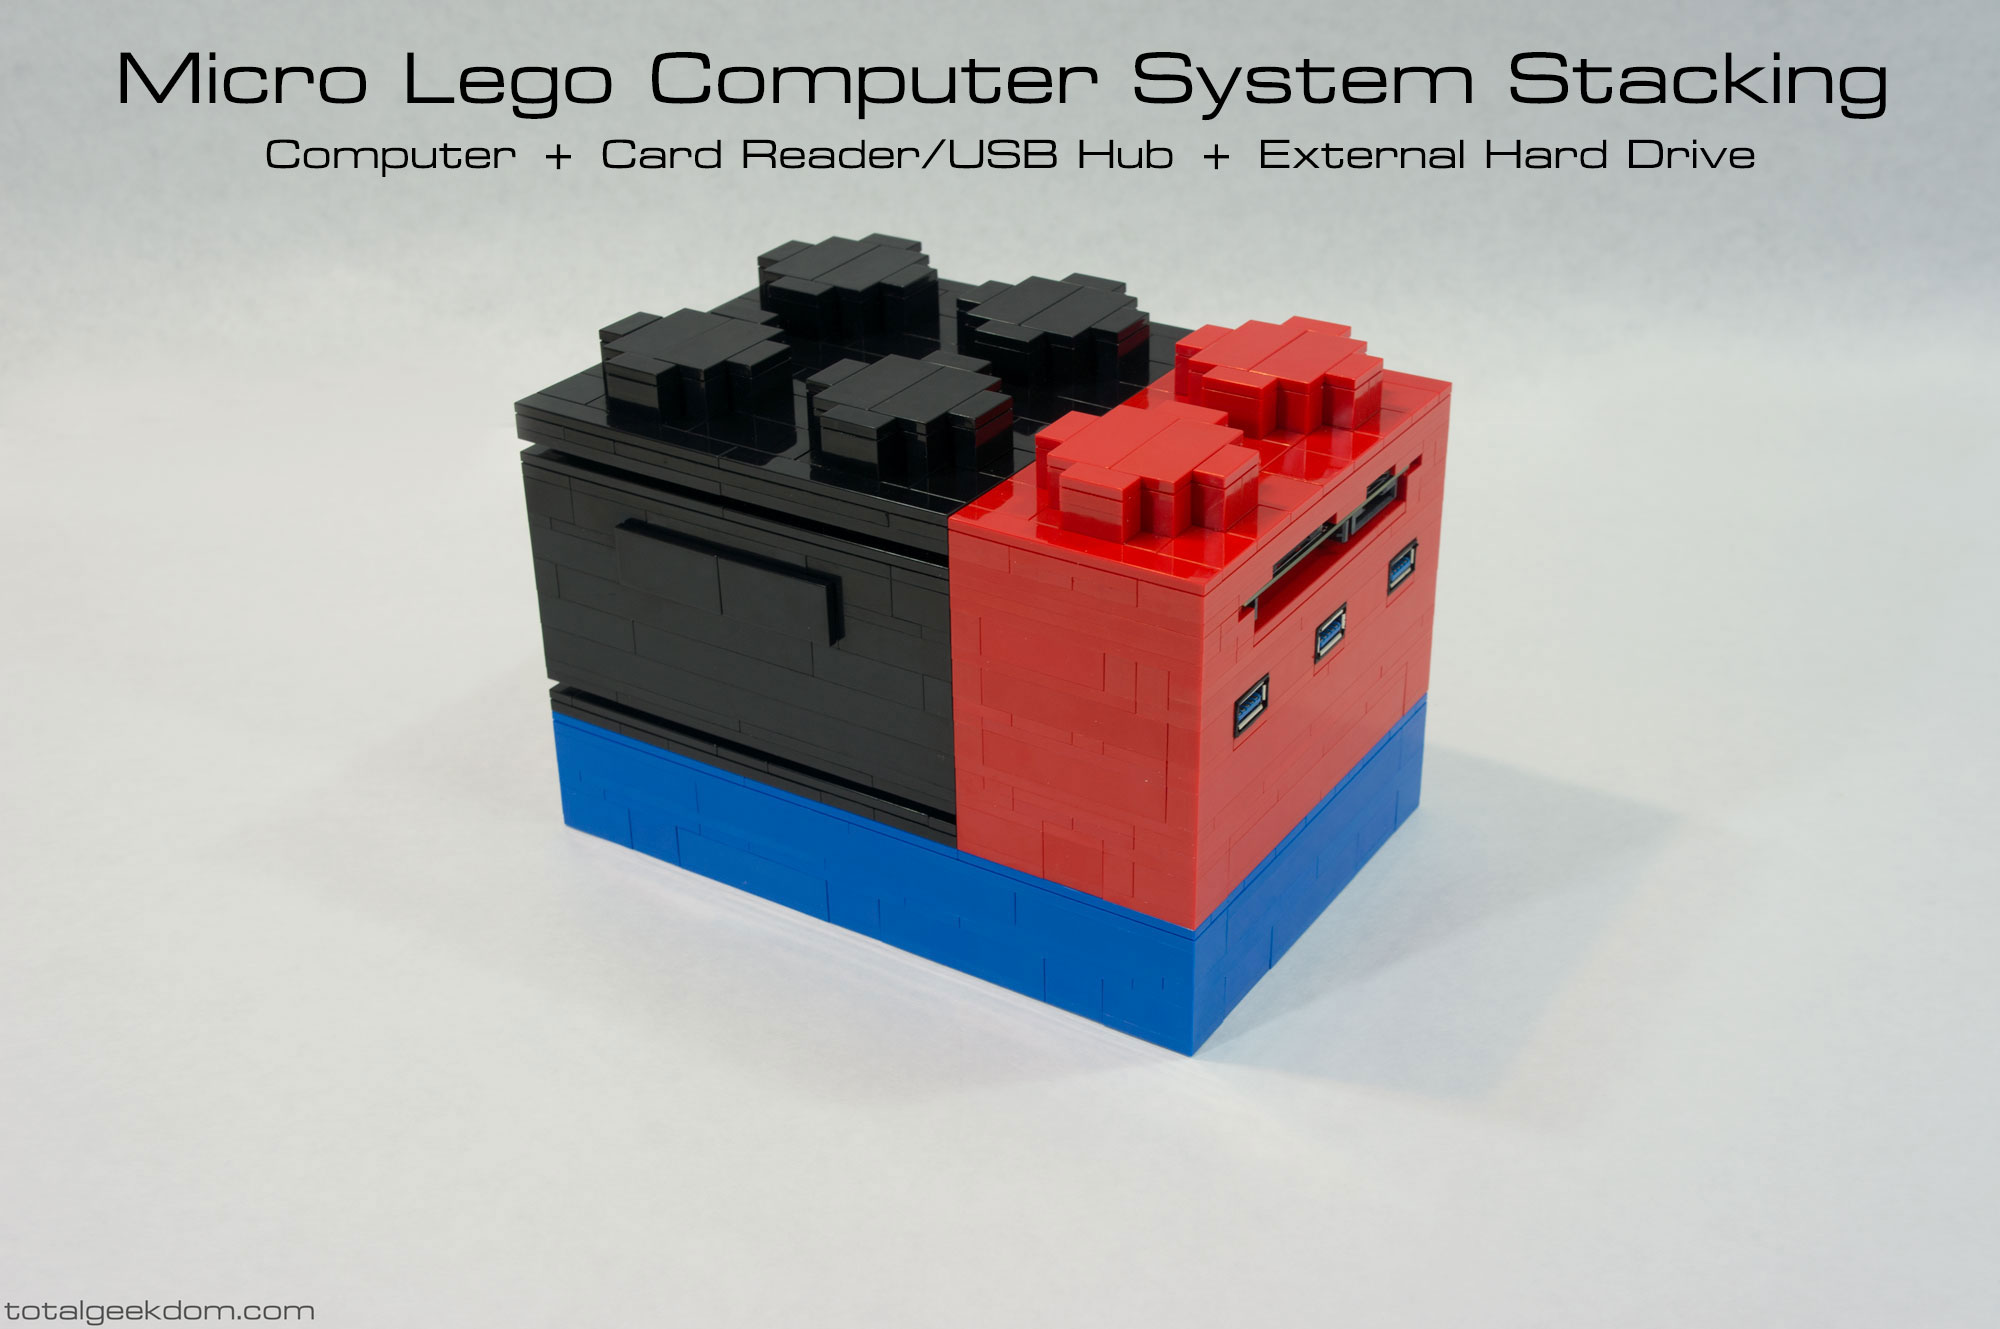
Micro Lego Computer System Stacking
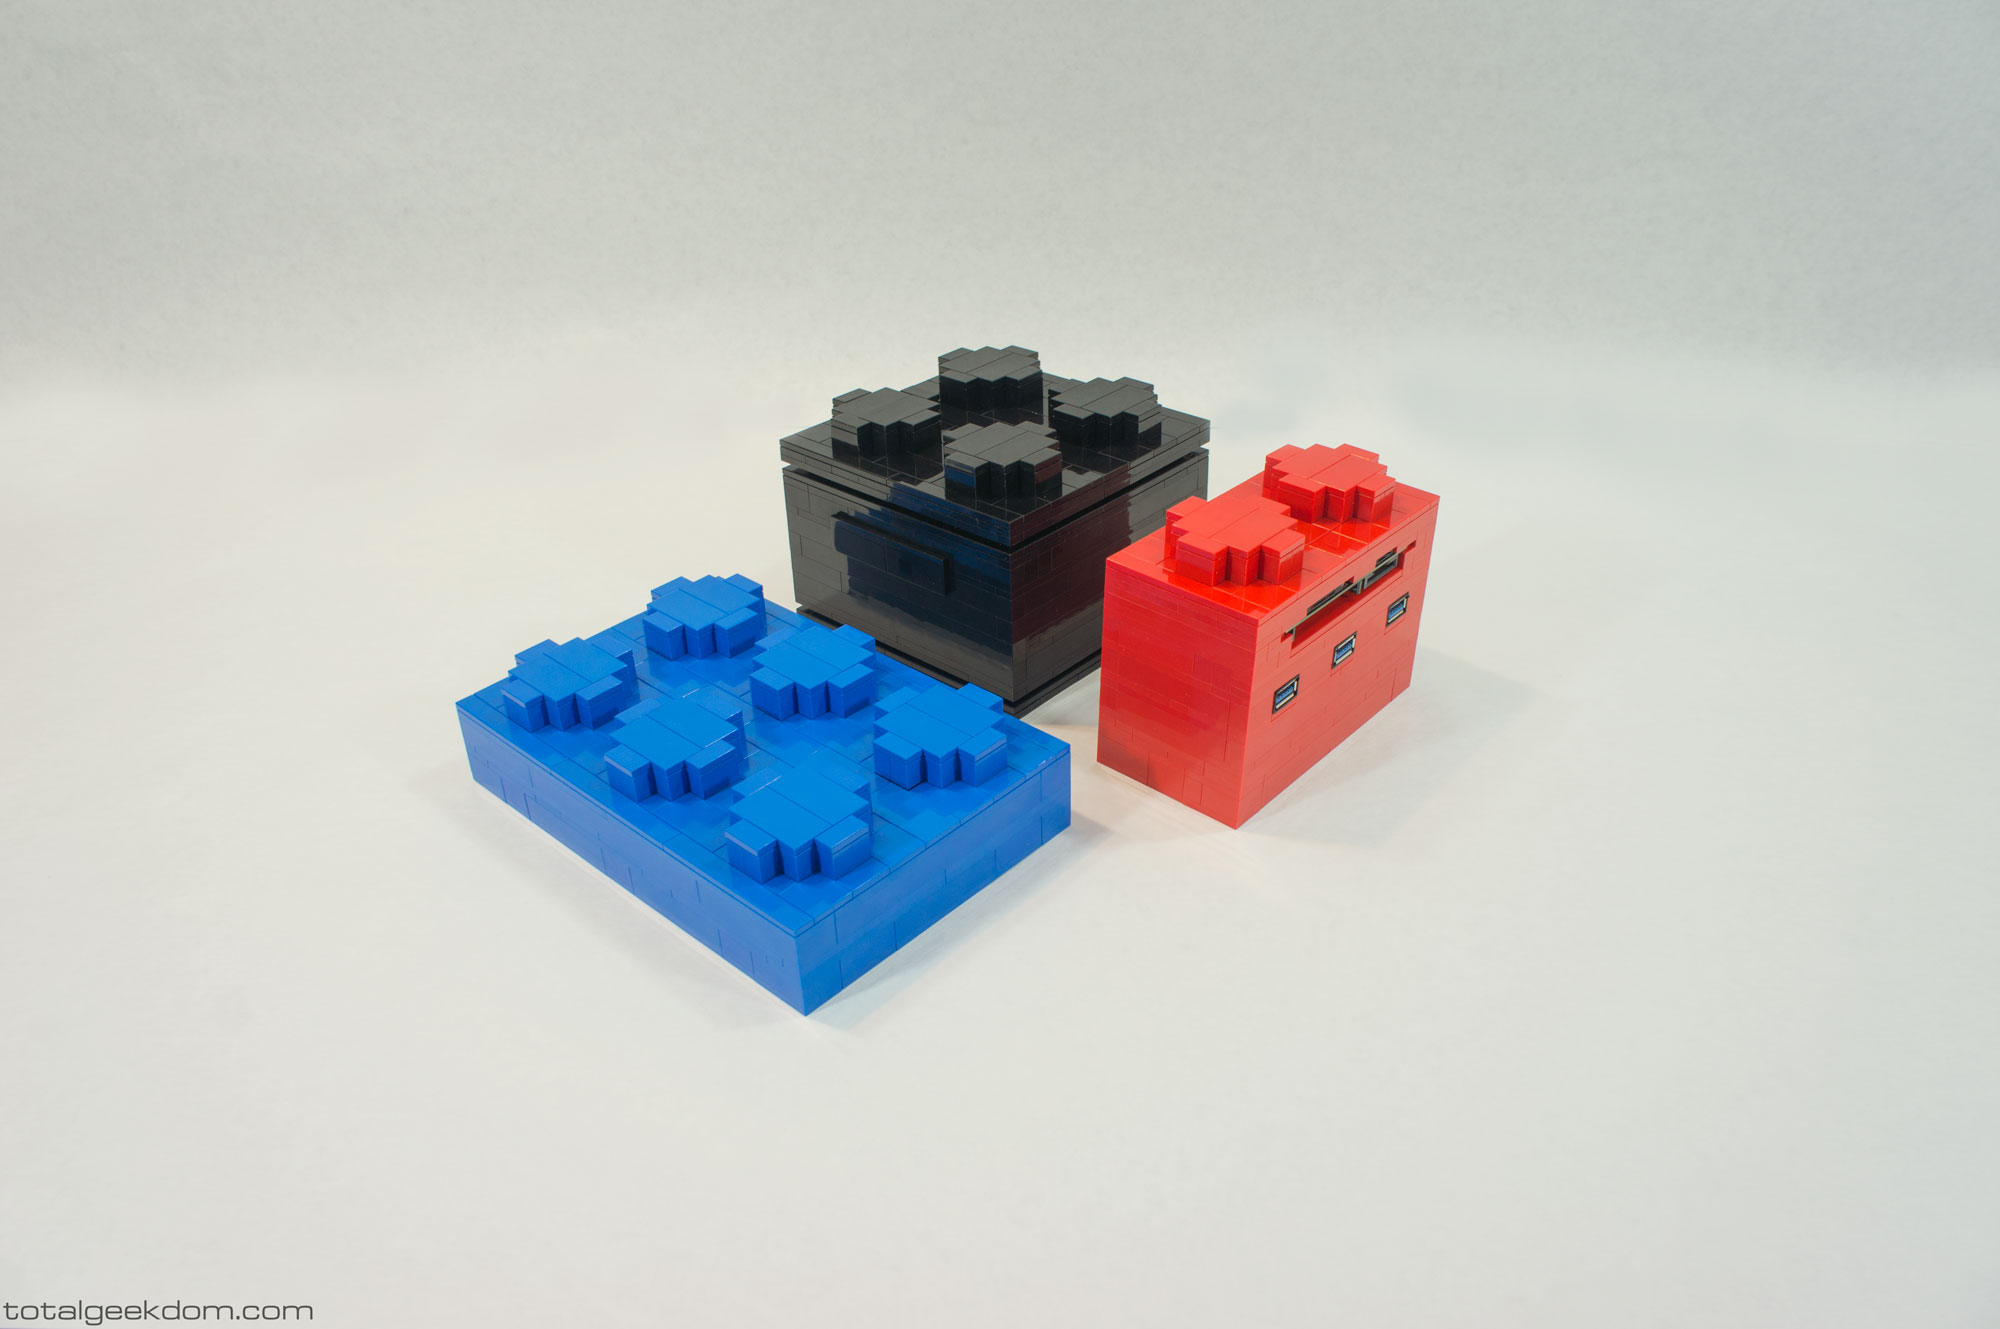
Micro Lego Computer System Bricks
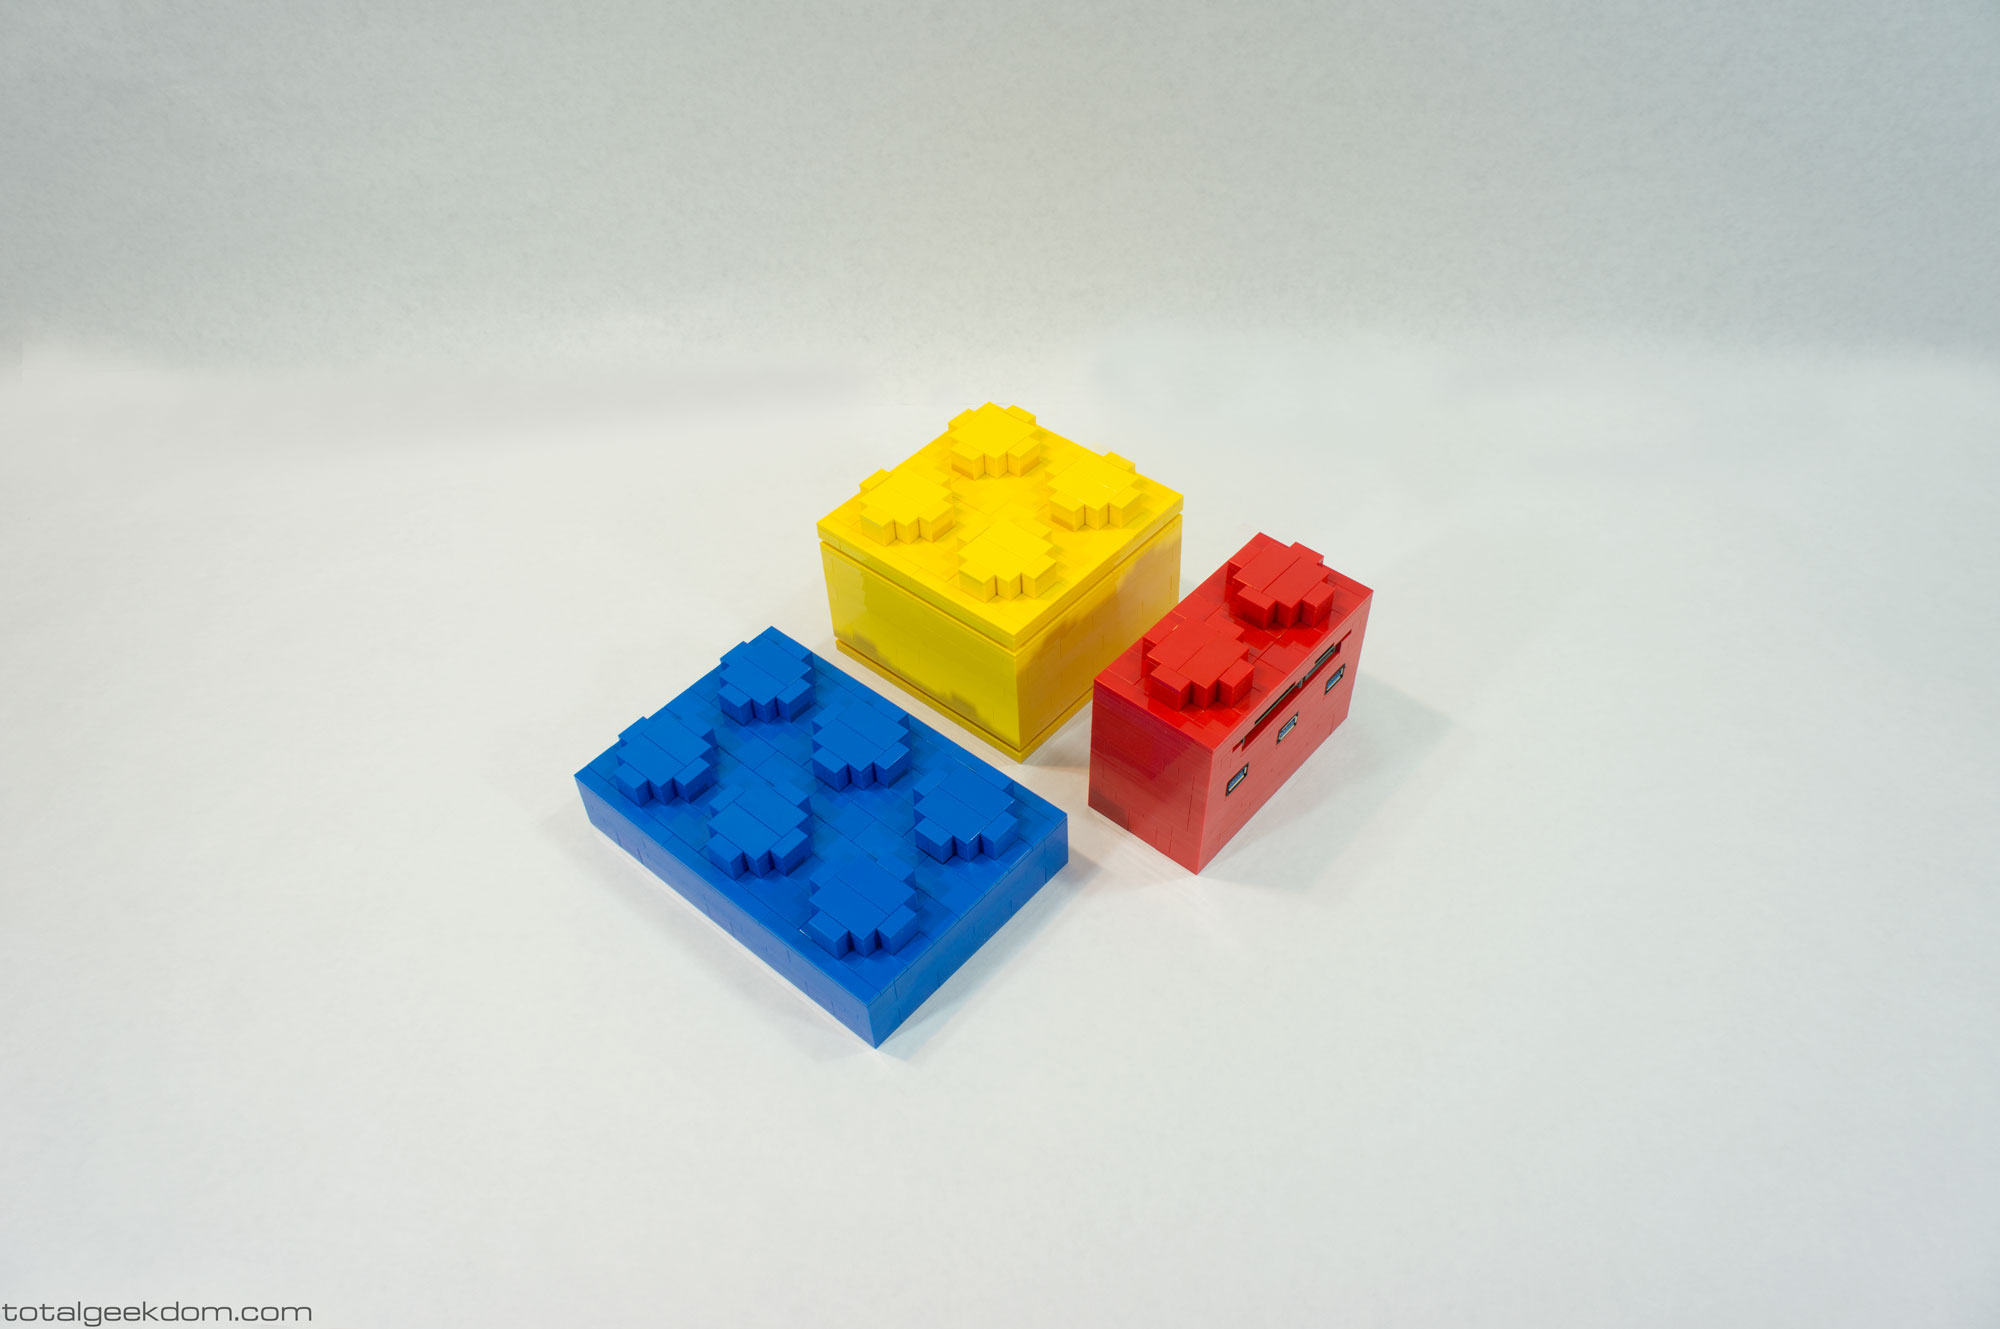
Micro Lego Computer System Bricks Variation
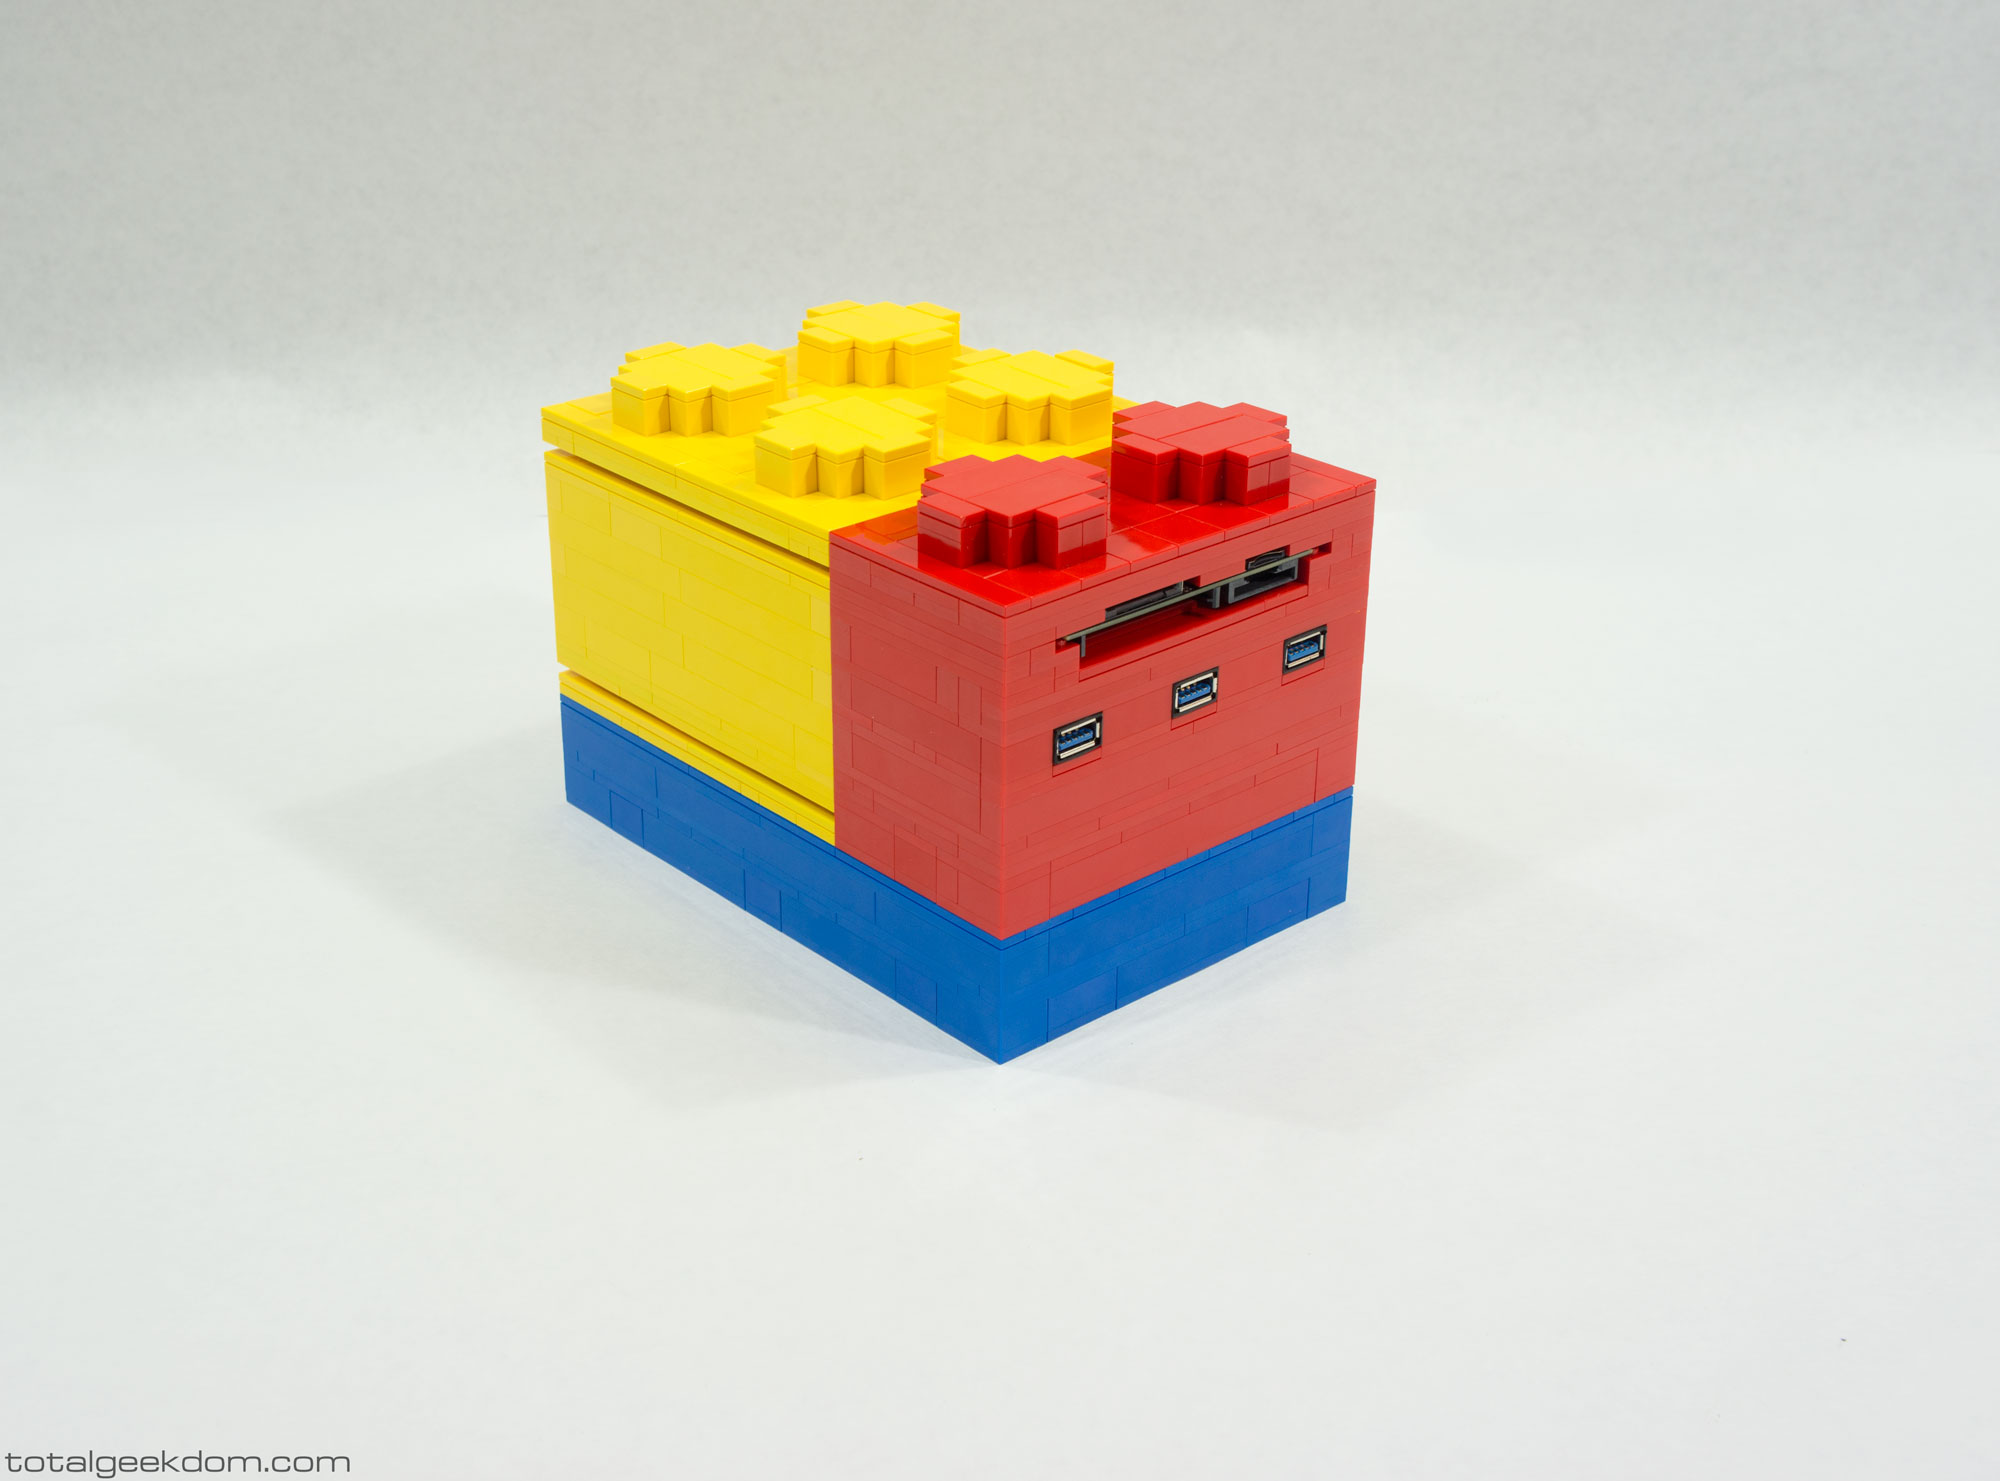
Micro Lego Computer System Stacking Variation
Micro Lego Computer Hard Drive on Top

Micro Lego Computer Bricks
For more information, pricing, and options, visit the Micro Lego Computer page.
Lego Computer Updates
If you're interested in following along with new updates, pics, designs, models, and info related to the Lego Computer, then click the button below to check out the Total Geekdom Facebook page. There you can Like and follow Total Geekdom to see updates on the Lego Computer.
Total Geekdom