If you interested in a full scale, functional, 2U rack server built entirely of 2000+ Lego than read on for more details and pictures!

Back in 2017 Silicon Mechanics reached out to me about creating a full size 2U rack server for them to display in their booth at the 2017 SC show (SuperComputing Conference). After some back and forth discussion we settled in on one of their 2U models based around a dual processor, 12 bay, Supermicro chassis. The goal was to build the entire chassis out of Lego, while having all the appropriate mounts for the hardware so that if desired the system could be powered up.
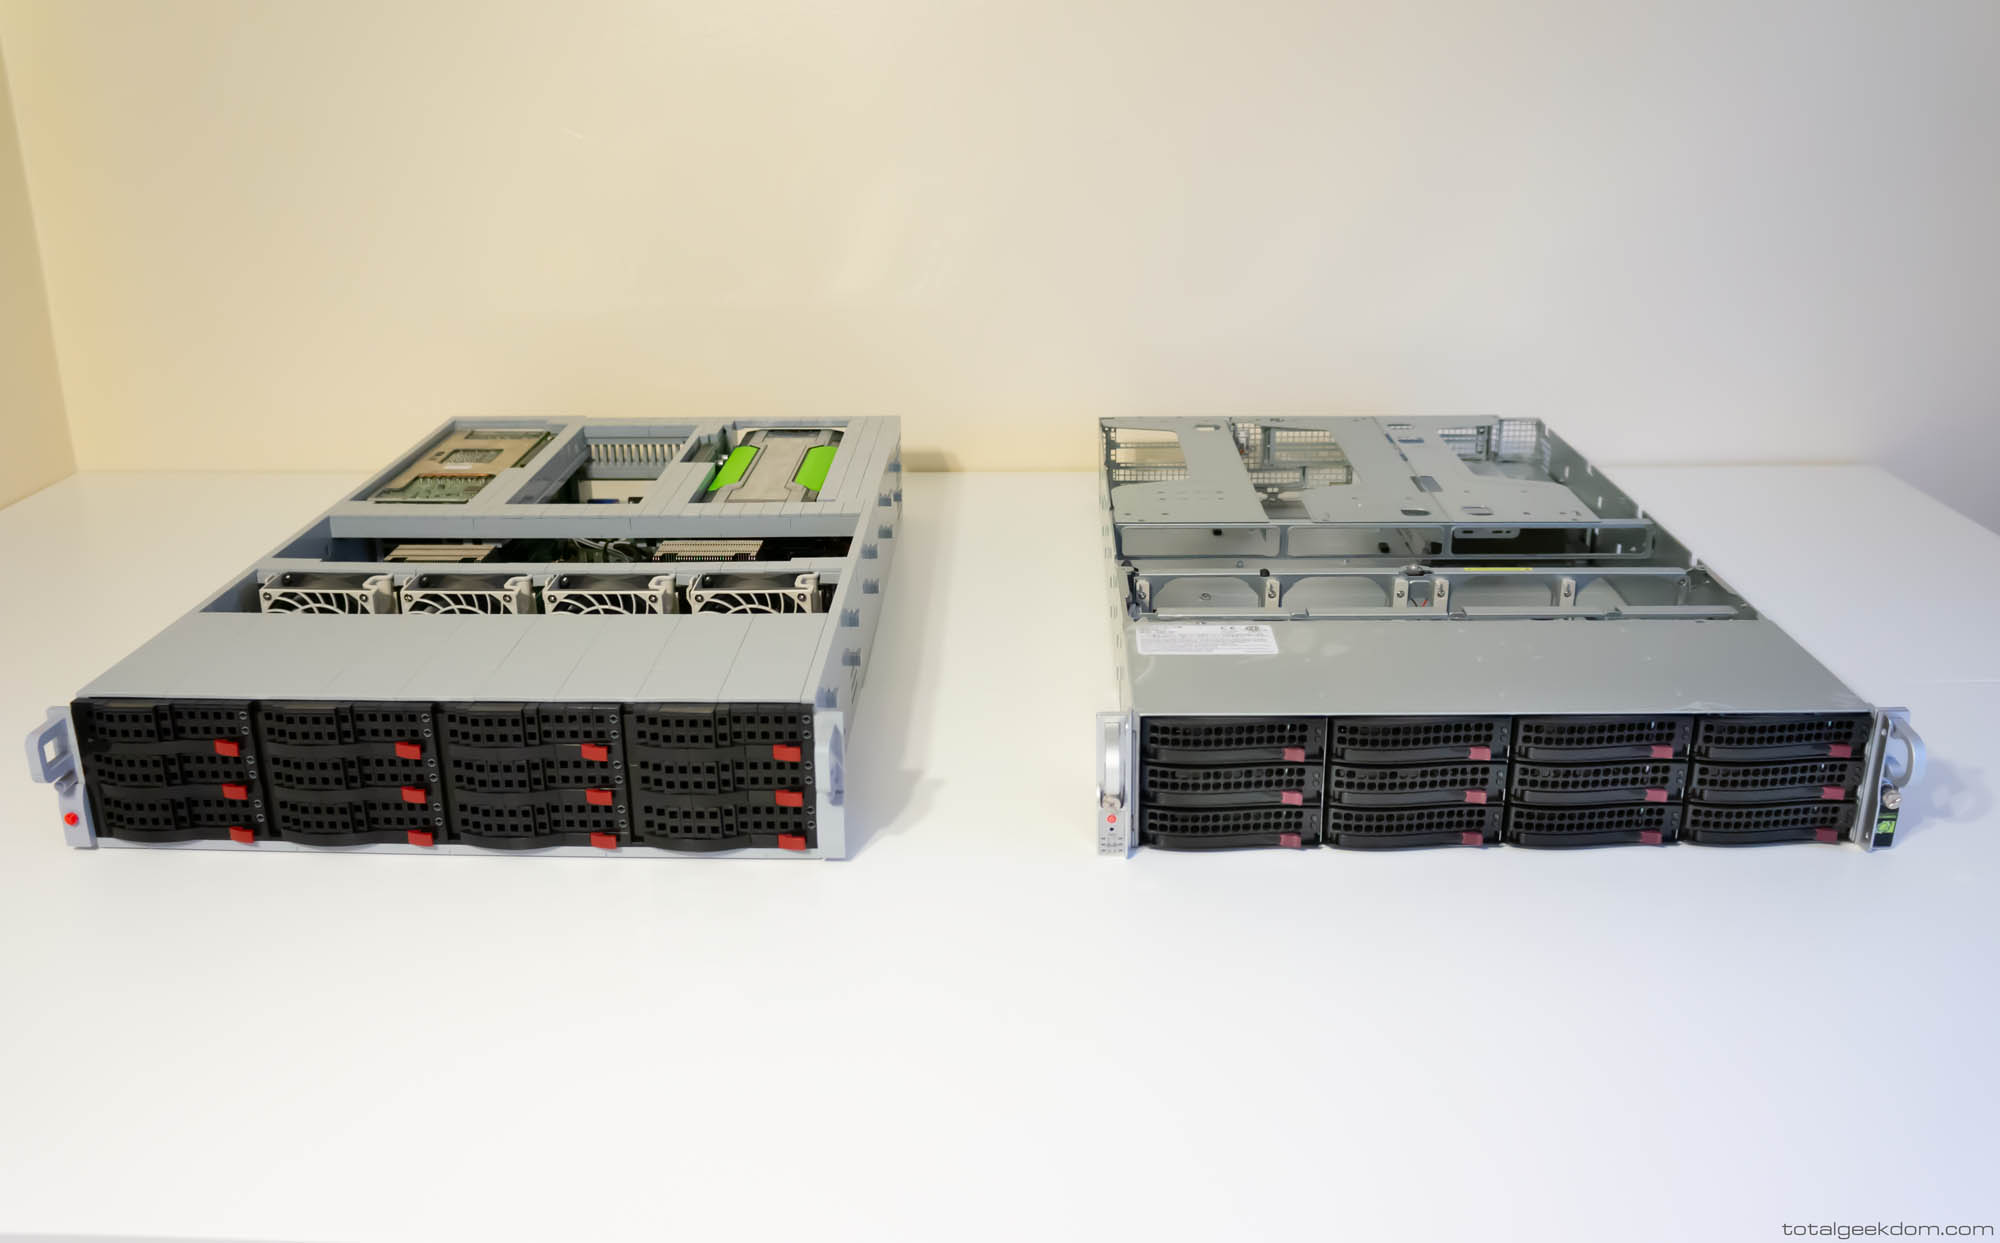
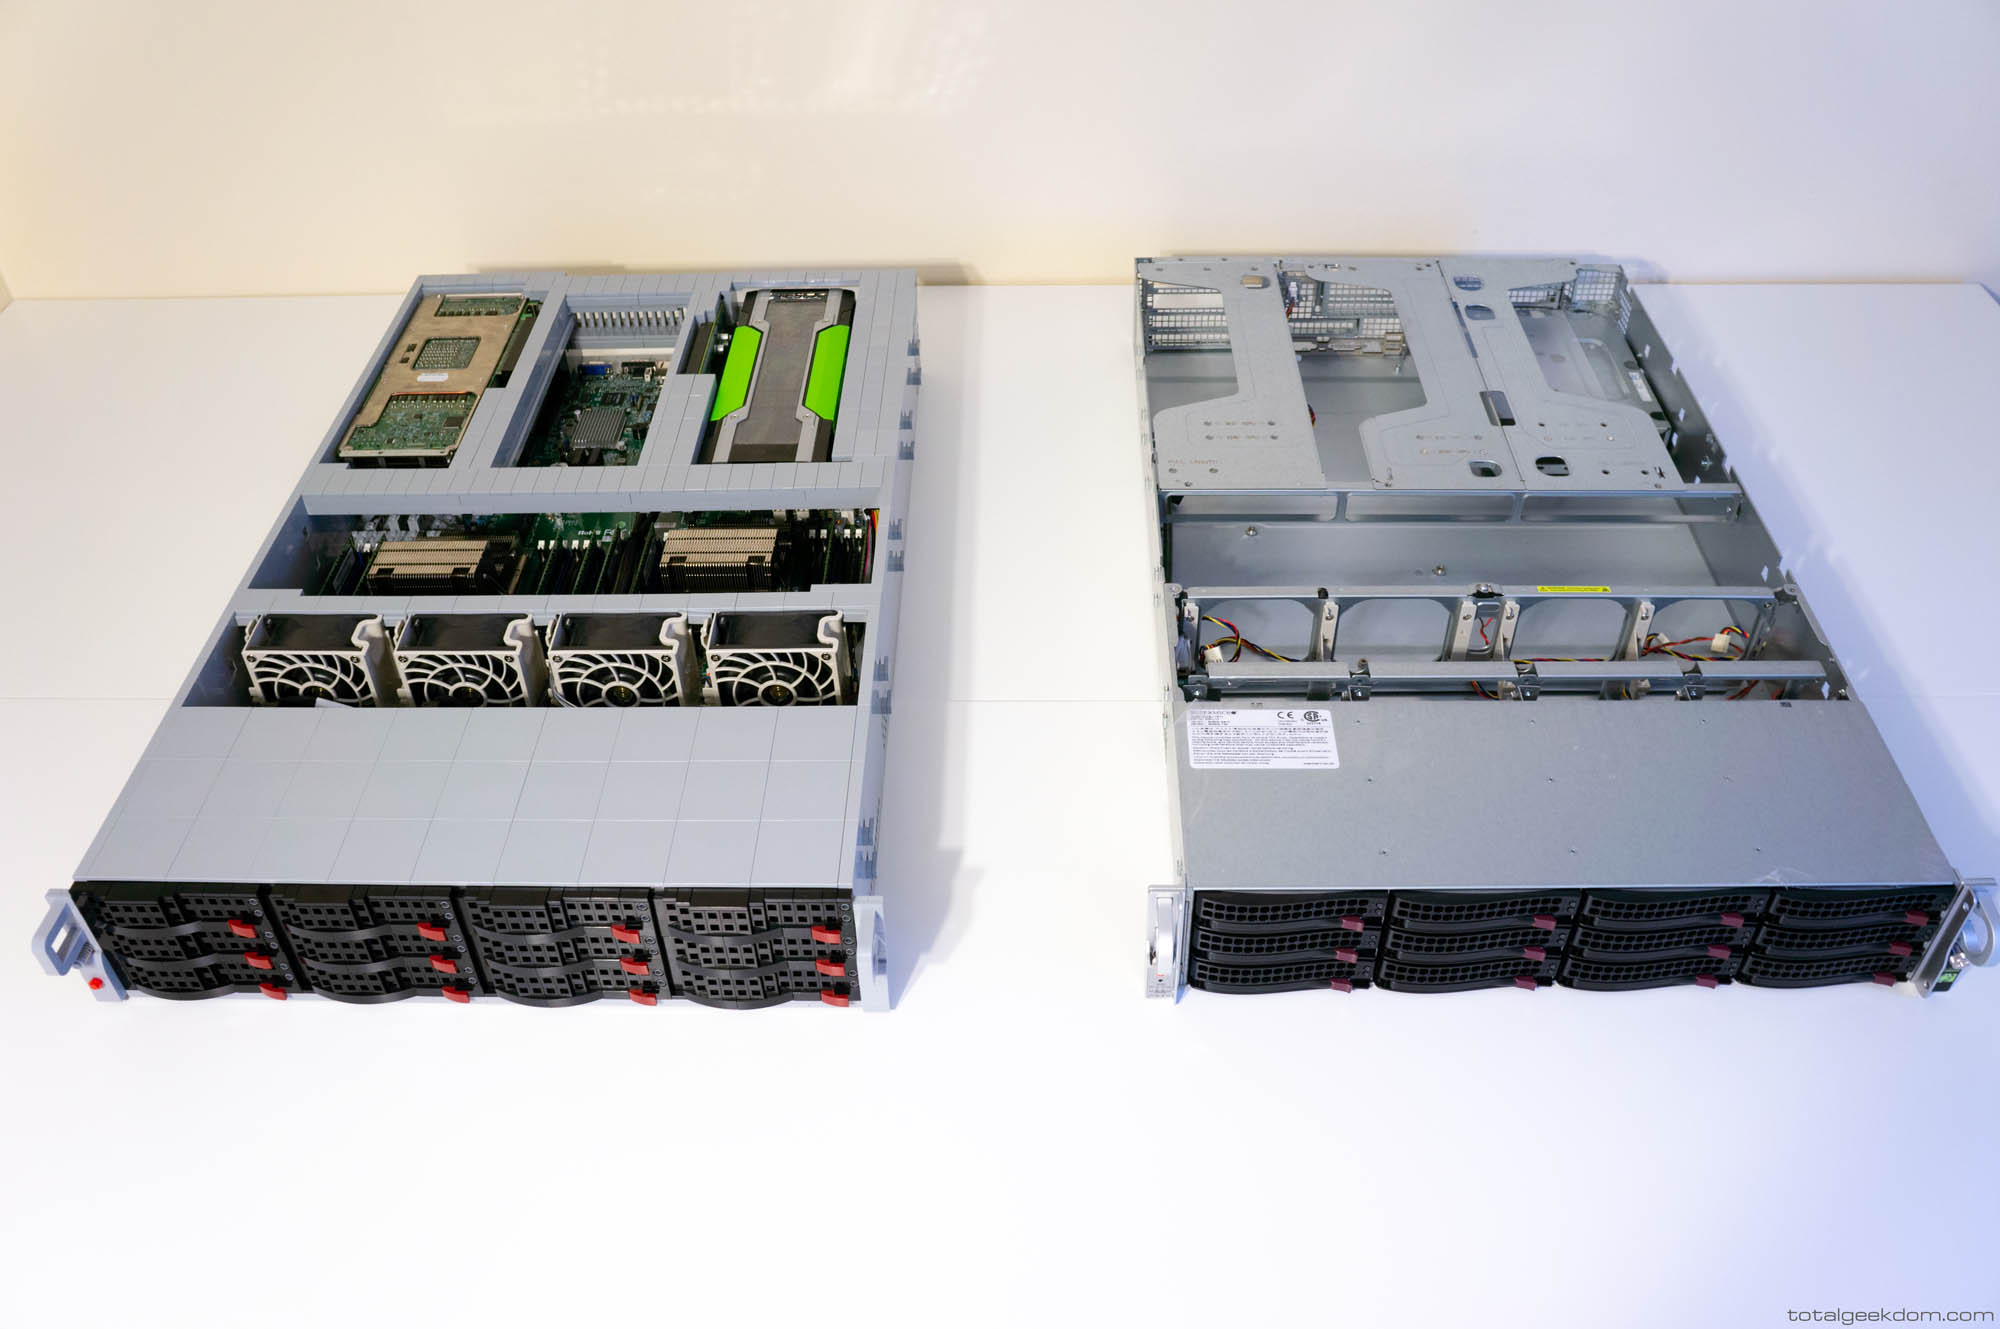
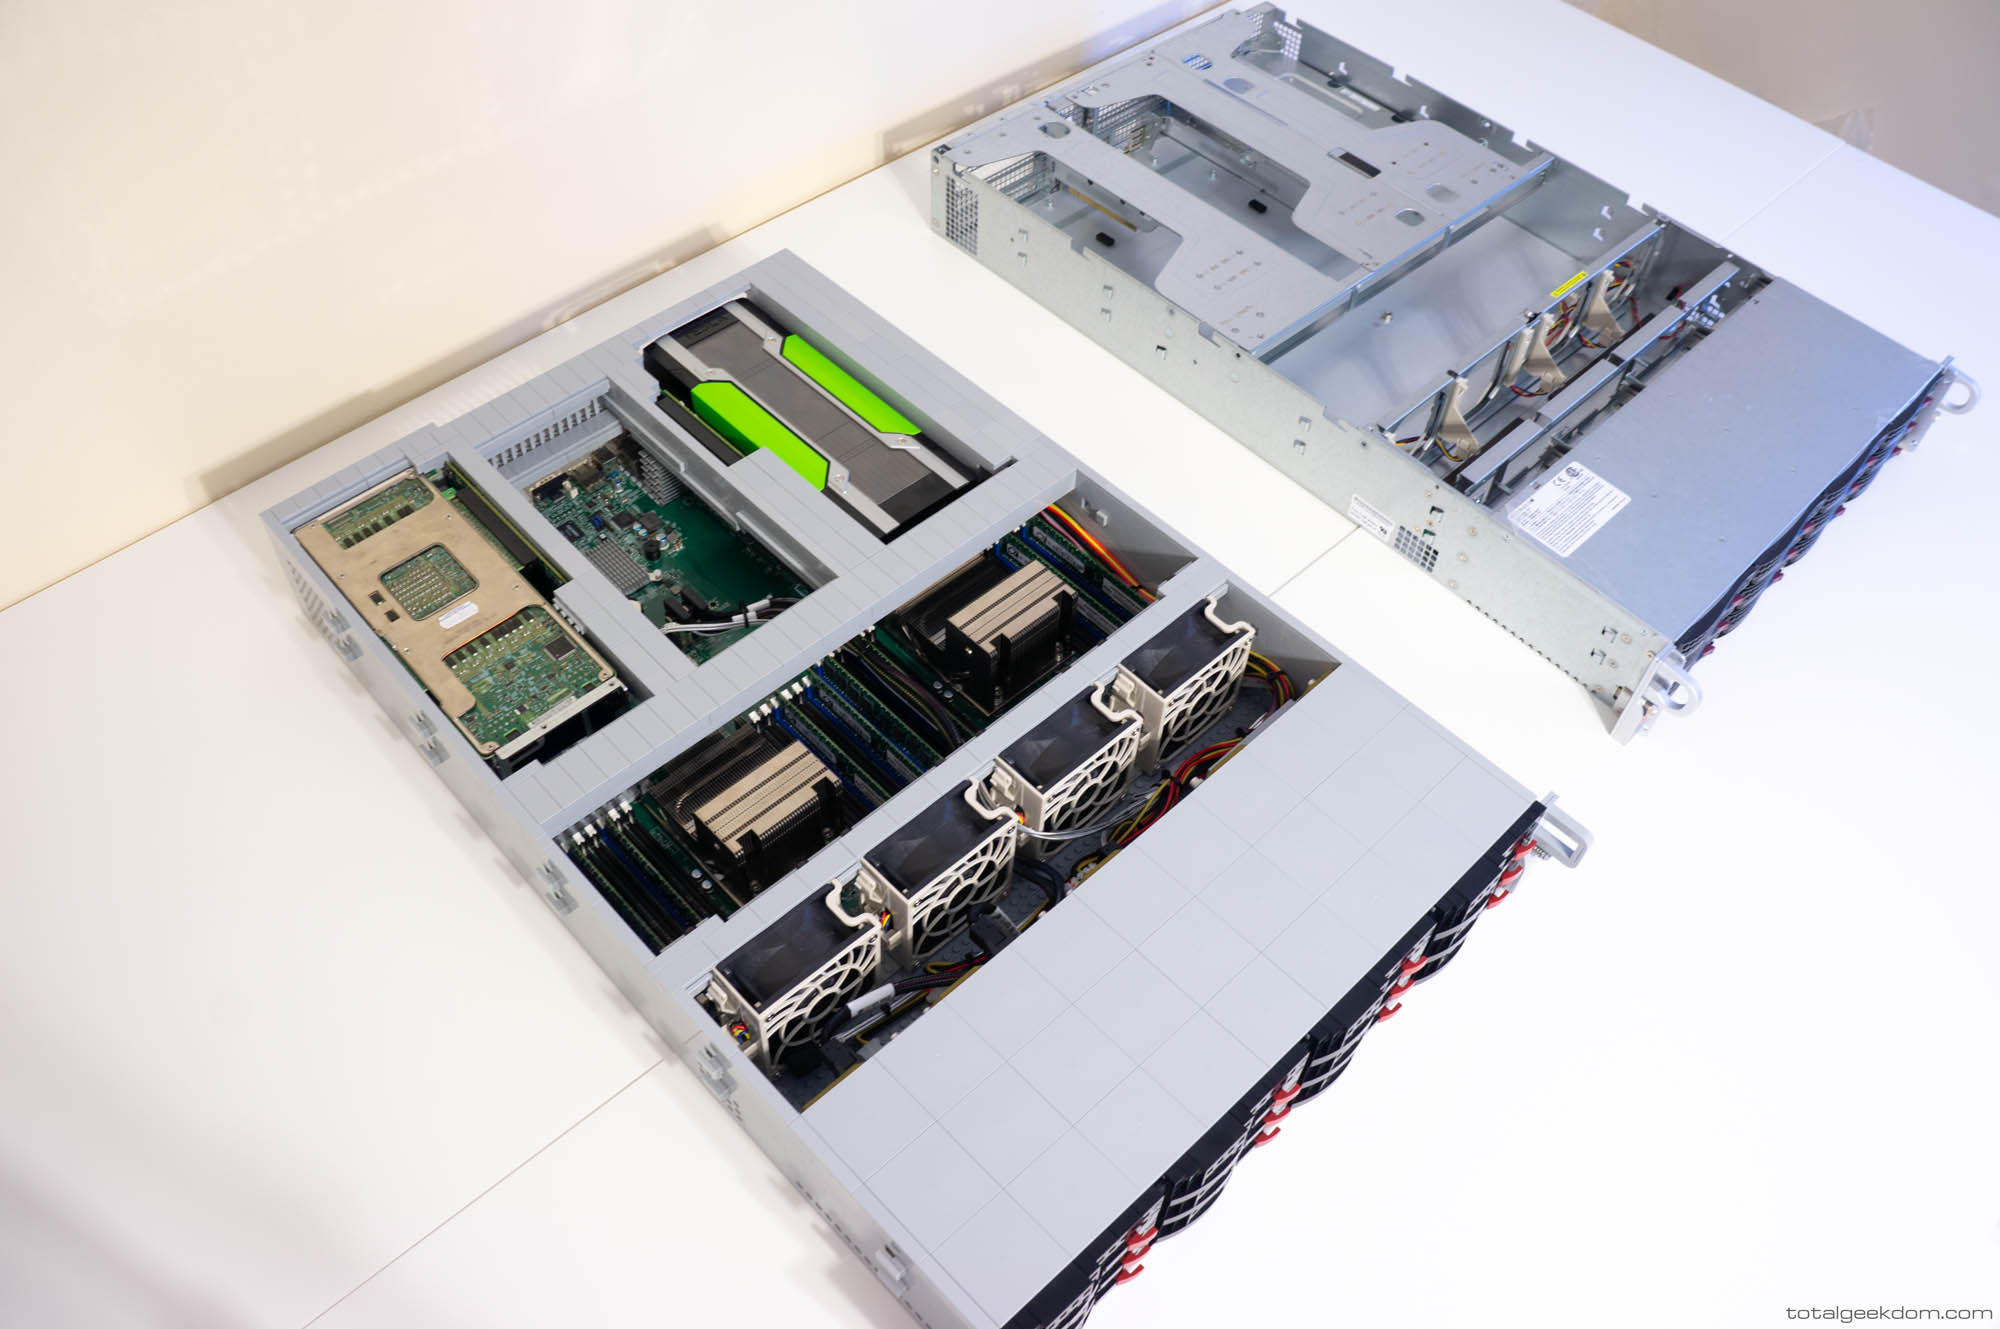
Silicon Mechanics sent me one of their U623 systems as the model. It would also serve as the donor for me to pull the hardware from for use in the Lego version. The main challenge I initially encountered was trying to design the structure of the case to be rigid enough to support all of the components and massive weight. As any kid who’s ever played with Lego can tell you, Lego doesn’t like being built in long thin spans, it tends to want to bow and flex under load and then fall apart. After messing around with the design and going trough a series of test models I found a structure that seemed to work best. The floor structure is made of plates, constructed in a very specific overlapping design to minimize flex and pull. One of the challenges of working with Lego in large spans, especially with plates, is that they tend to bow and flex as you add more layers and a larger spread. With the case being a foot and half wide and over 2 feet deep that meant that it was hard to find a plate layout that managed to support the weight, while also maintaining exacting geometry. The floor structure is closely tied into the wall/frame structure. I used a combination of standard Lego and Technic pieces to build much of the framework for the case. This allowed building the case structure with just the right amount of tension built in to hold the weight, minimize flex, and support and house all of the components.
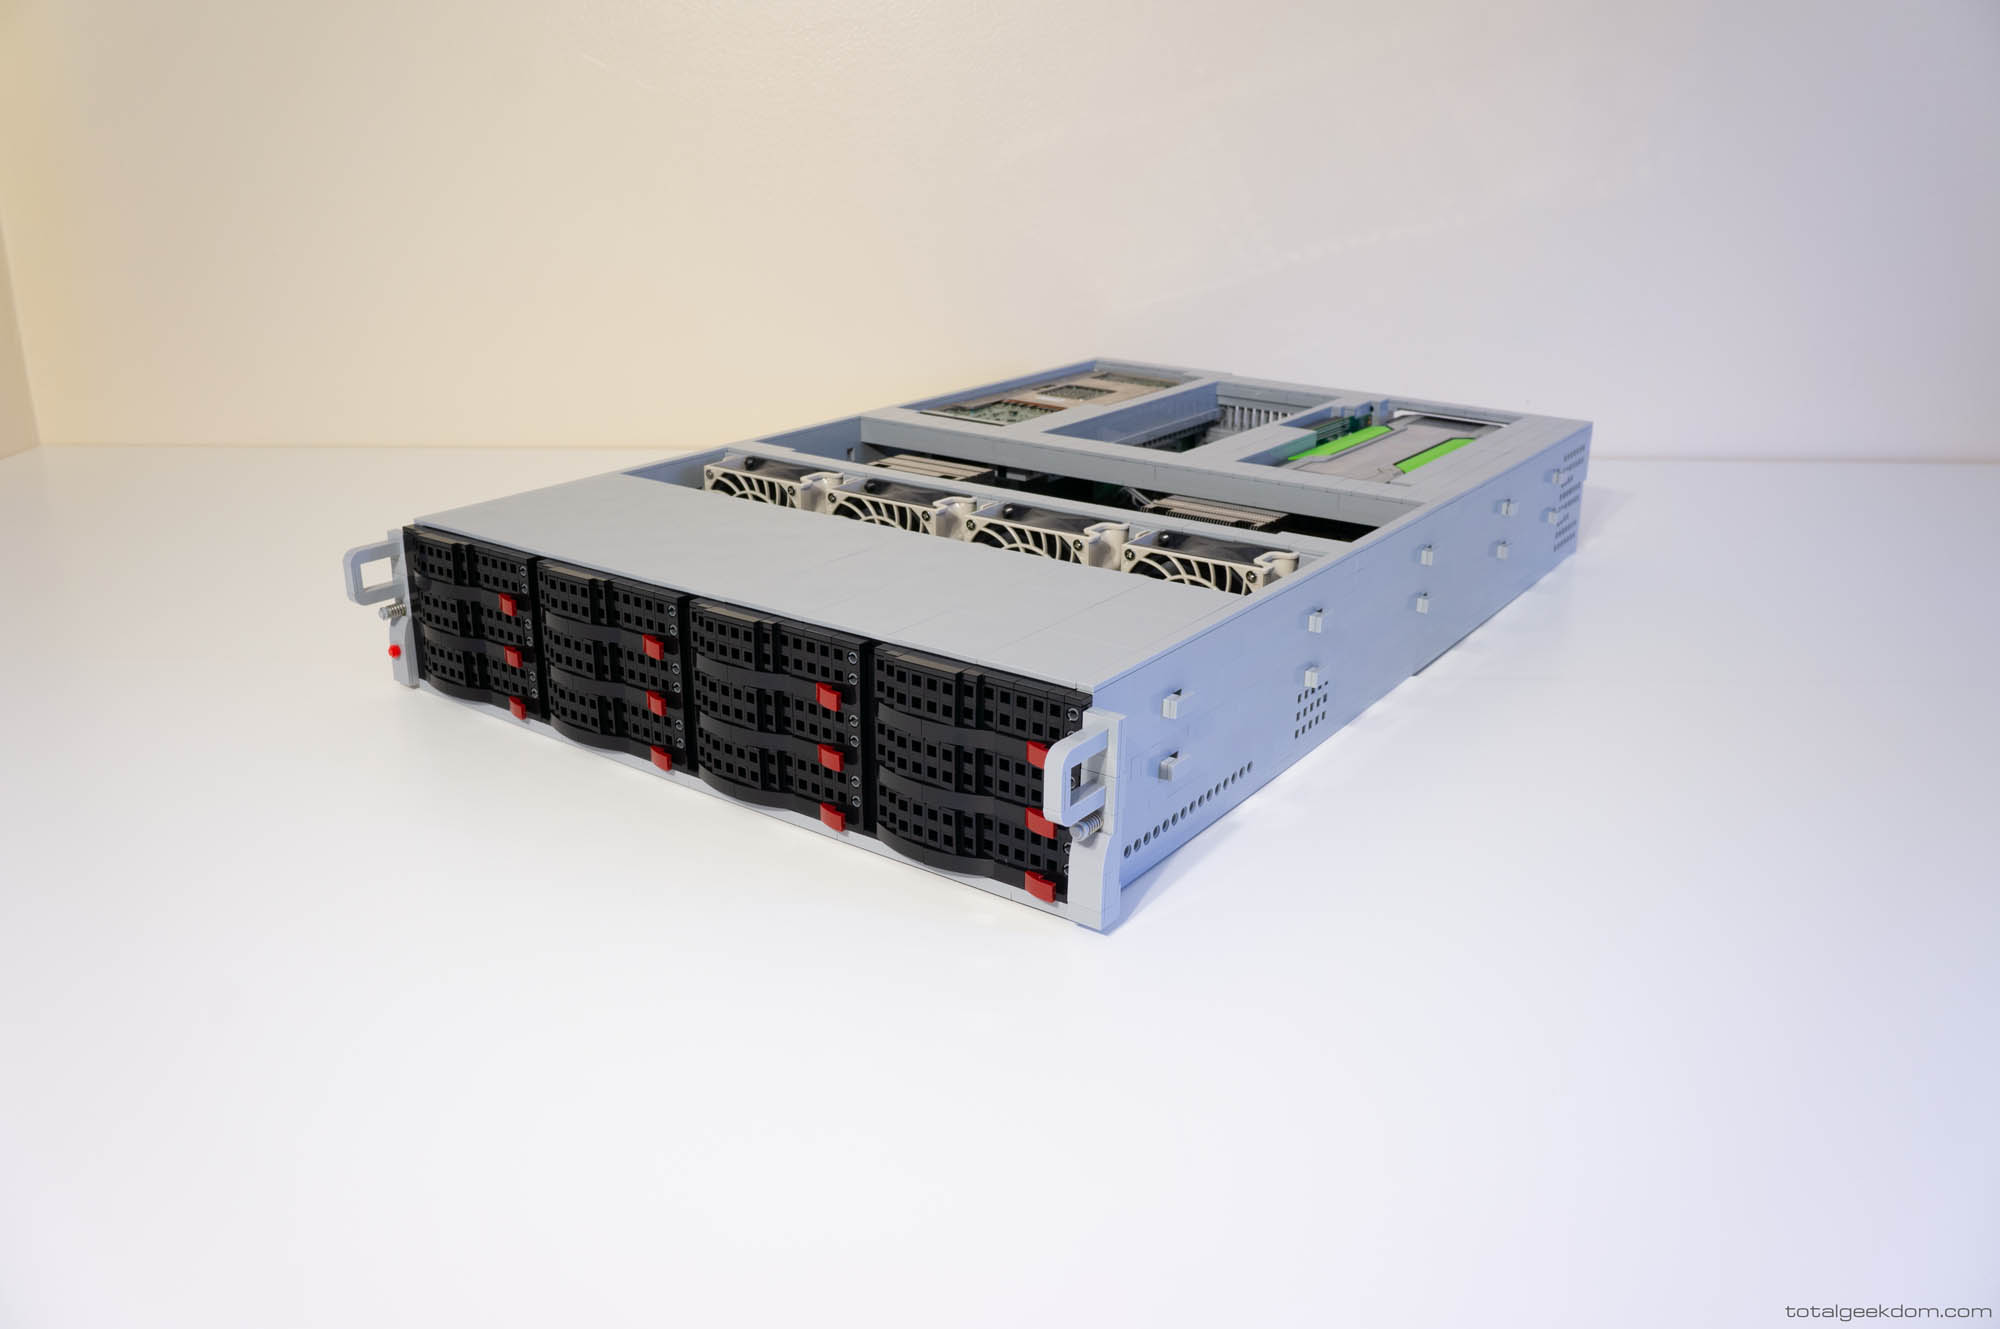
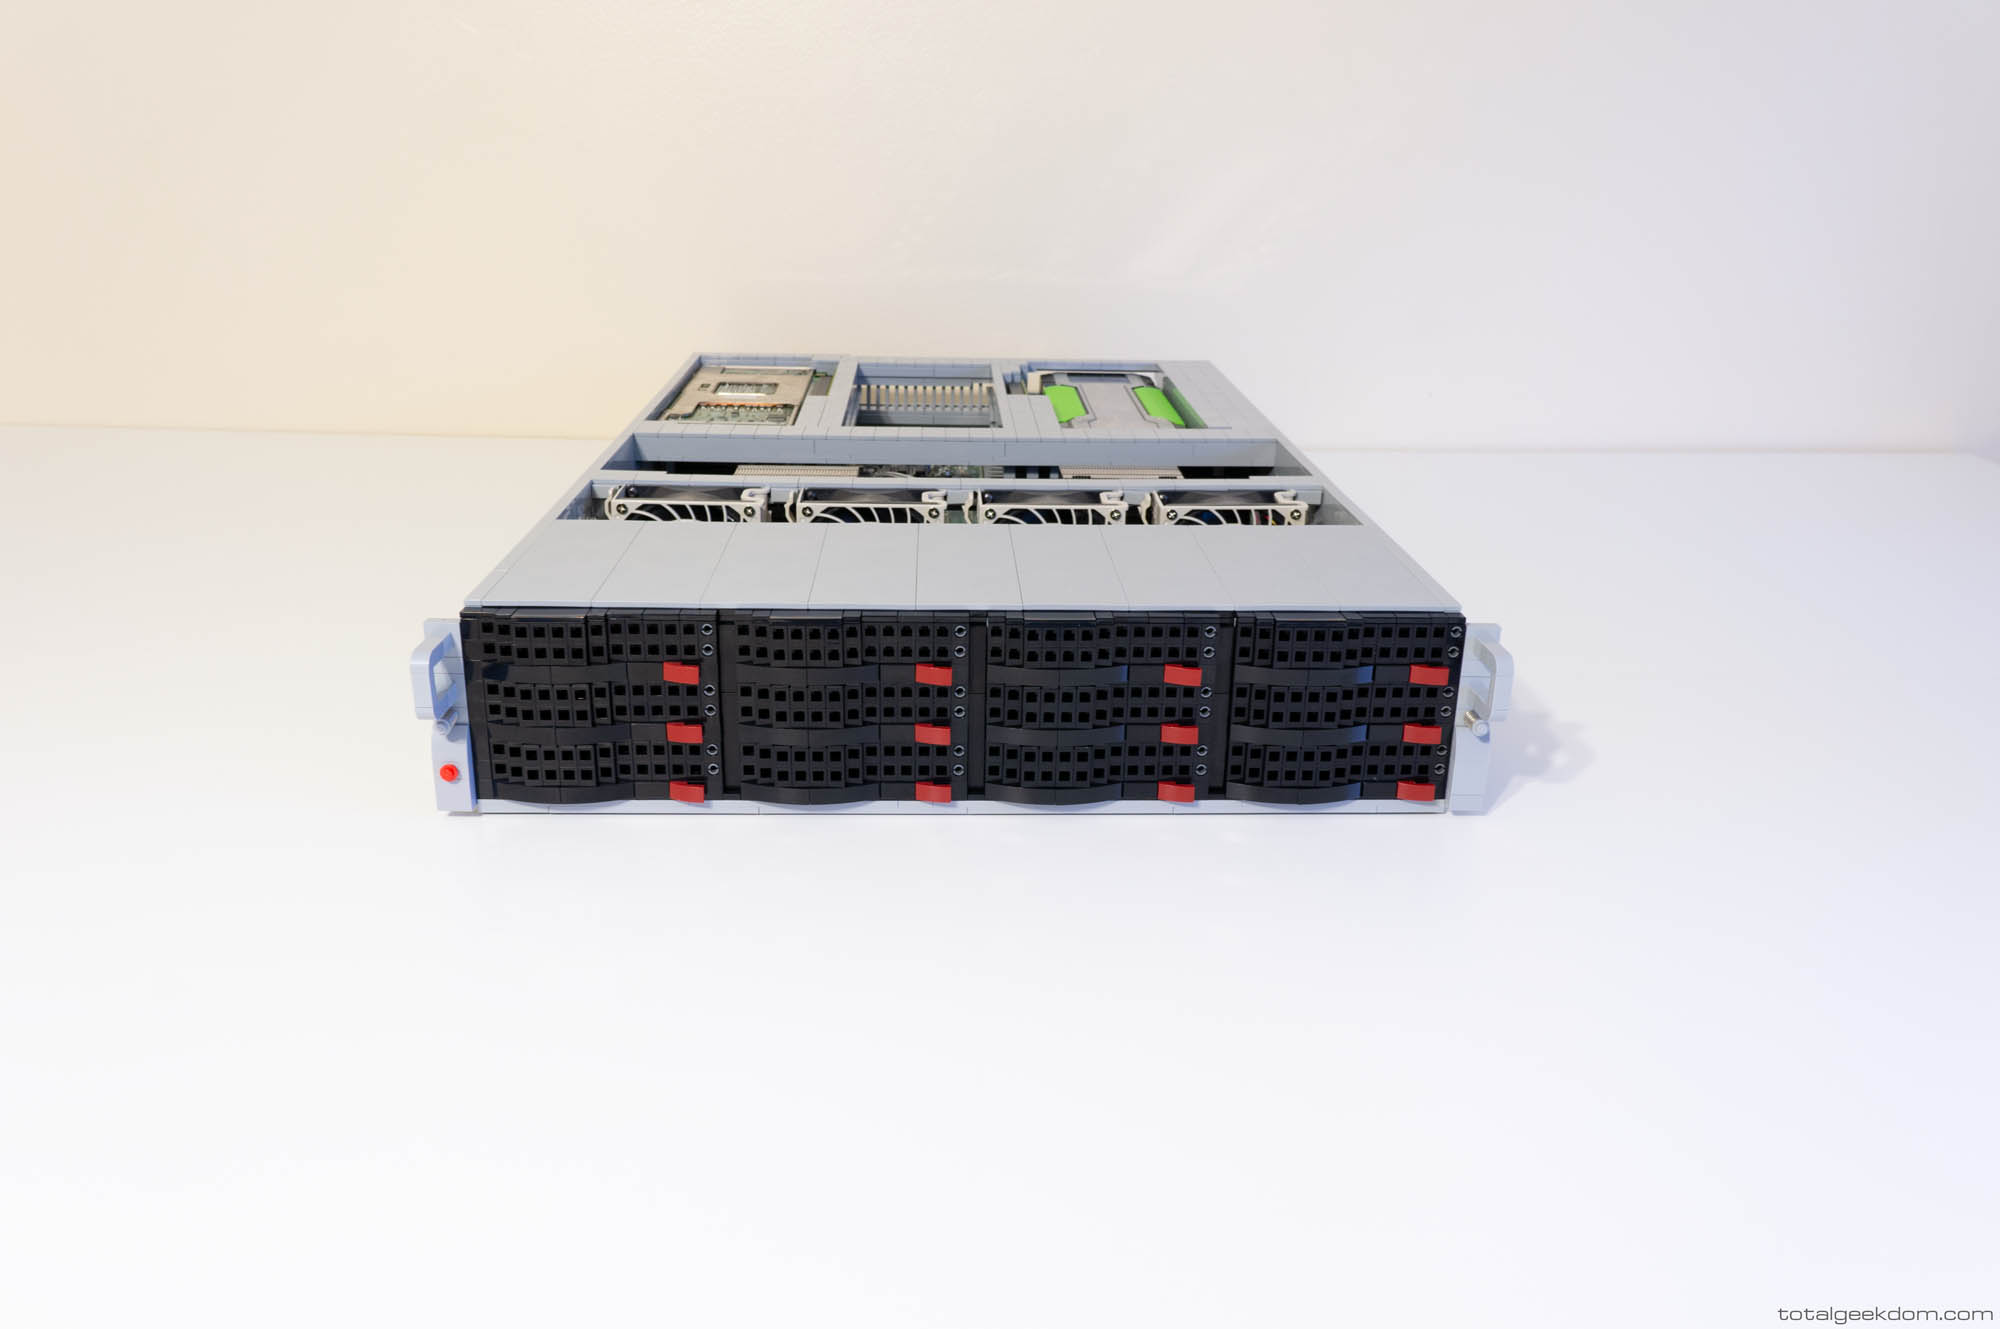
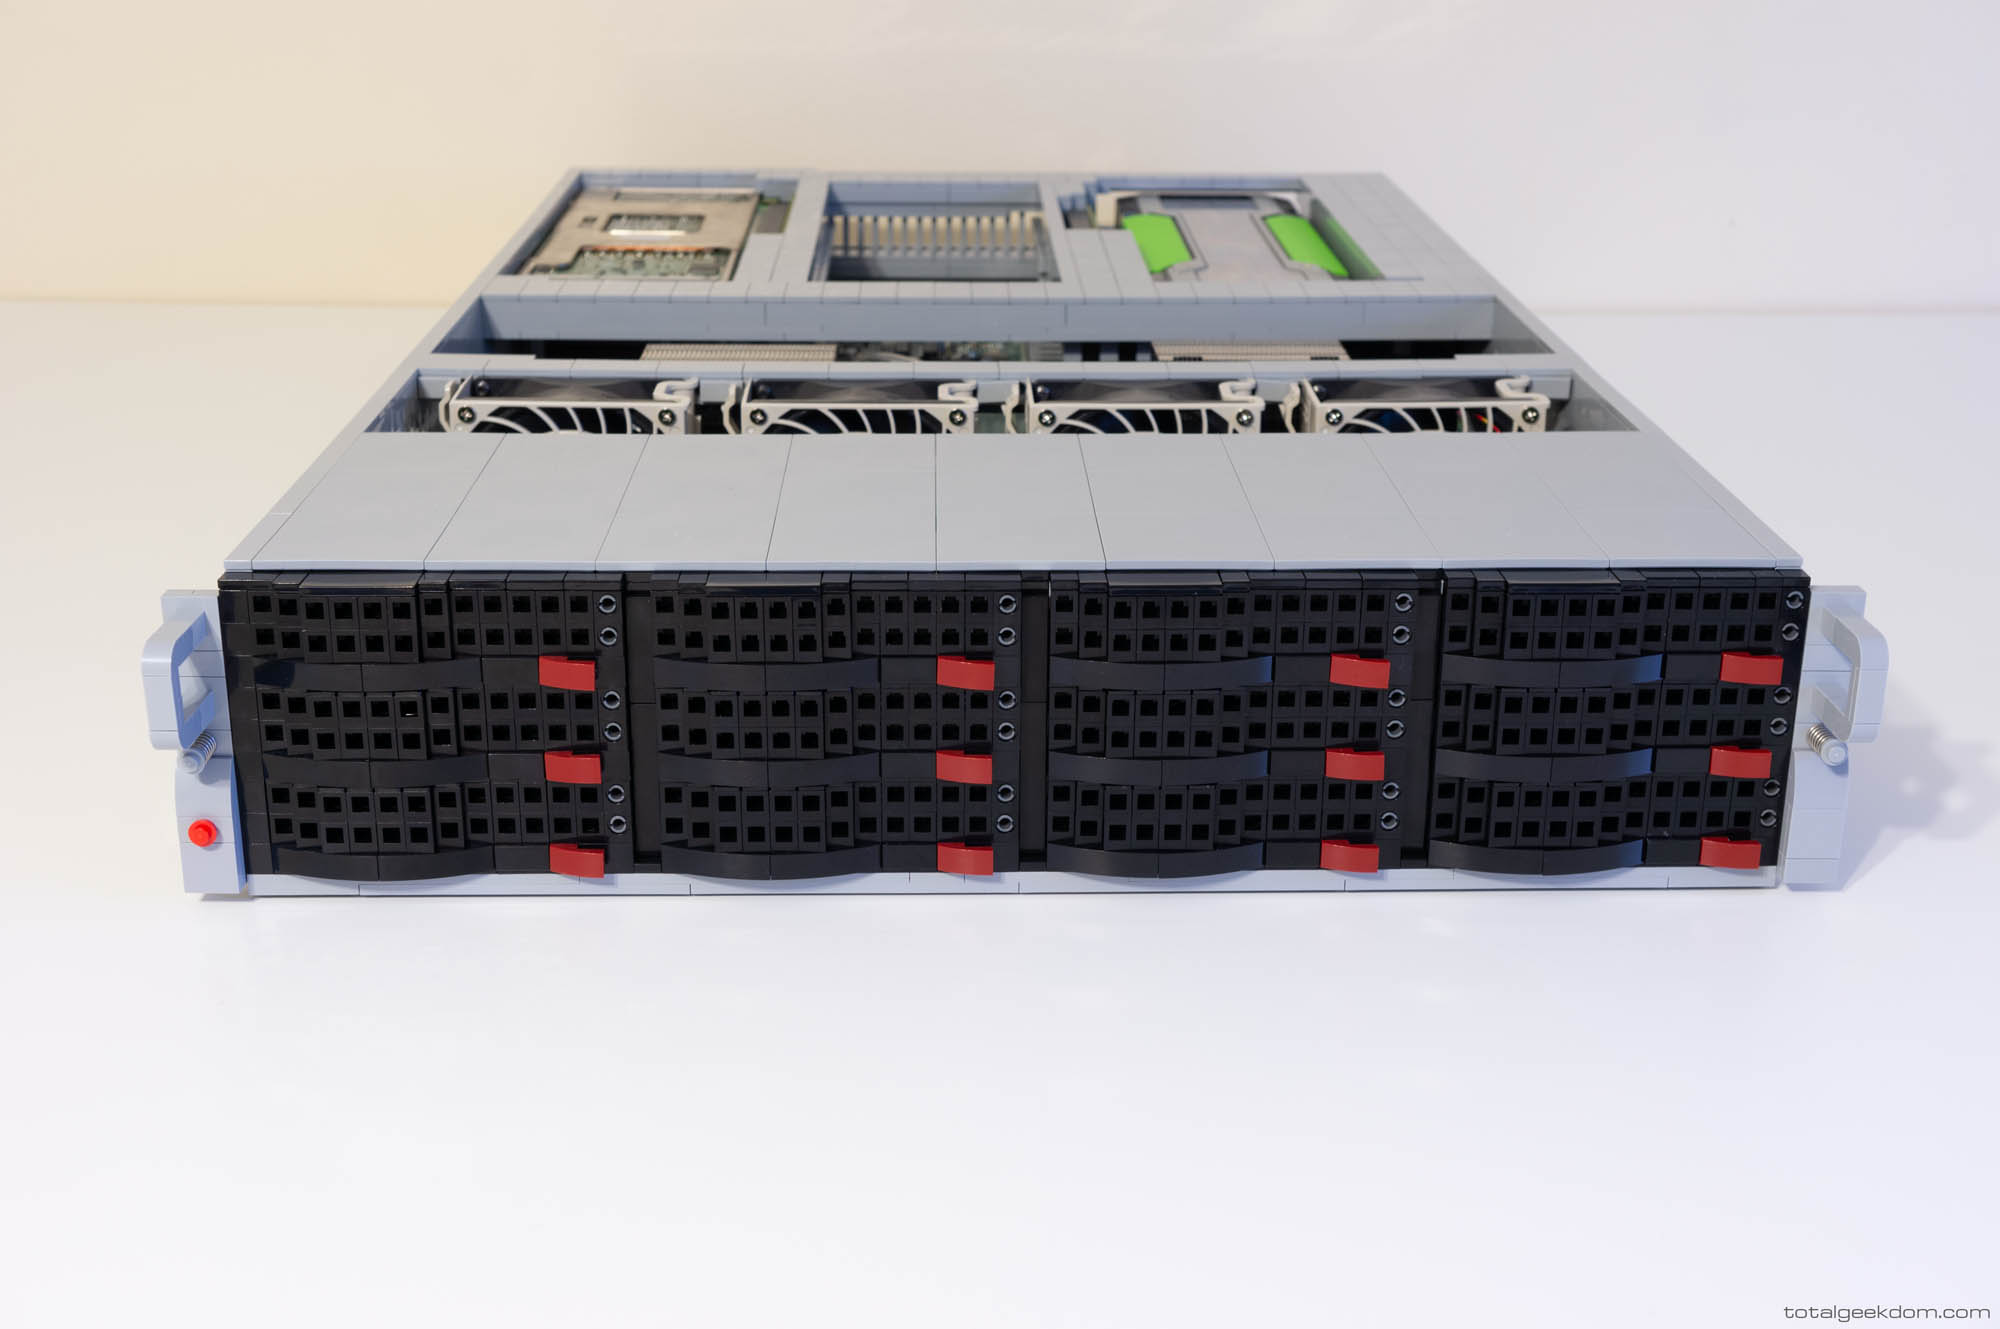
Once the case structure was established I focused my efforts on some of the aesthetic elements and finding ways to mimic the look and shape of the case with Lego. The most challenging area was the front bay doors, as they’re very unique and sloping curvature made it interesting trying to find a combination of Lego pieces that could match the look. After lots of trial and error testing I settled in on an arrangement of stud offsets to try and create some small depth increments in the curve. From there I worked on building a structure to support the rest of the front of the case, along with tinkering with more of the detail items.
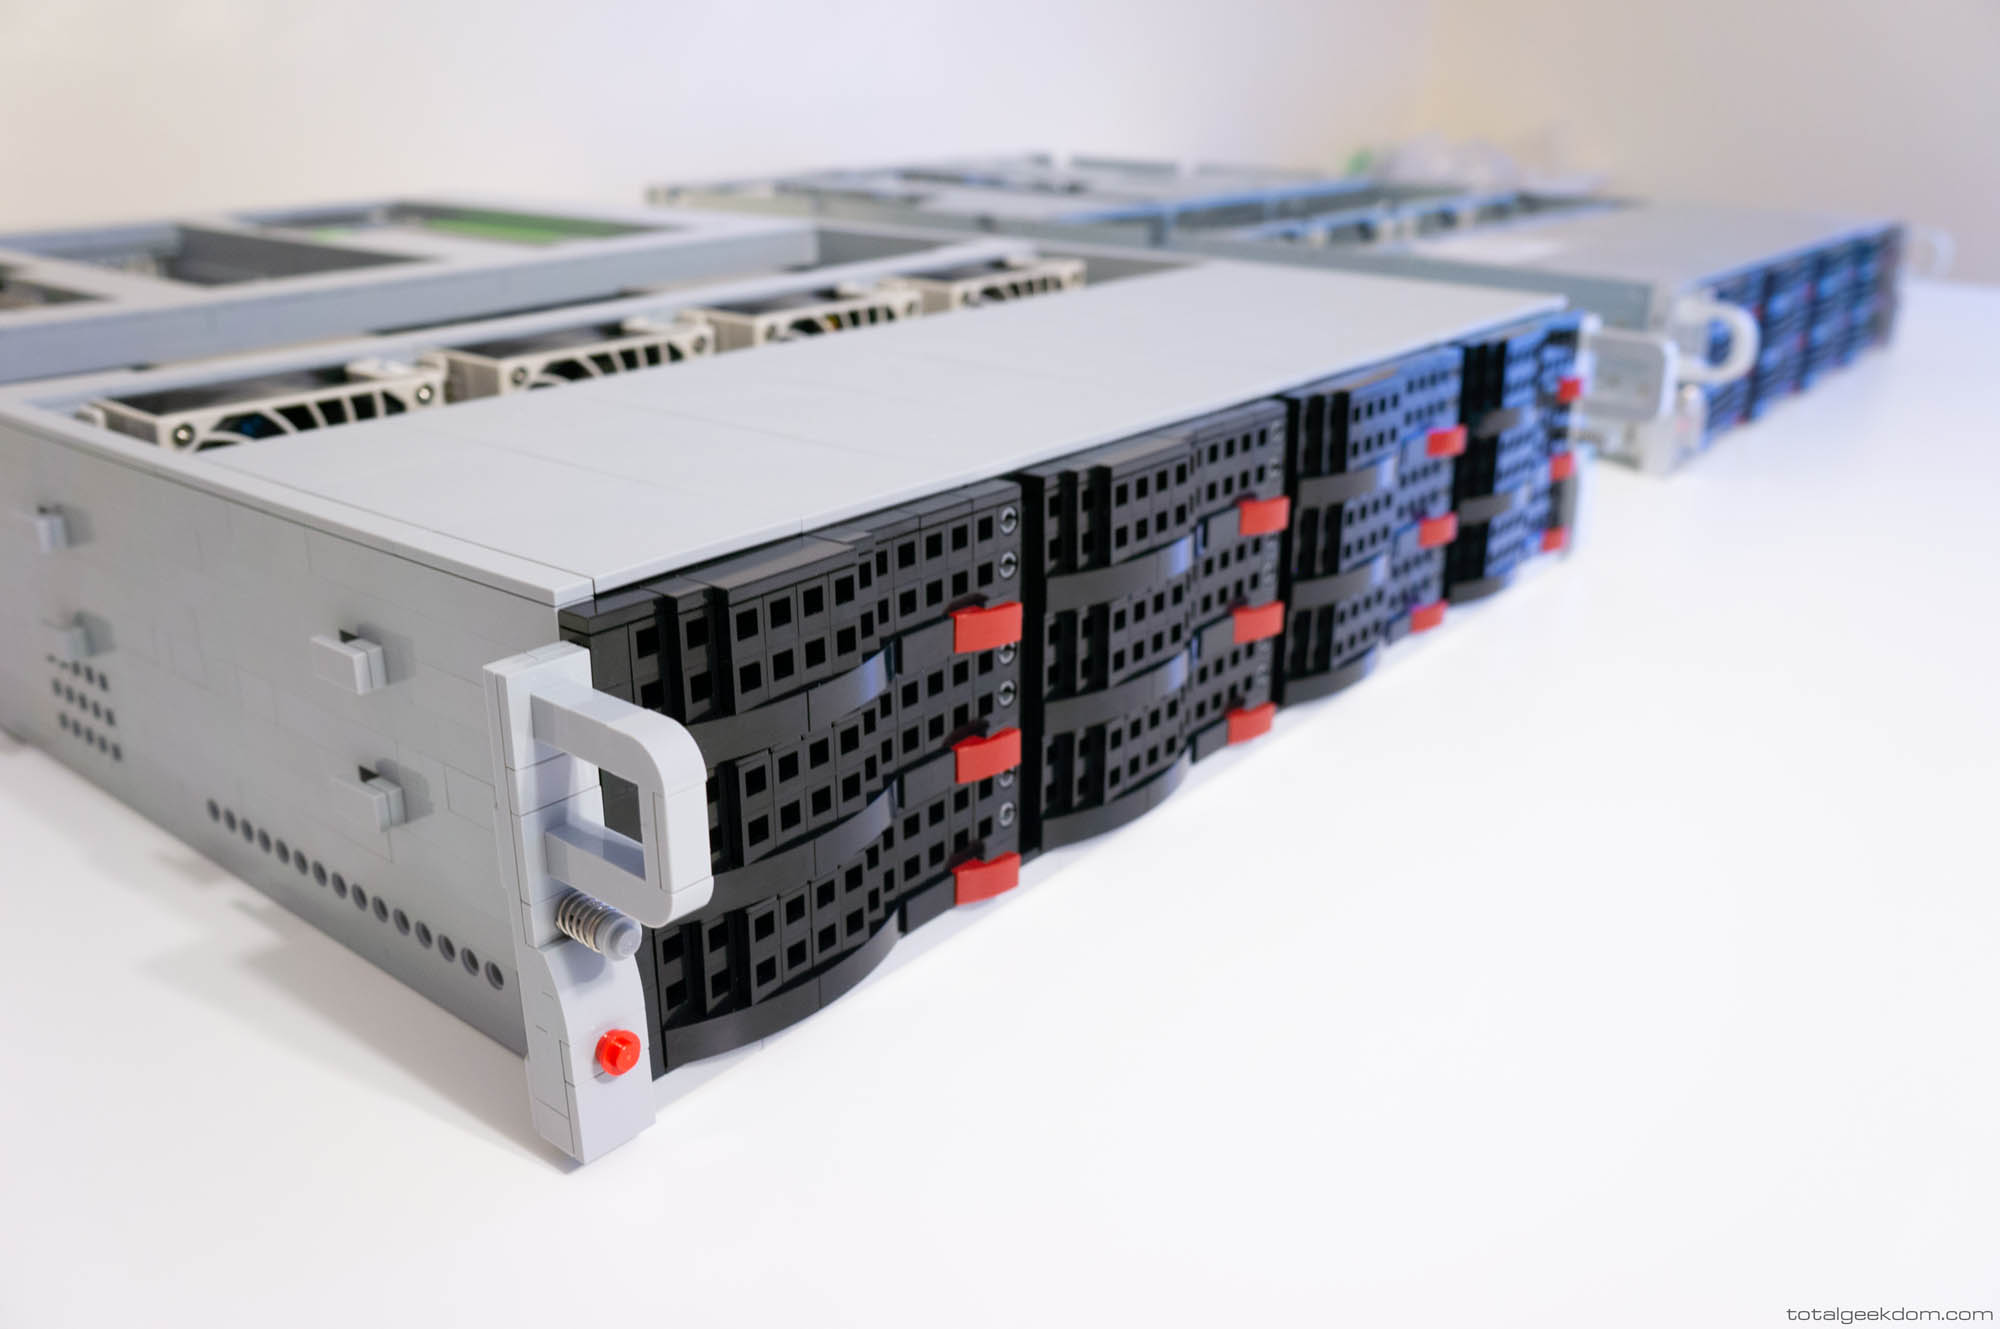
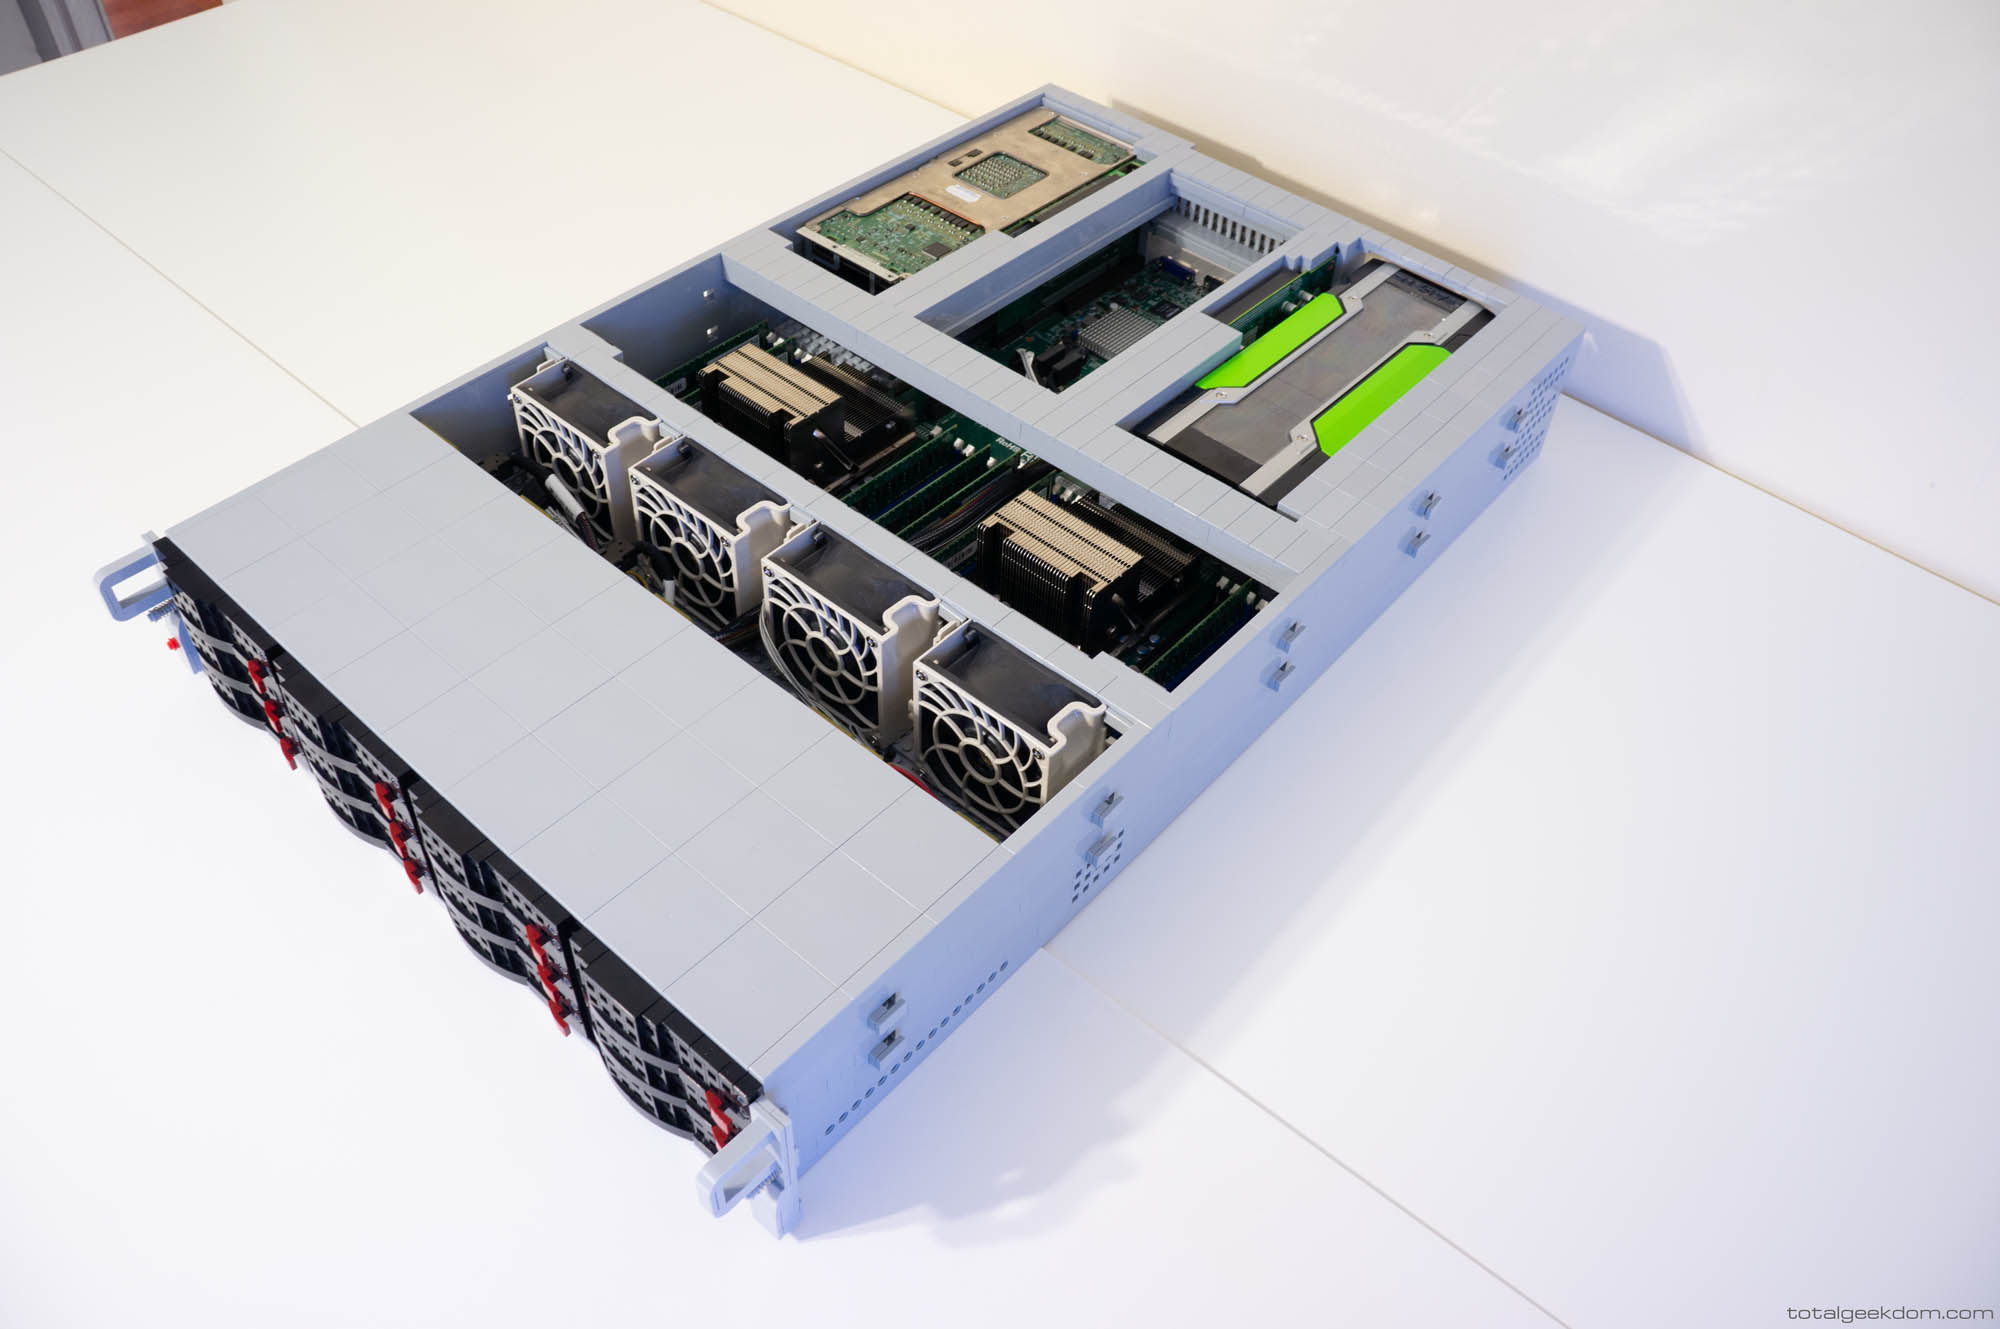
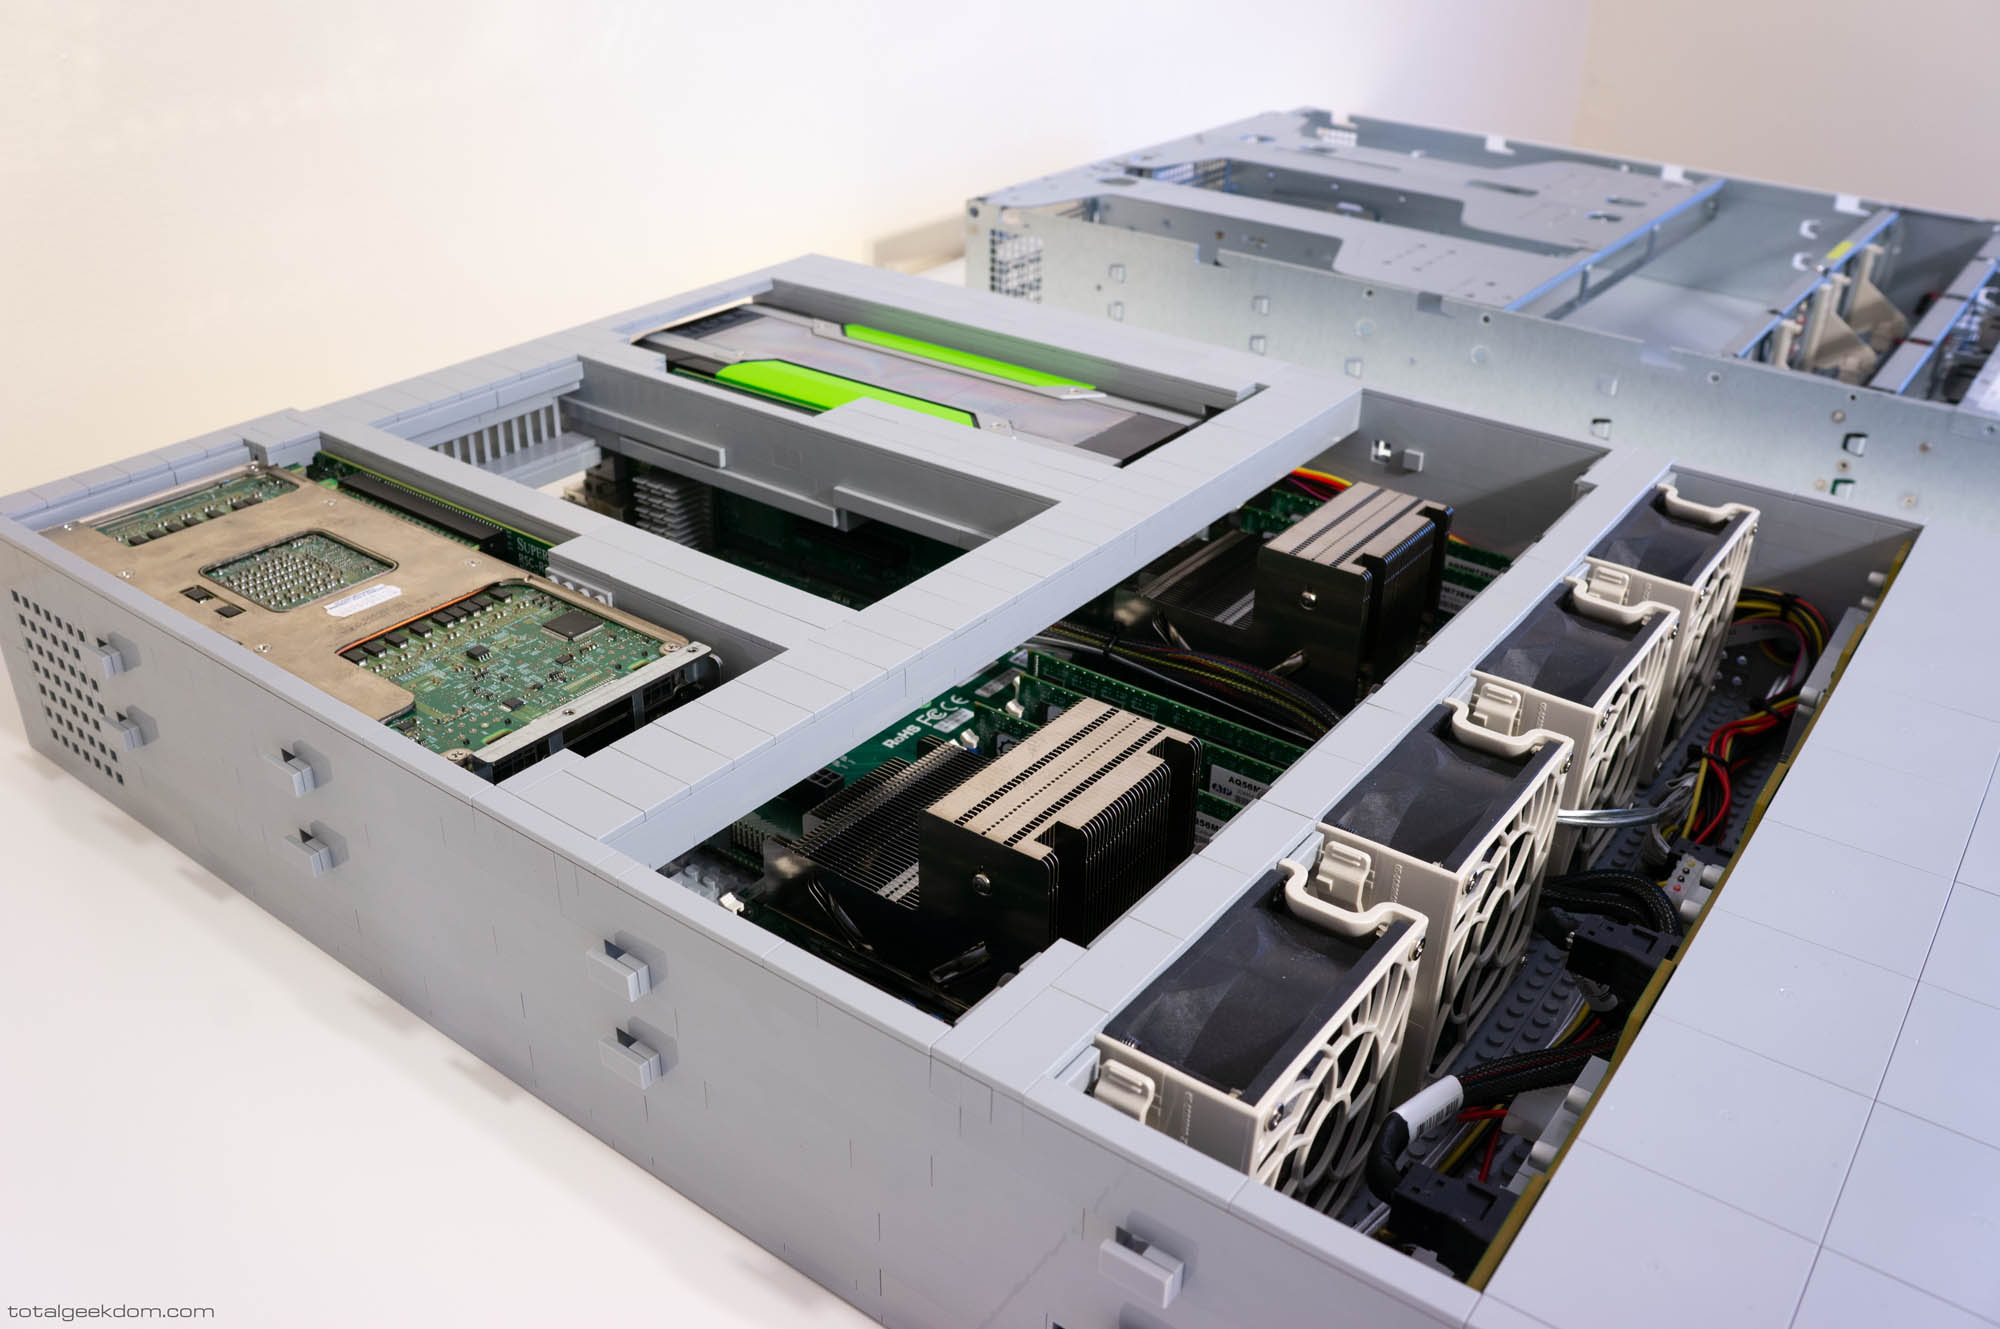
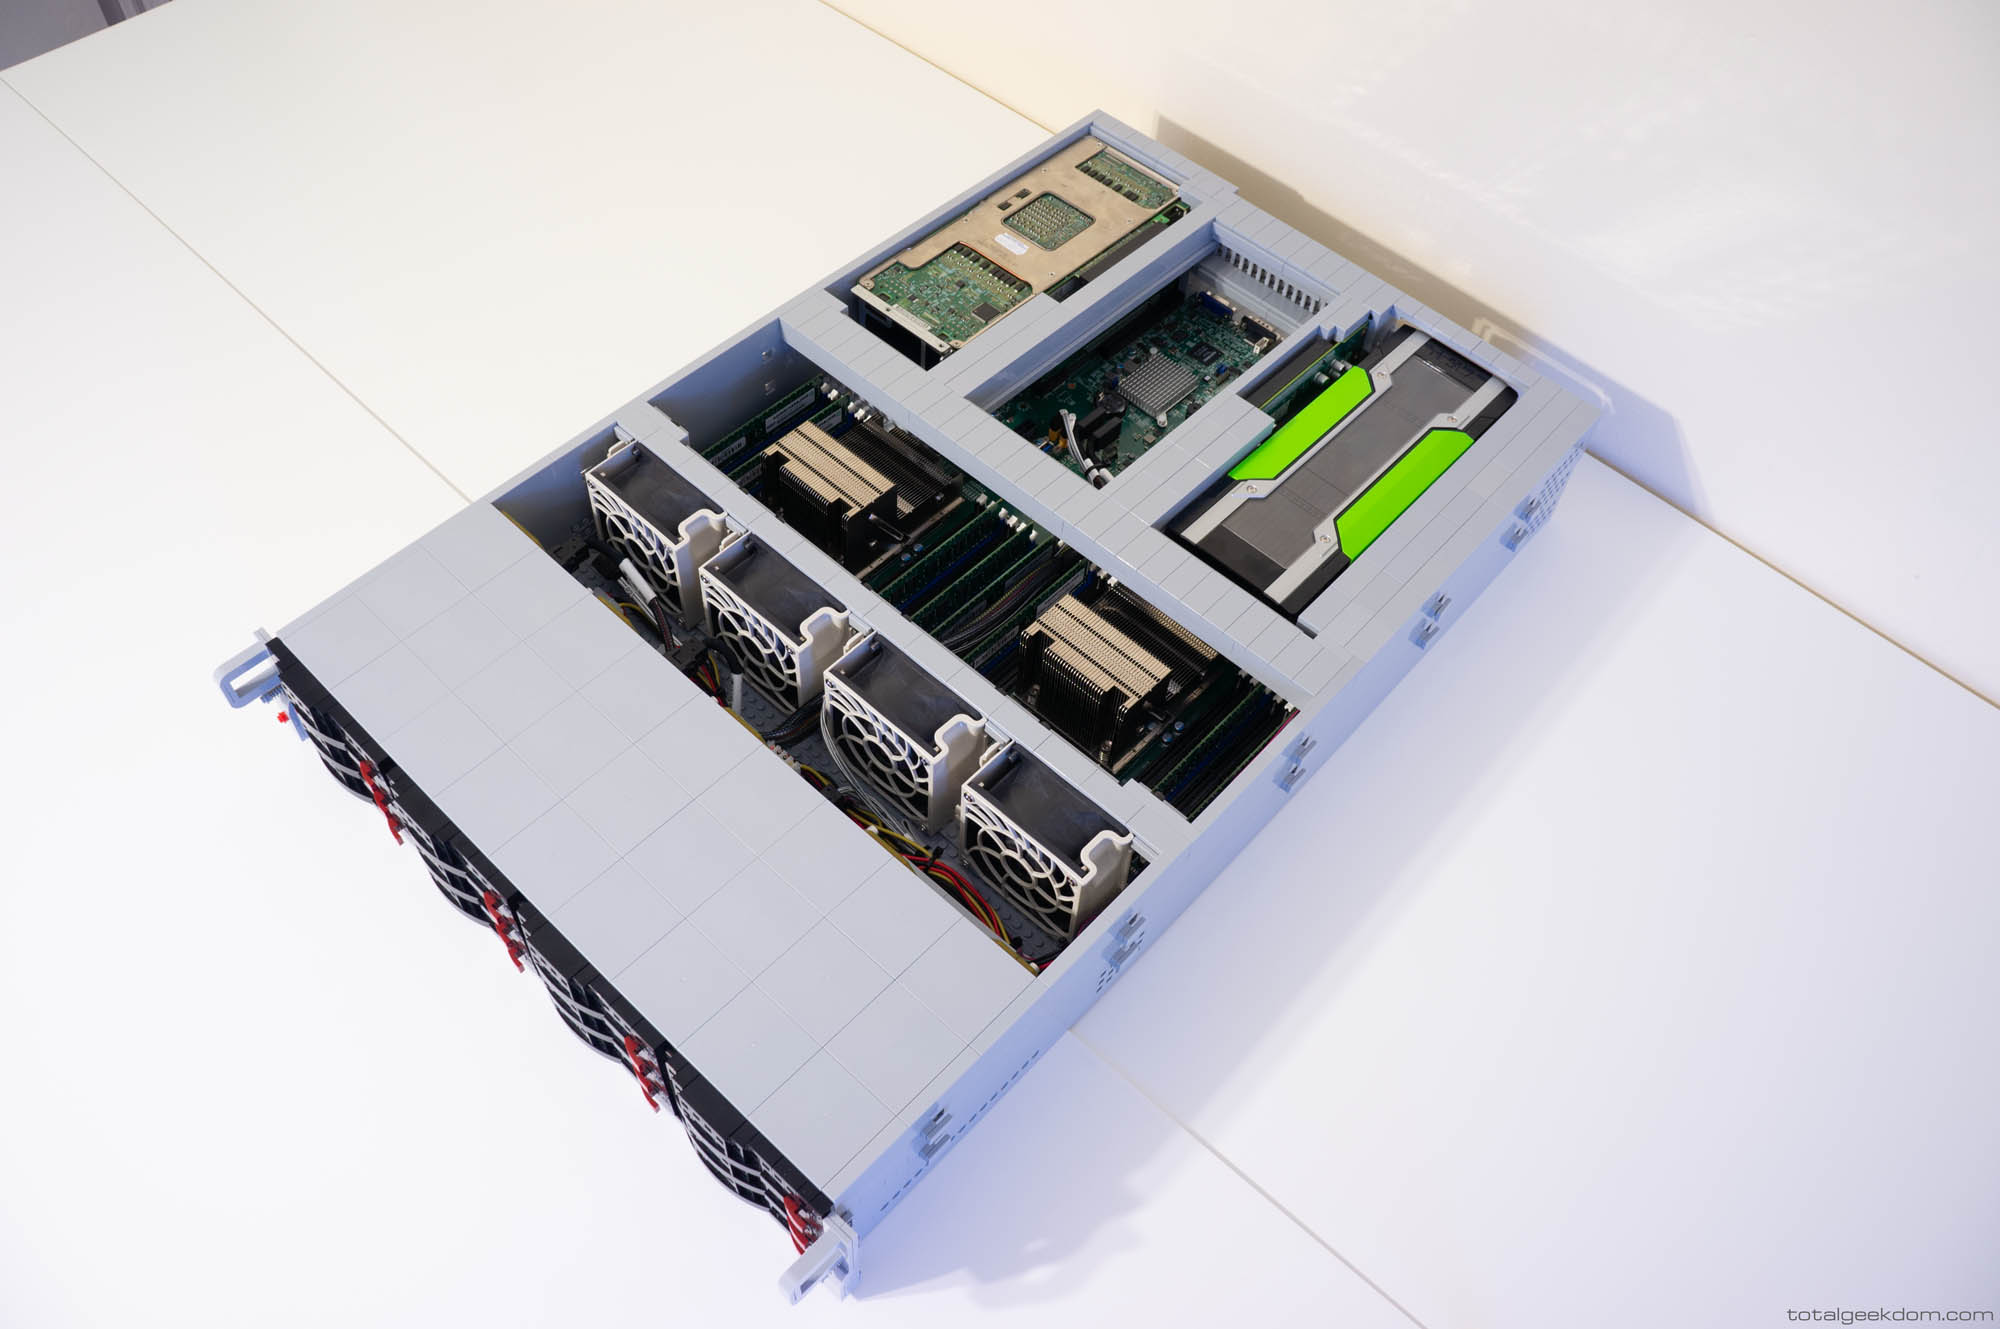
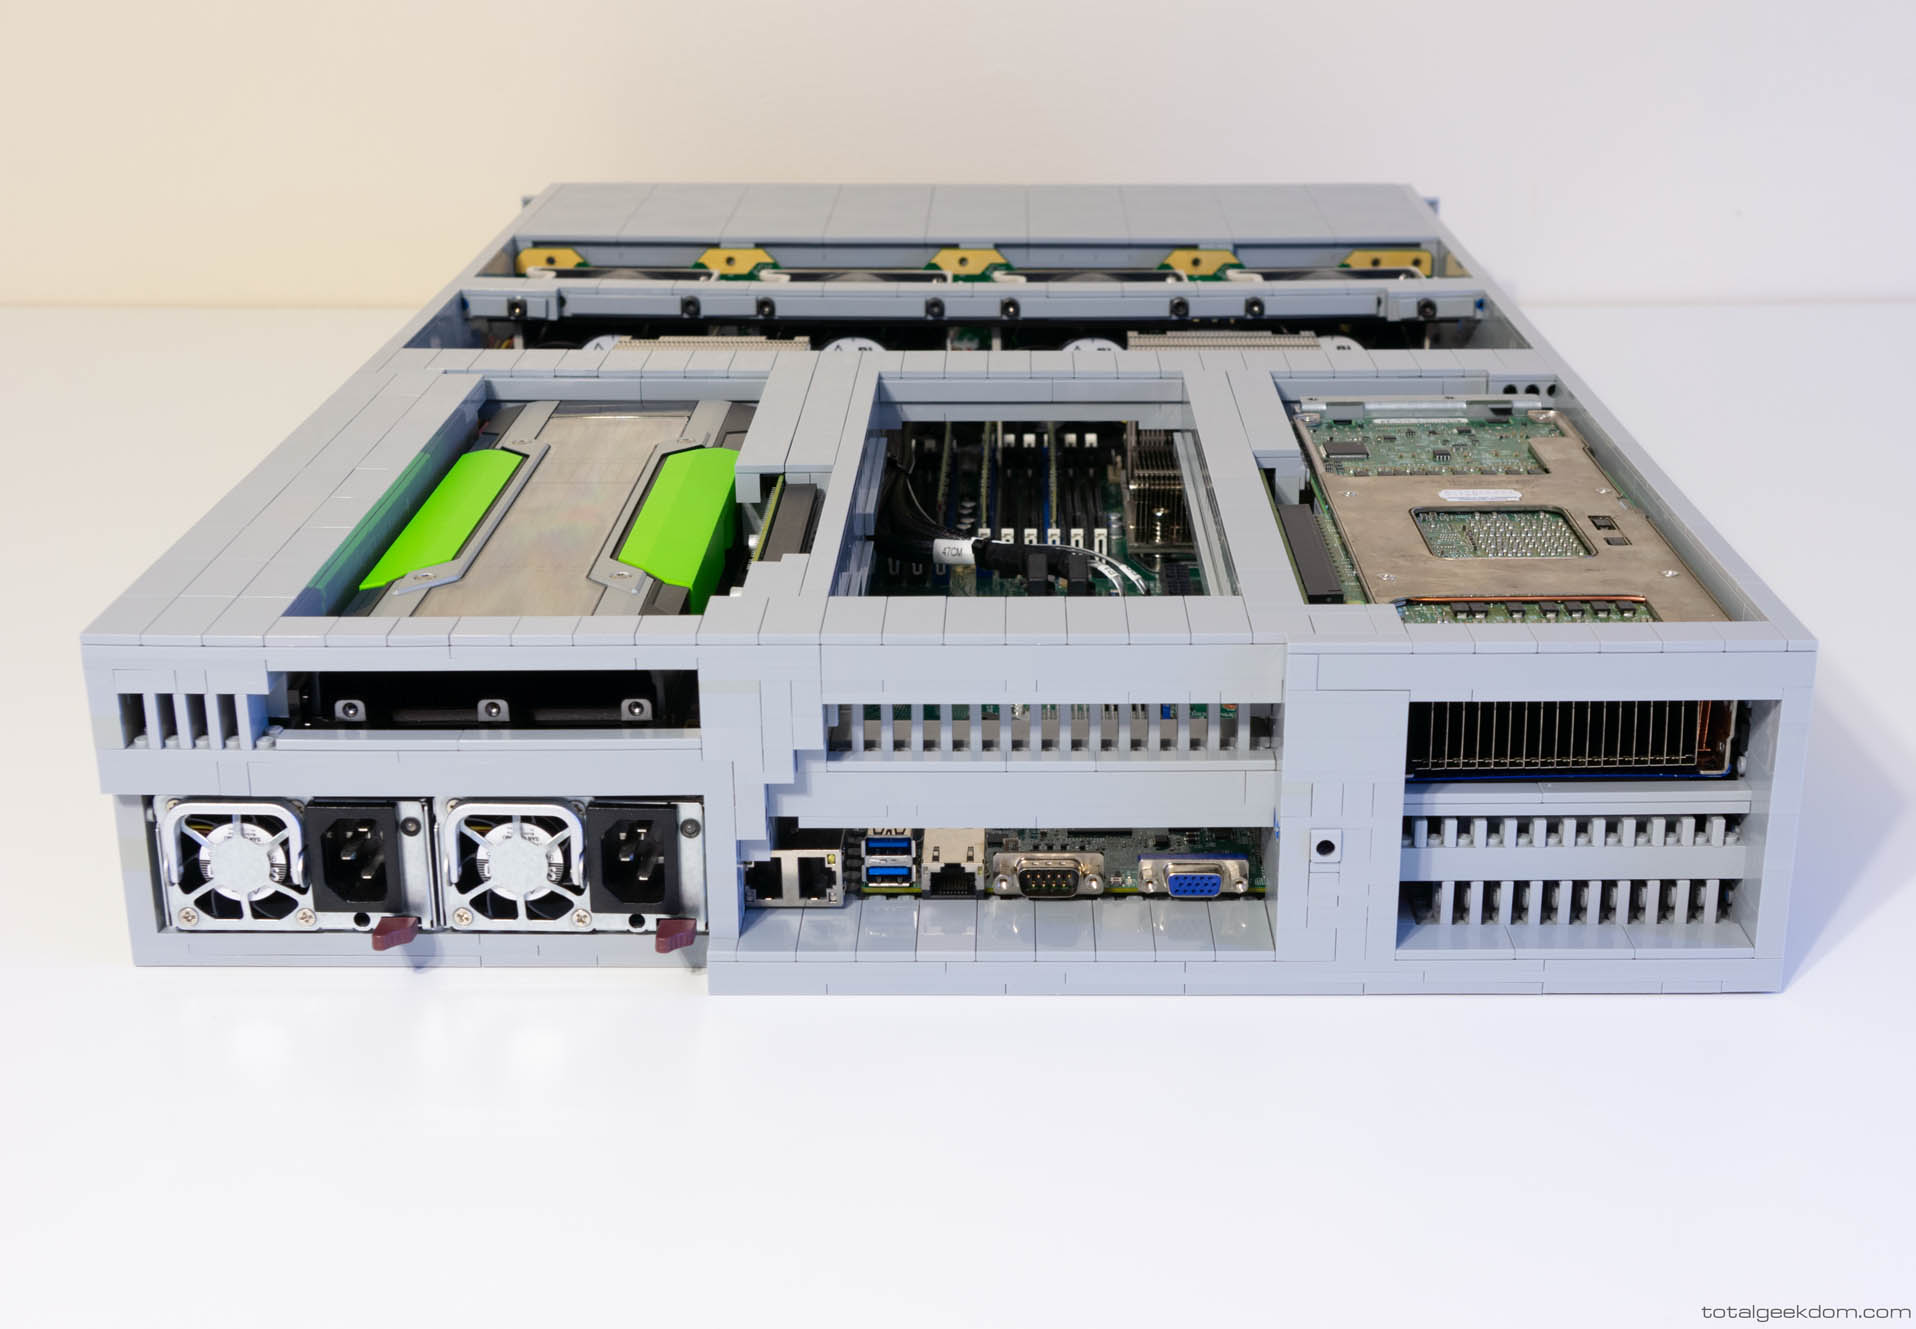
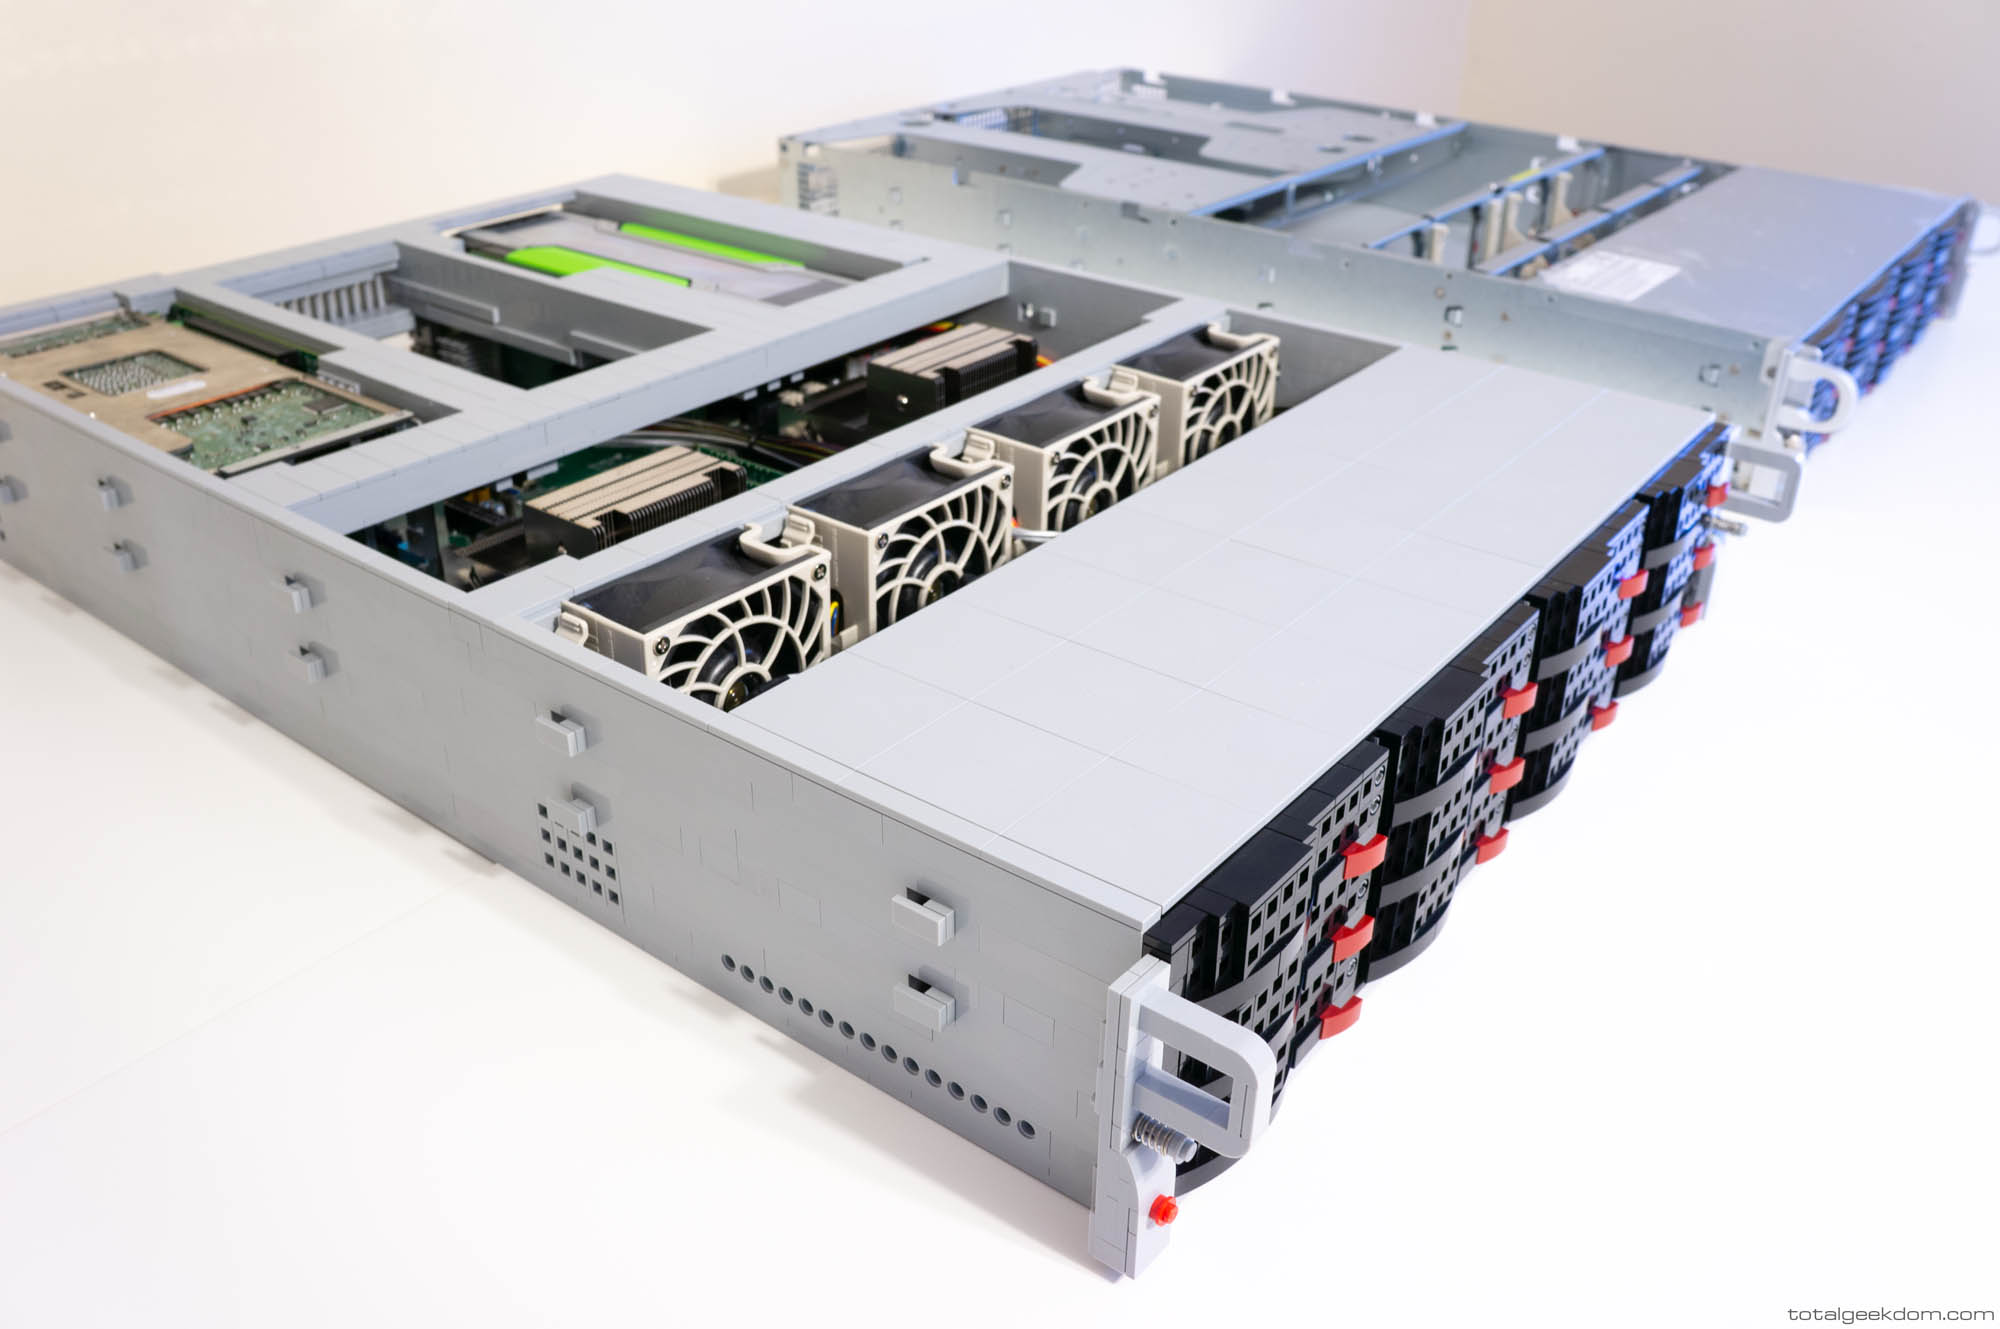
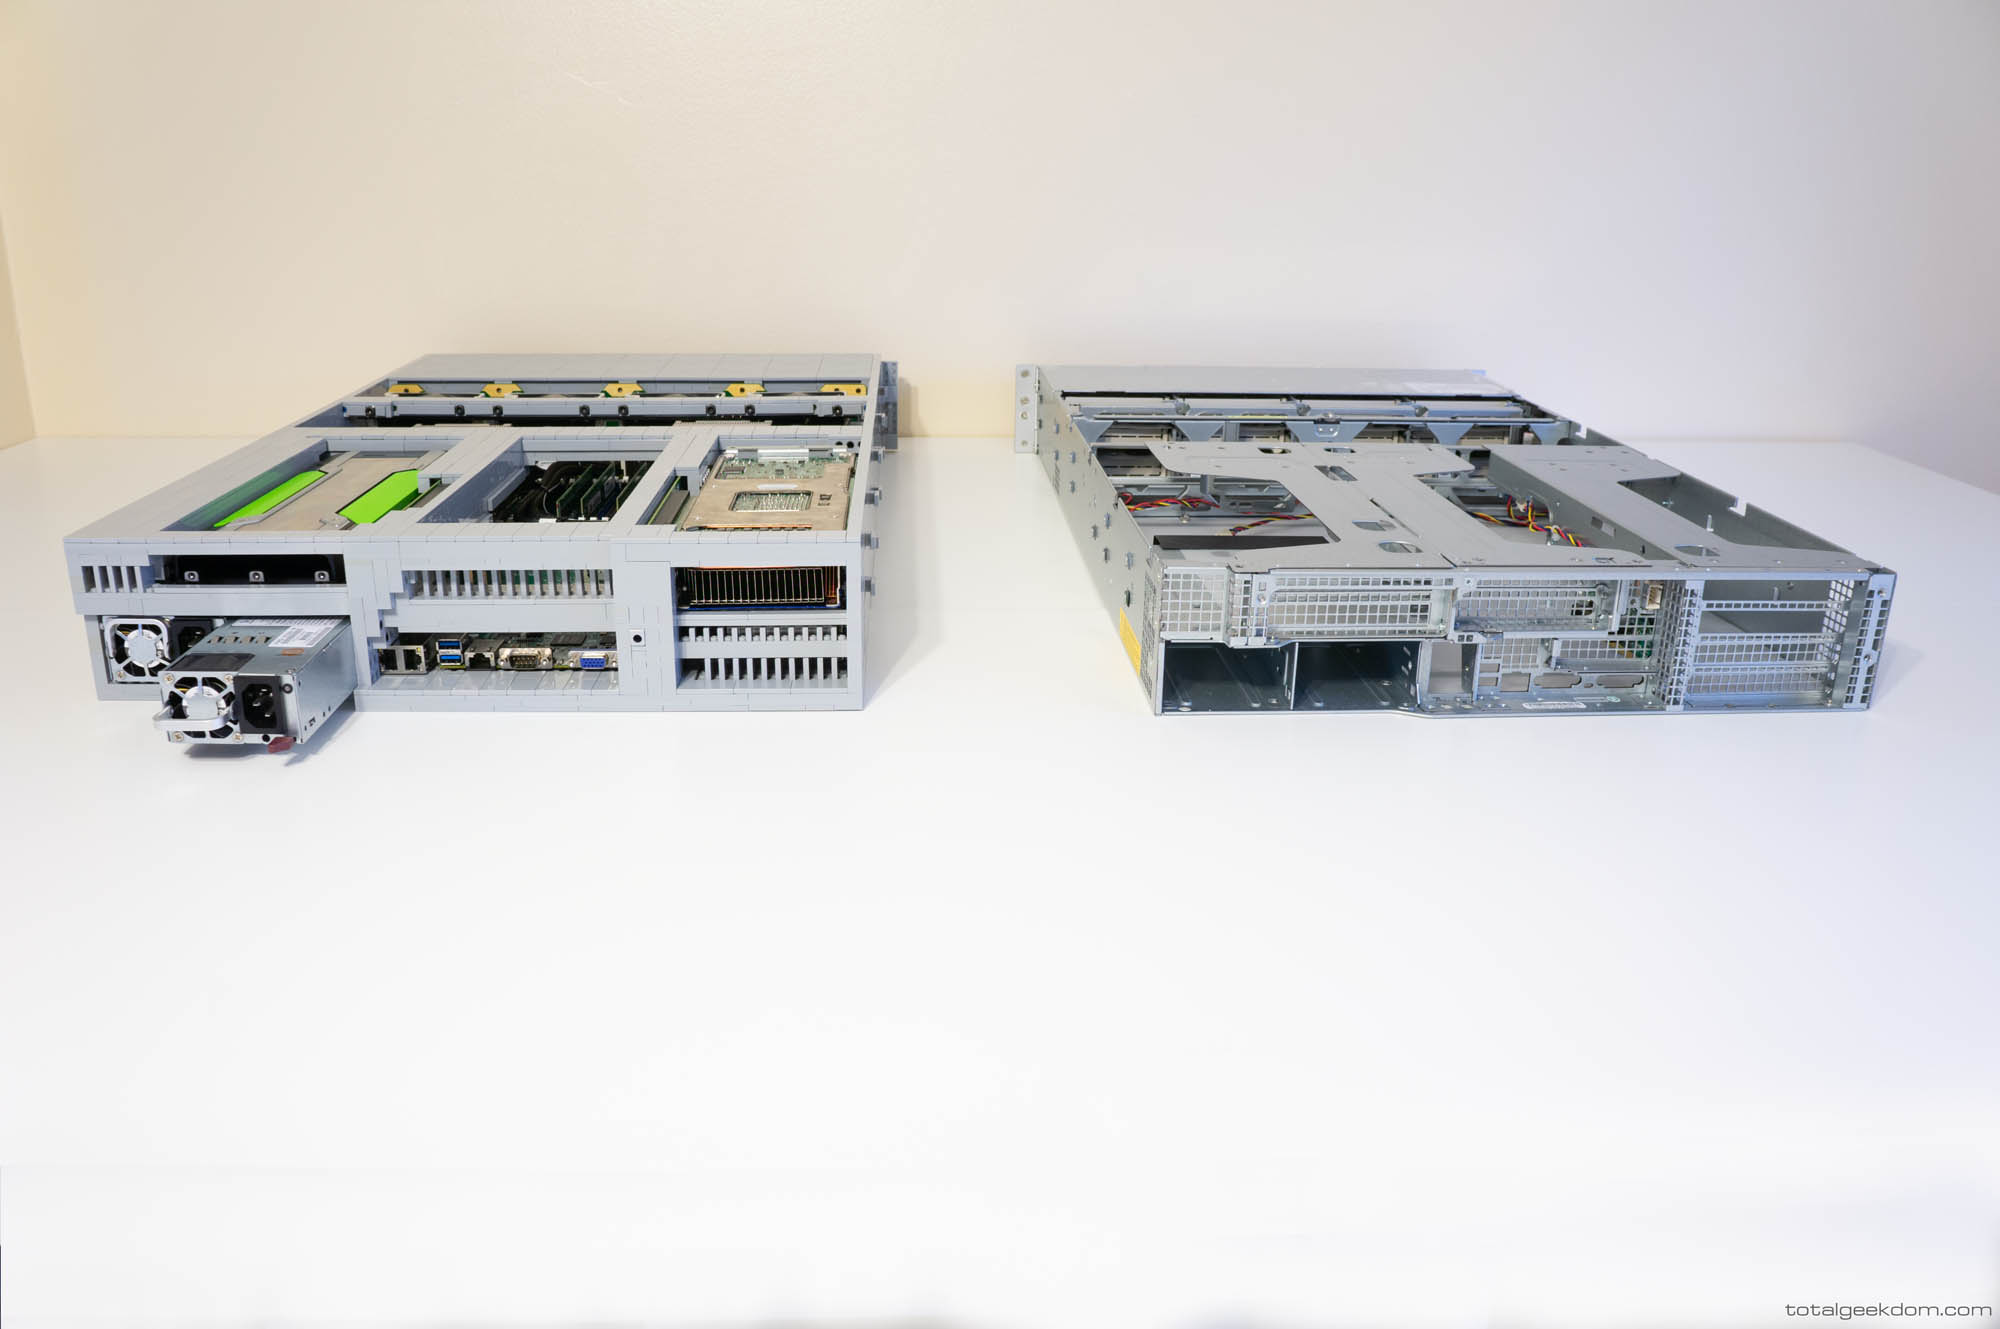
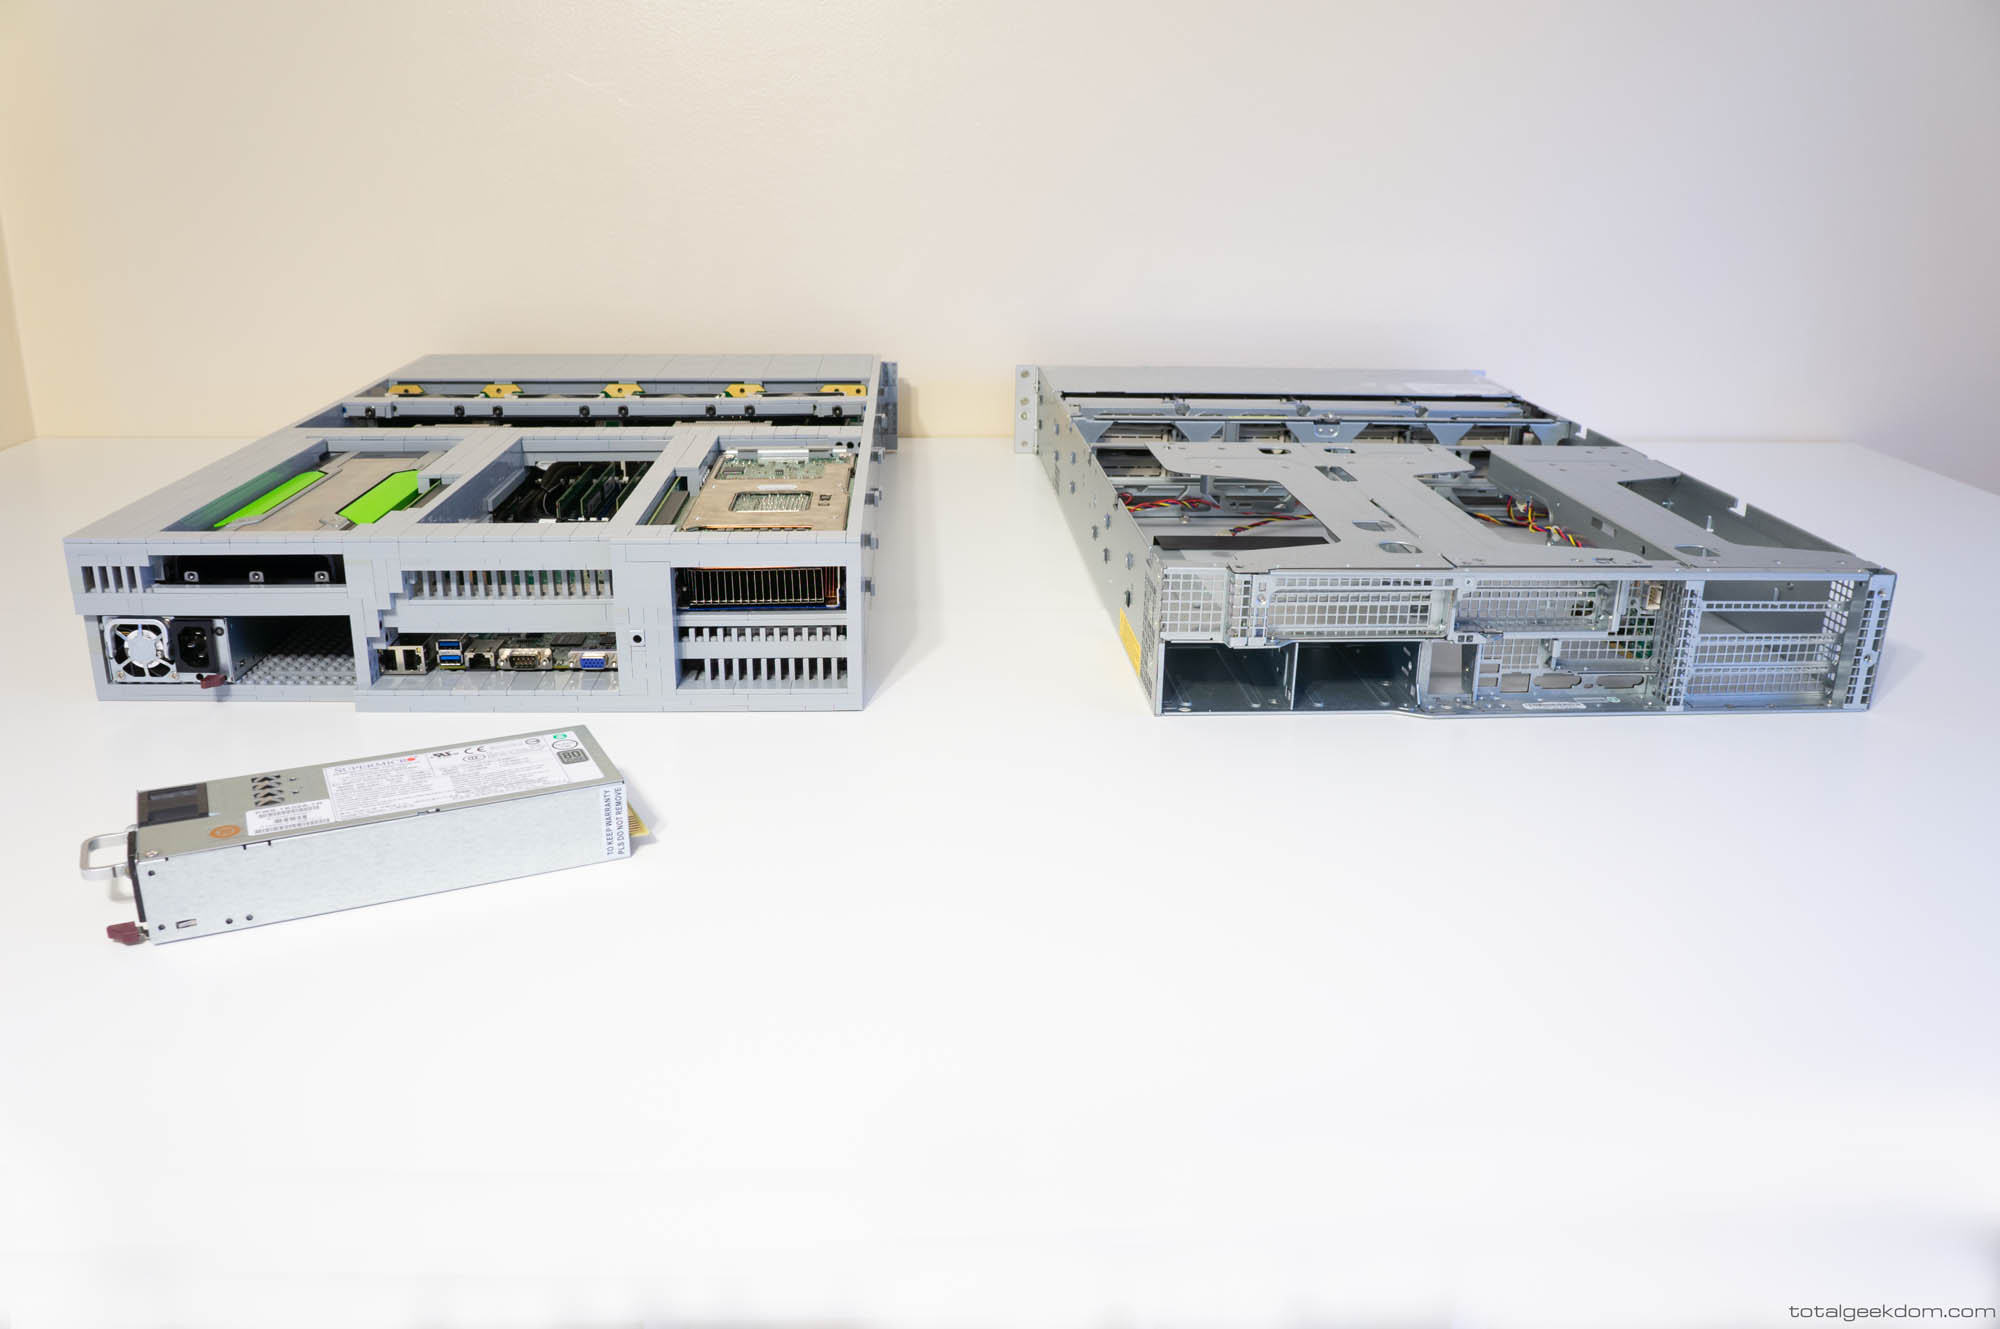
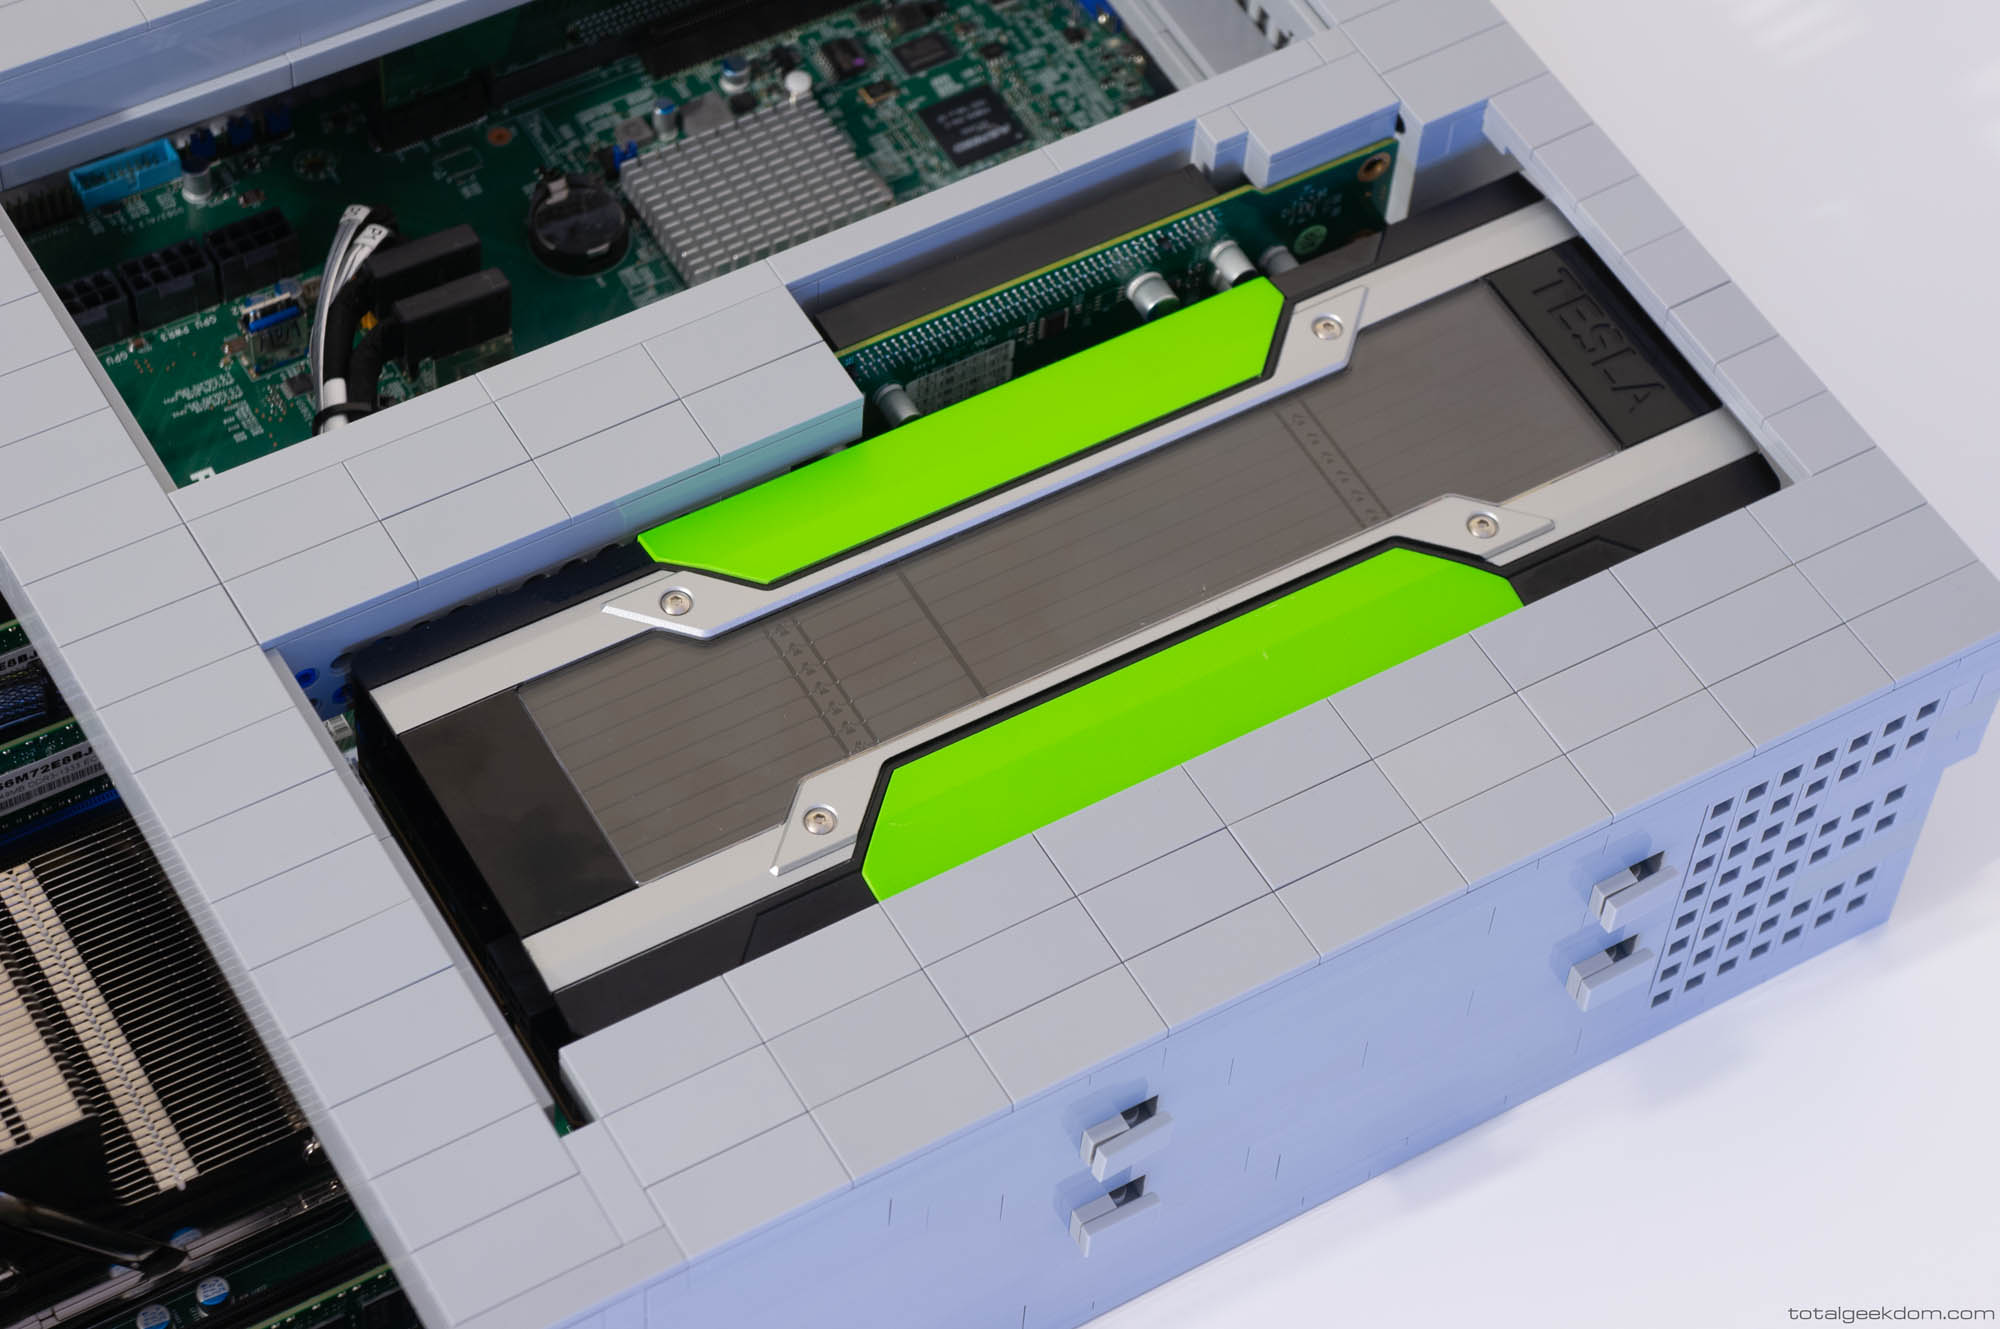
One of the more challenge details of the build was replicating the exact dimensions and spacing for all of the components to mount inside the case. This was a requirement in order to ensure that the system was fully functional, with all power, cooling, and wiring needing to match the real metal Supermicro case. The mounts for the fans, drives, Tesla and Xeon Phi card and boards are all secured to Lego Technic pieces, with the holes in the Technic pieces serving as the mounting holes for screws to pass through. The dual power supplies are hot swappable in the Lego case just as they are in the real thing, with the small latching levers that hold them in place matching Lego mounts to secure them.
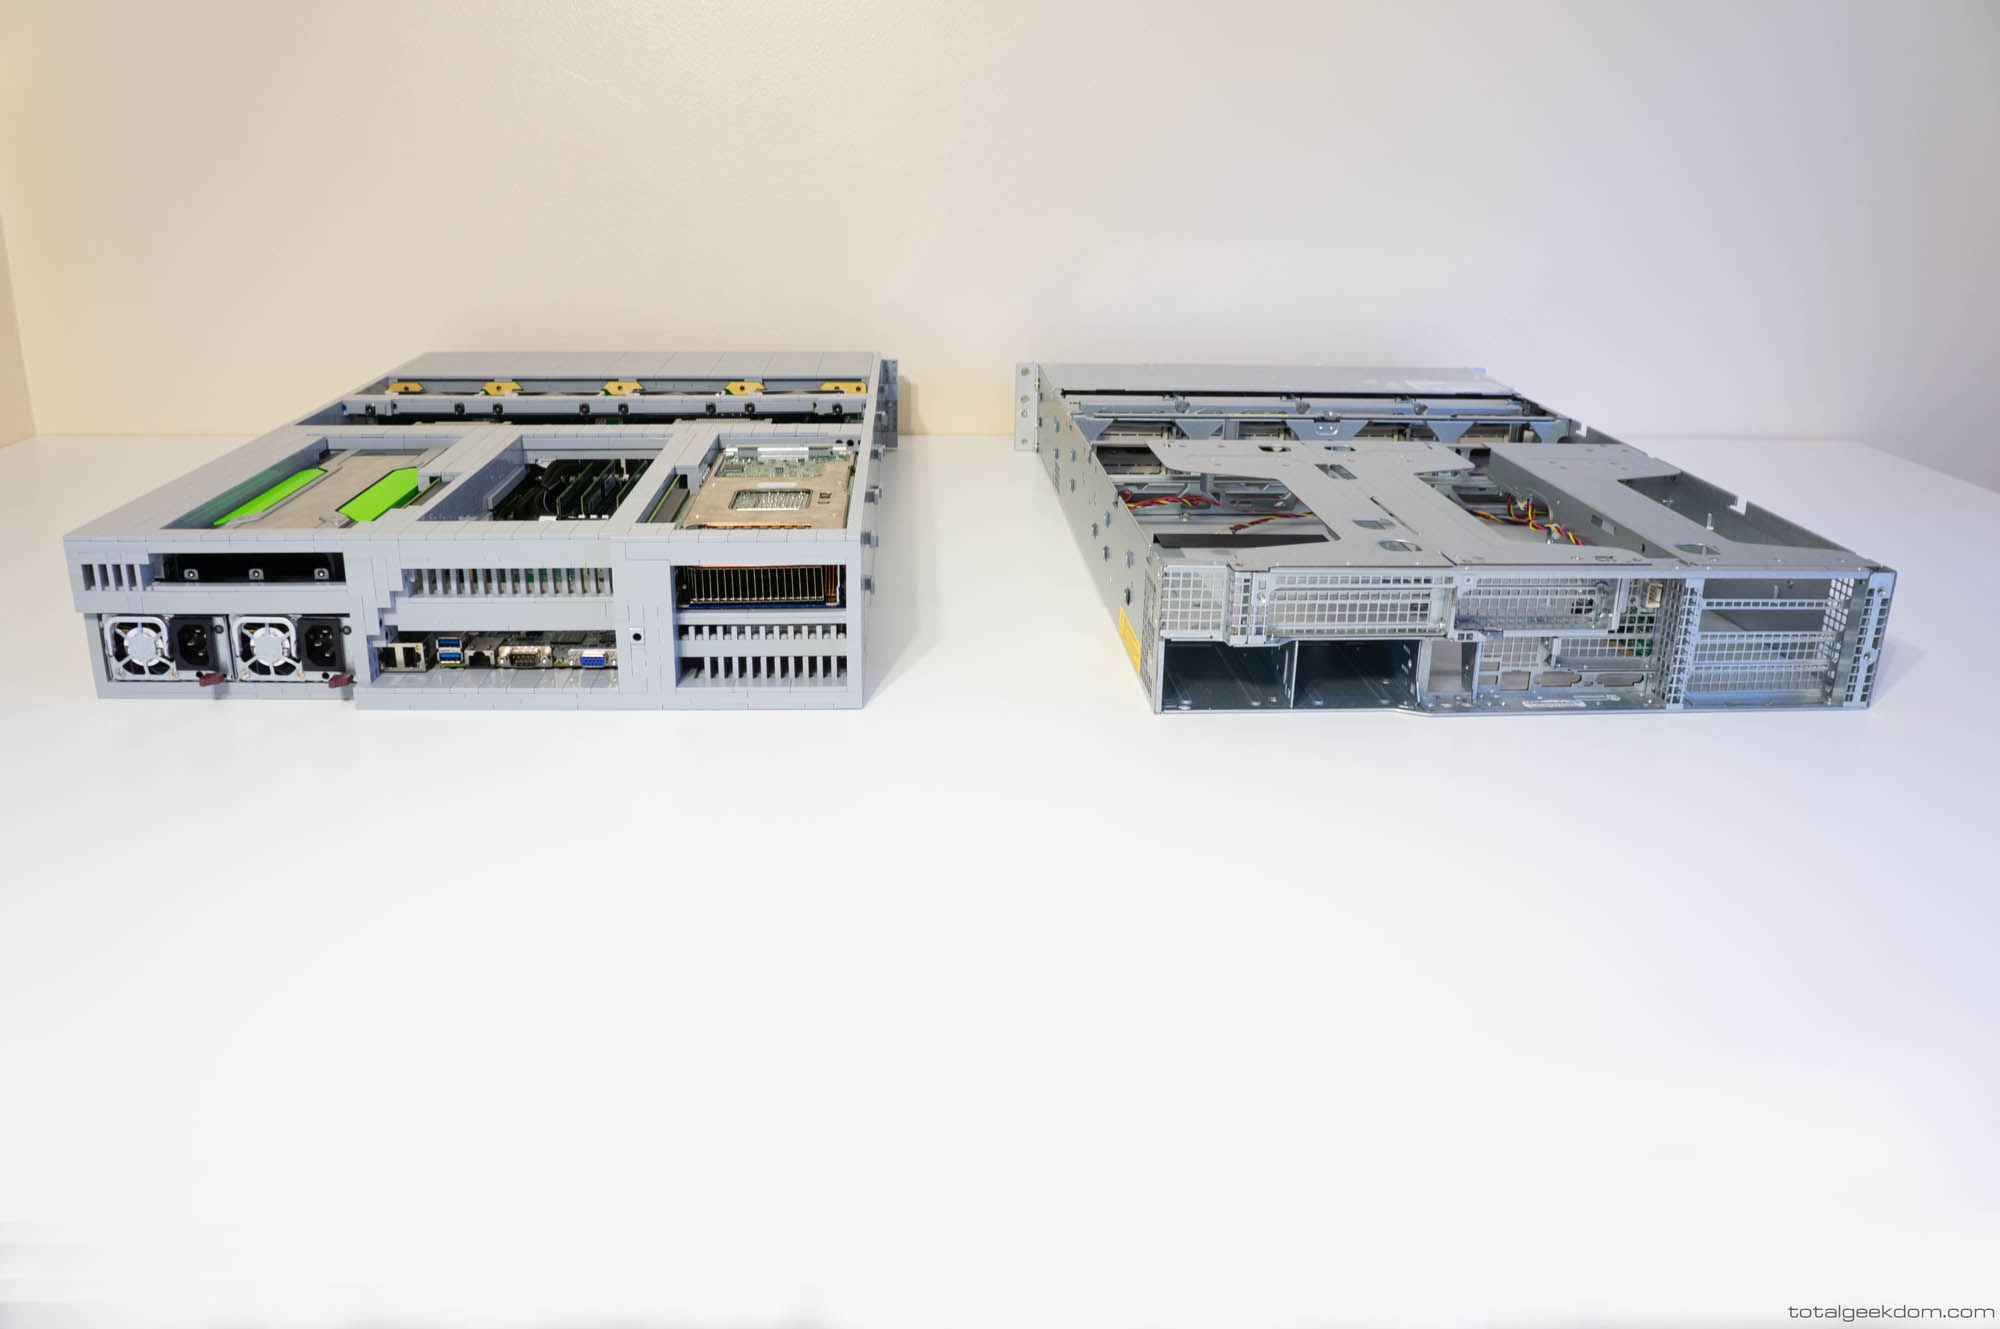
The dimensions of the case are nearly identical to the real Supermicro case, with the one exception being that the Lego case is slightly taller due to the need of having more plates in the floor structure to support the span load.

Overall I had a lot of fun designing this system and it was really cool to power it on and actually have it running. The team at Silicon Mechanics really loved it and it was a great show system to have at their booth.